type
status
date
slug
summary
tags
category
icon
password
数据库
MySQL下载安装
一、下载
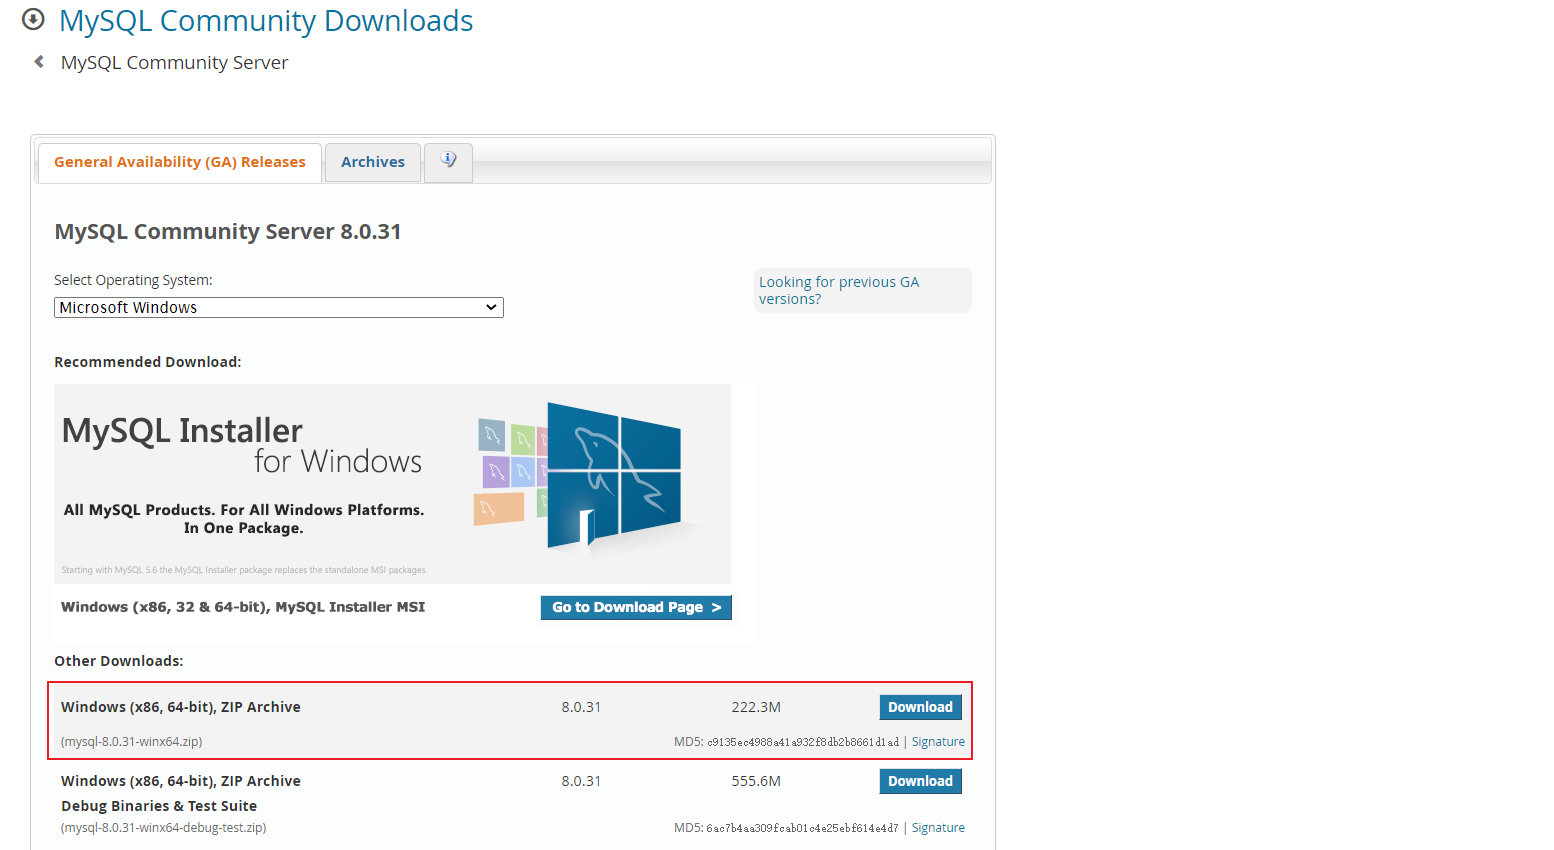
点击Download 就可以下载对应的安装包了, 安装包如下:
二、解压
下载完成后我们得到的是一个压缩包,将其解压,我们就可以得到MySQL 8.0.31 的软件本体了(就是一个文件夹),我们可以把它放在你想安装的位置 。

三、配置
1. 添加环境变量
环境变量里面有很多选项,这里我们只用到Path这个参数。为什么在初始化的开始要添加环境变量呢?在黑框(即CMD)中输入一个可执行程序的名字,Windows会先在环境变量中的Path所指的路径中寻找一遍,如果找到了就直接执行,没找到就在当前工作目录找,如果还没找到,就报错。我们添加环境变量的目的就是能够在任意一个黑框直接调用MySQL中的相关程序而不用总是修改工作目录,大大简化了操作。
右键
此电脑→属性,点击高级系统设置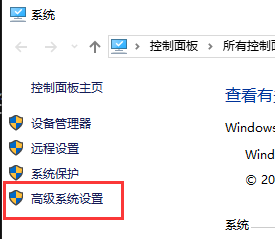
点击
环境变量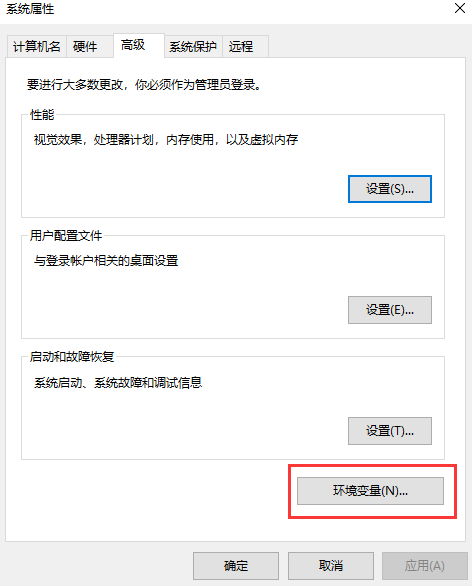
在
系统变量中新建MYSQL_HOME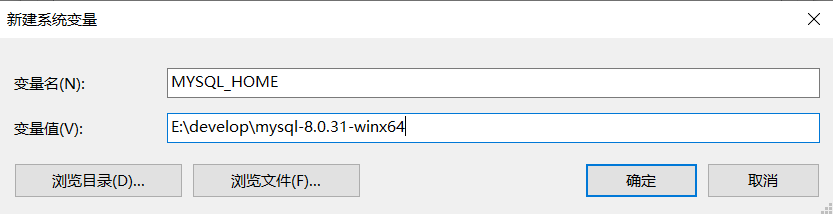
在
系统变量中找到并双击Path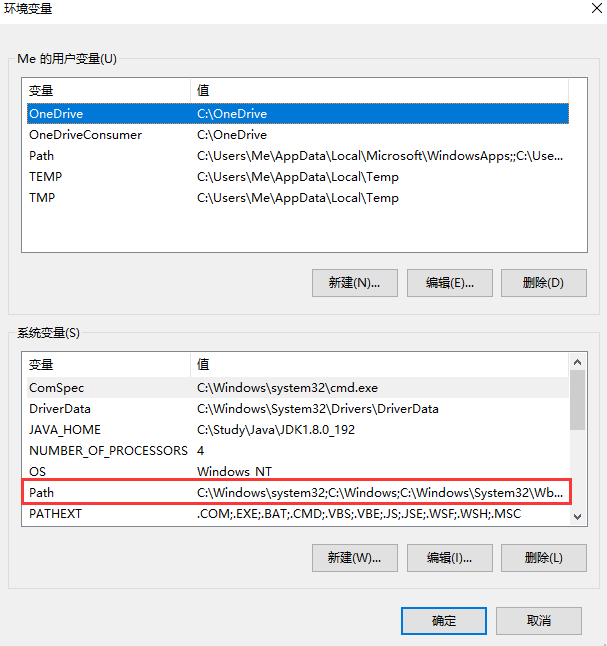
点击
新建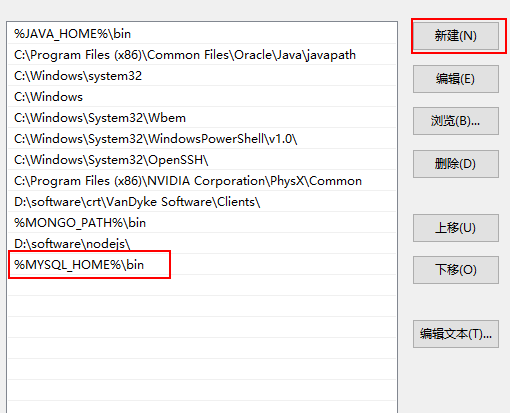
最后点击确定。
如何验证是否添加成功?
右键开始菜单(就是屏幕左下角),选择
命令提示符(管理员),打开黑框,敲入mysql,回车。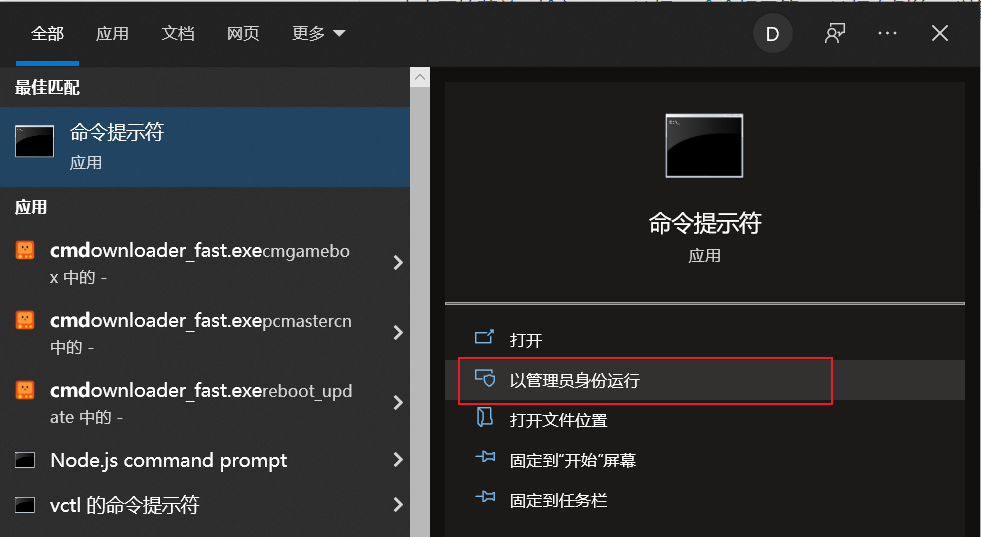
如果提示
Can't connect to MySQL server on 'localhost'则证明添加成功;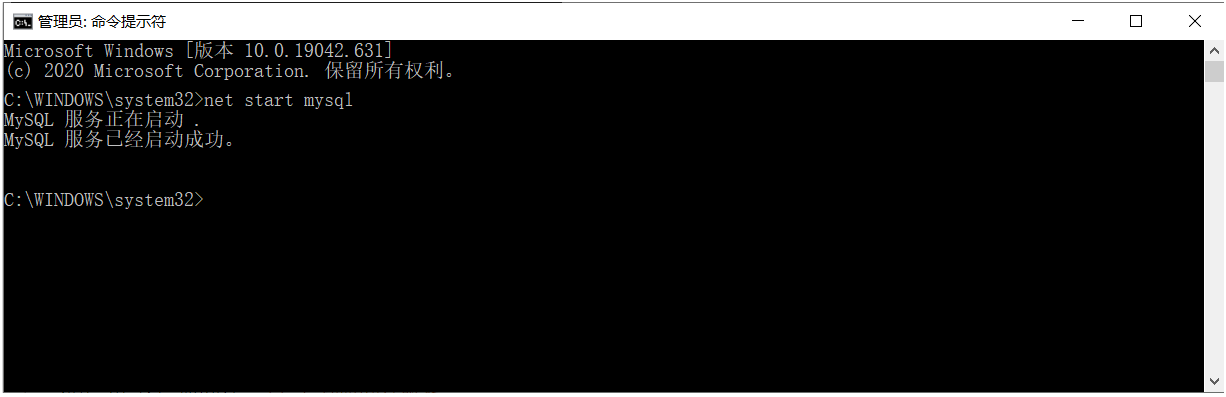
如果提示
mysql不是内部或外部命令,也不是可运行的程序或批处理文件则表示添加添加失败,请重新检查步骤并重试。2. 初始化MySQL
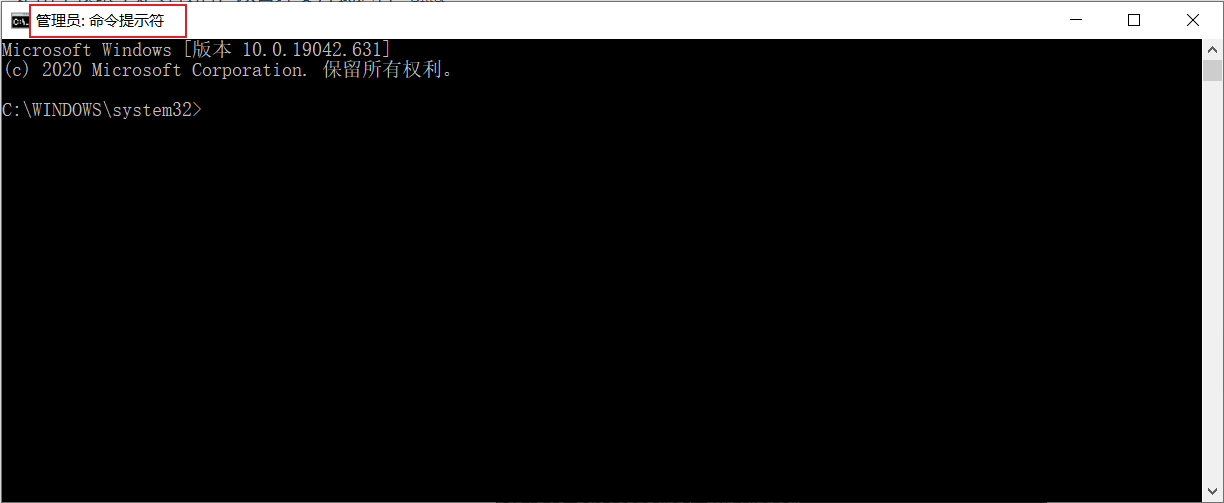
==以管理员身份,运行命令行窗口:==

在刚才的命令行中,输入如下的指令:
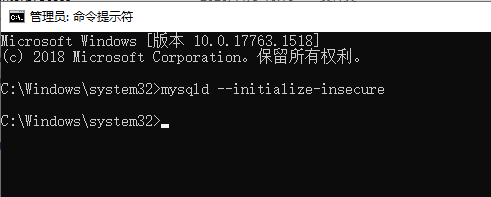
稍微等待一会,如果出现没有出现报错信息,则证明data目录初始化没有问题,此时再查看MySQL目录下已经有data目录生成。
tips:如果出现如下错误

是由于权限不足导致的,以管理员方式运行 cmd
3. 注册MySQL服务
命令行(注意必须以管理员身份启动)中,输入如下的指令,回车执行:
现在你的计算机上已经安装好了MySQL服务了。
4. 启动MySQL服务
在黑框里敲入
net start mysql,回车。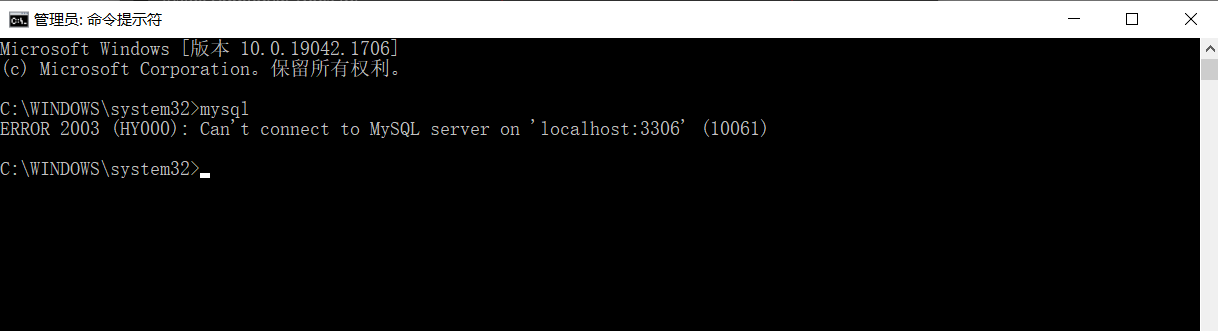
5. 修改默认账户密码
在黑框里敲入
mysqladmin -u root password 1234,这里的1234就是指默认管理员(即root账户)的密码,可以自行修改成你喜欢的。
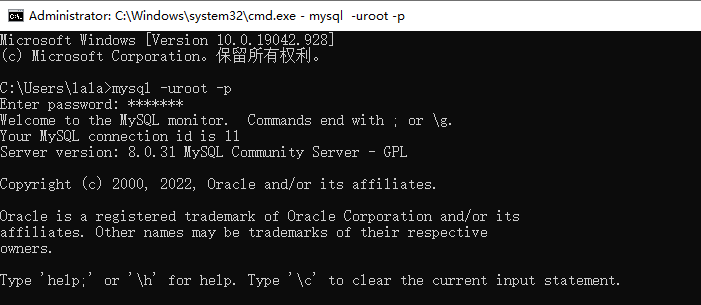
四、登录MySQL
右键开始菜单,选择
命令提示符,打开黑框。
在黑框中输入,mysql -uroot -p1234,回车,出现下图且左下角为mysql>,则登录成功。
到这里你就可以开始你的MySQL之旅了!
退出mysql:
登陆参数:
五、卸载MySQL
如果你想卸载MySQL,也很简单。
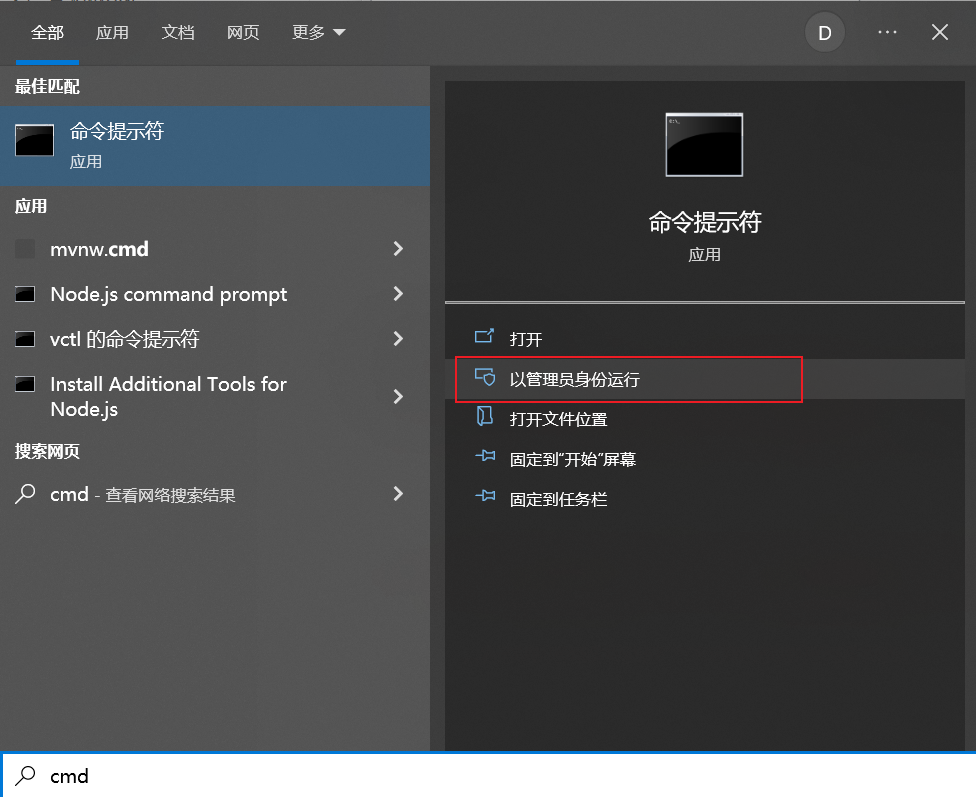
点击开始菜单,输入cmd,选择 "命令提示符",选择右侧的 "以管理员身份运行"。
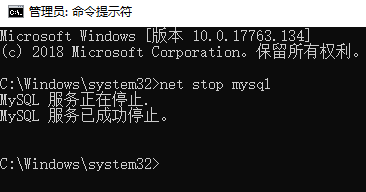
- 敲入
net stop mysql,回车。
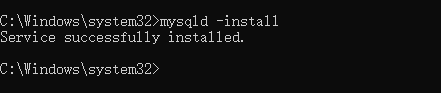
- 再敲入
mysqld -remove mysql,回车。

- 最后删除MySQL目录及相关的环境变量。
至此,MySQL卸载完成!
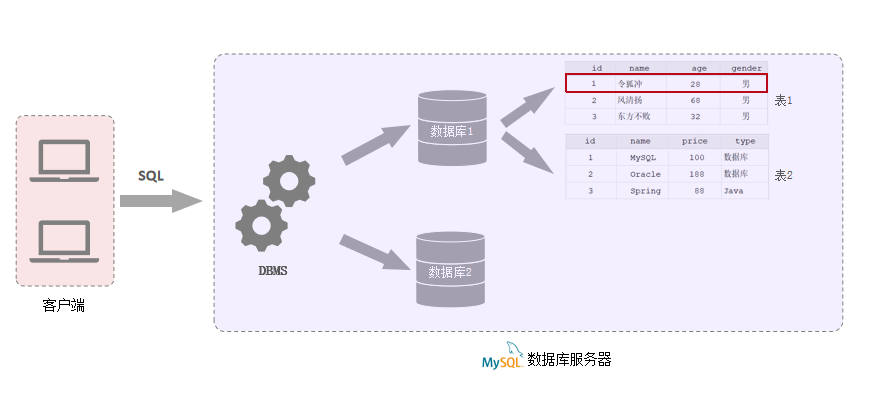
MySQL数据模型
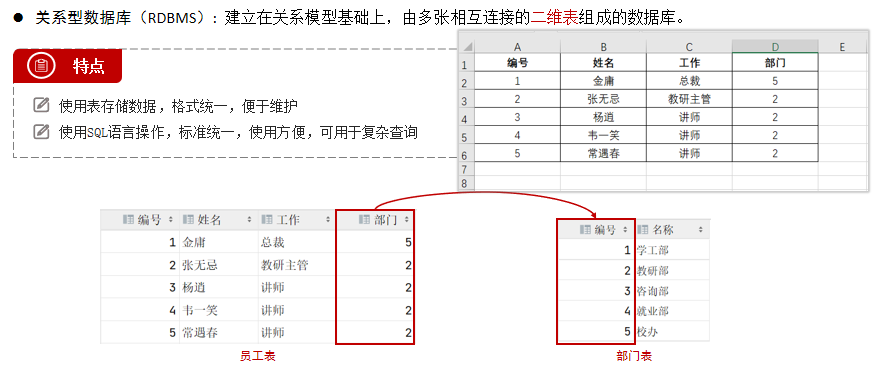
关系型数据库
数据模型
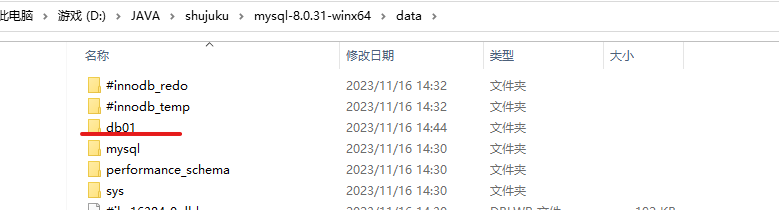
在命令行登录数据库
然后创建一个数据库,指令

数据库在data目录下可以查看
在db01的库名下创建对象,就是上面表的形式
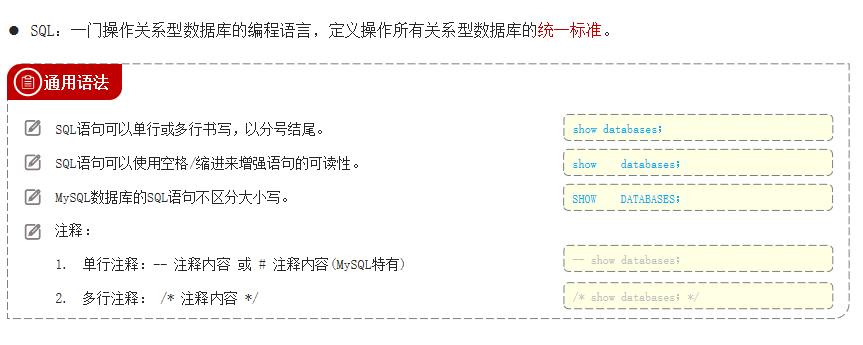
SQL简介
SQL通用语法
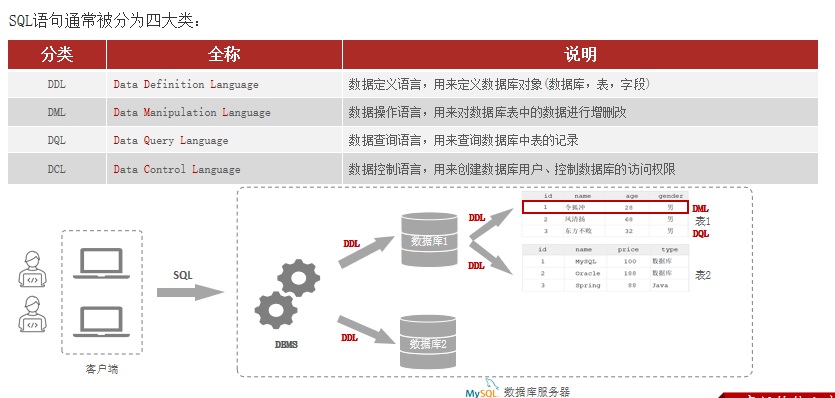
SQL分类
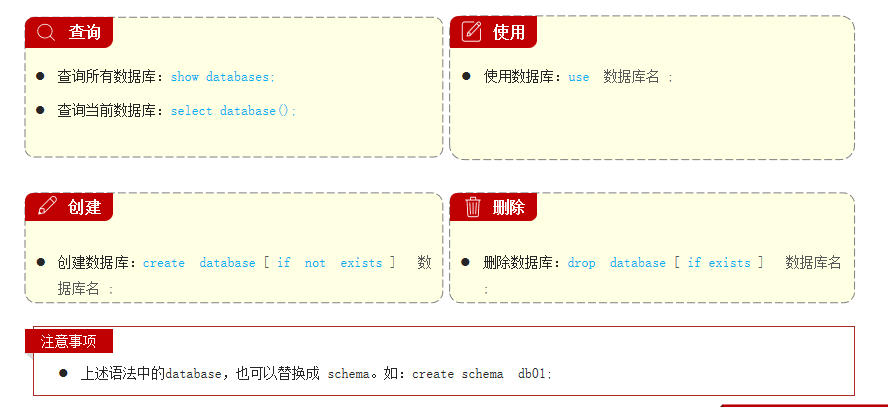
DDL(数据库操作)
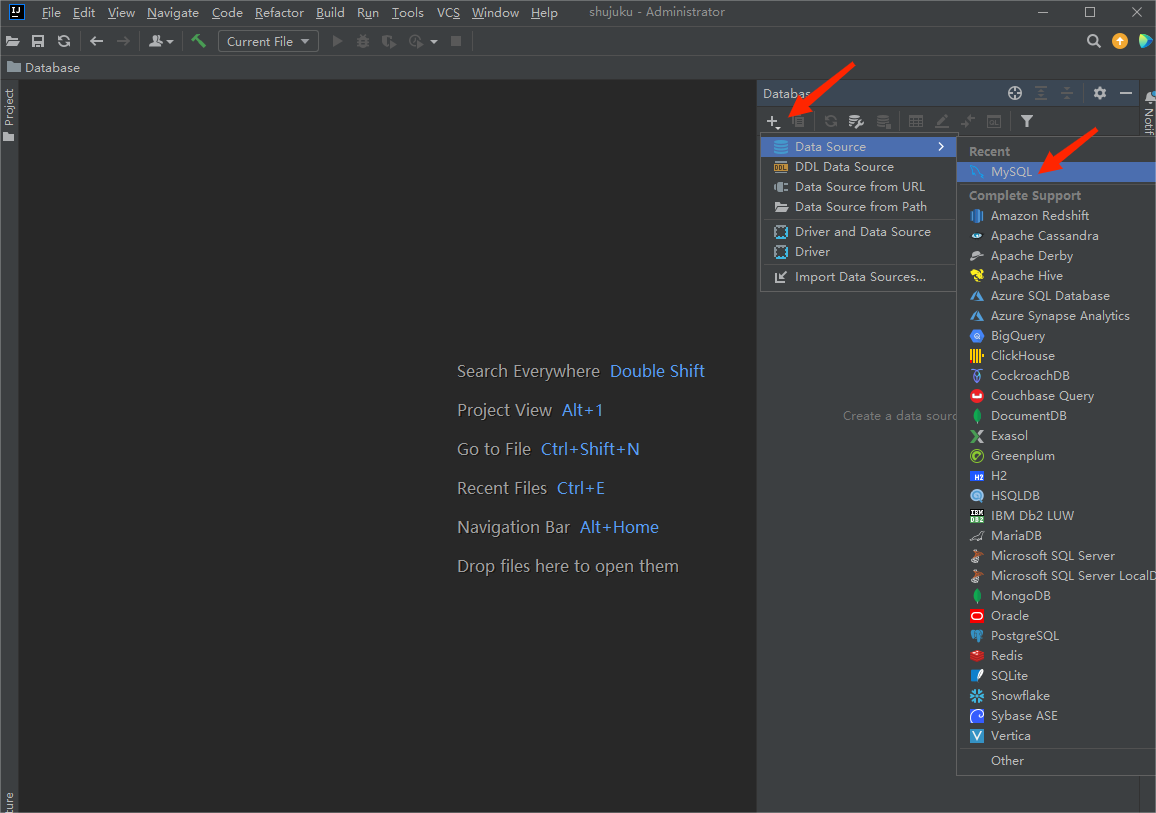
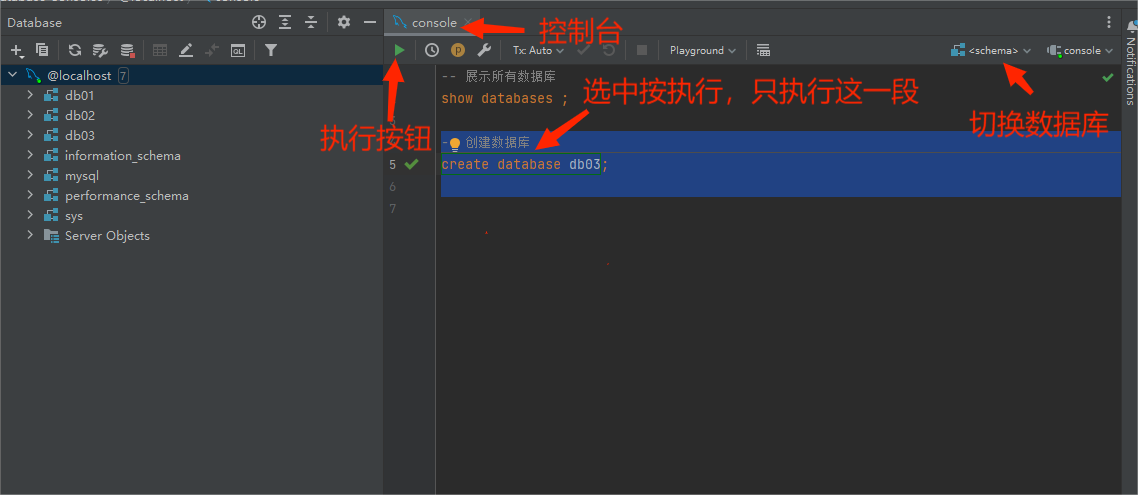
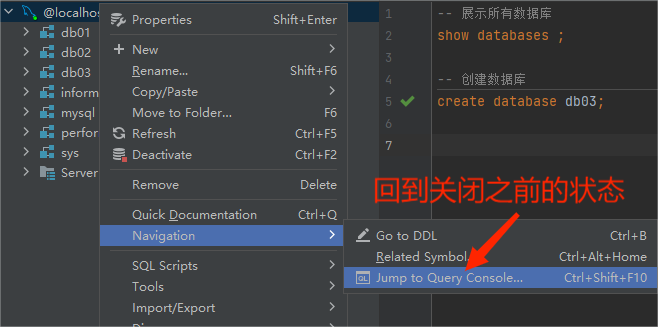
MySQL客户端工具
打开IDEA
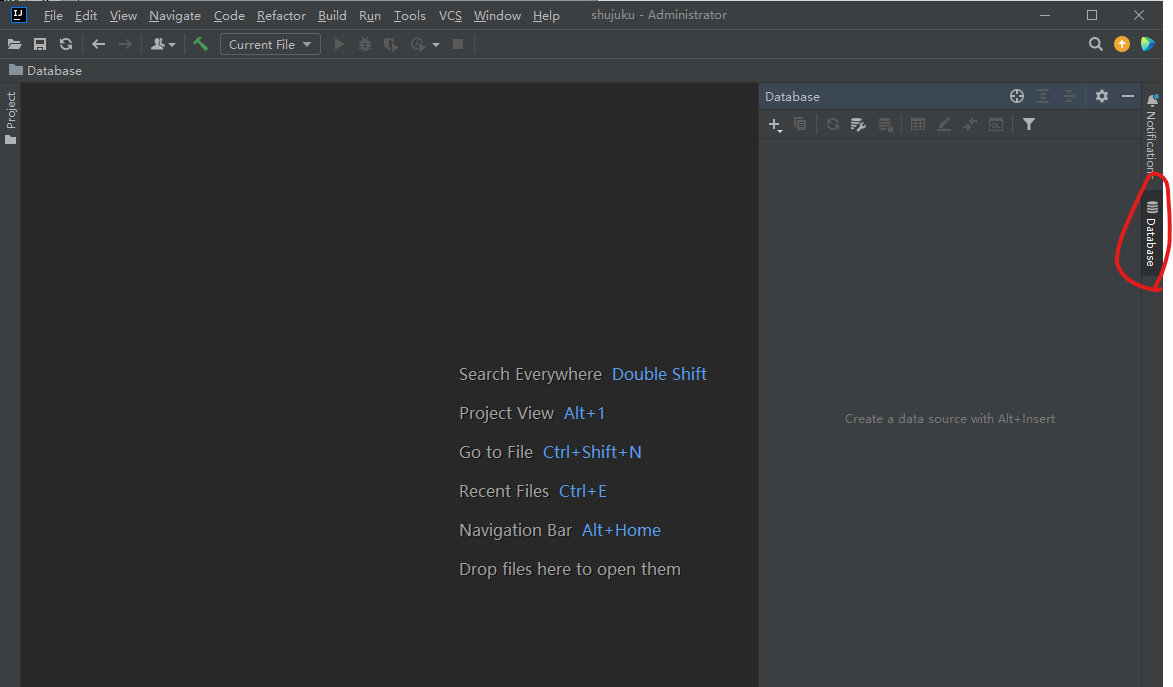
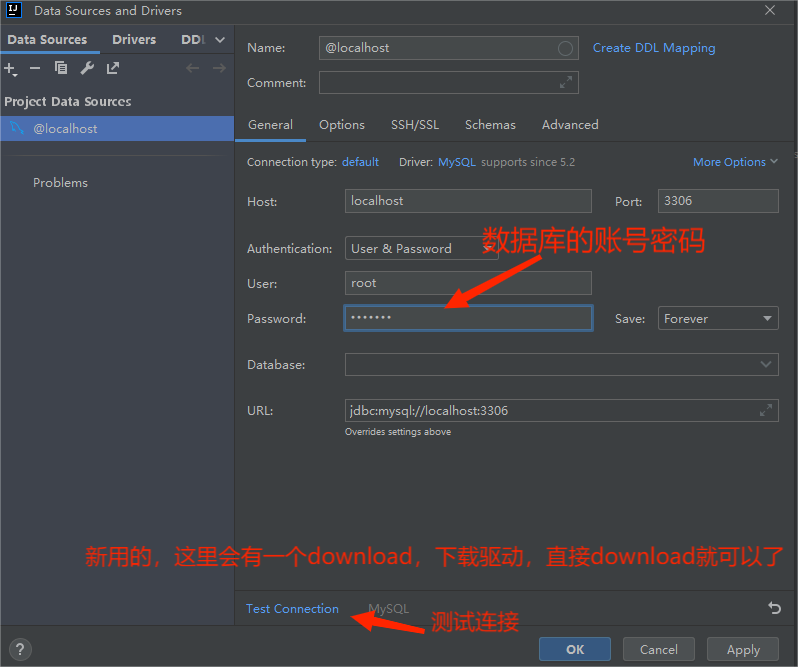
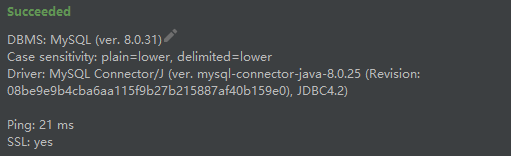
成功,点ok
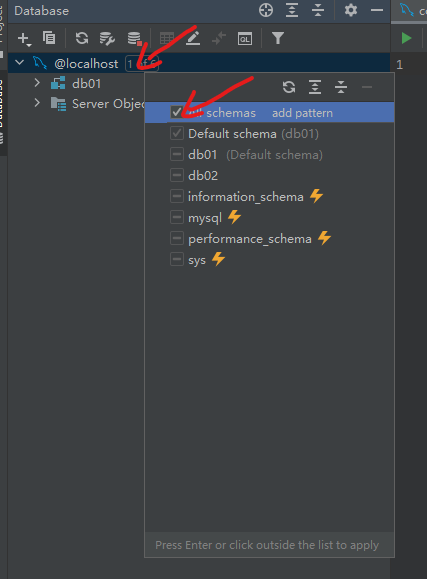
展示所有数据库
具体用法
数据类型
整数 字节 有符号 无符号 描述
tinyint 1byte signed(-128,127) unsigned(0,255) 小整数值(常用)
smallint 2byte signed(-32768,32767) unsigned(0,65535) 大整数值
mediumint 3byte signed(-8388608,8388607) unsigned(0,16777215) 大整数值
int 4byte signed(-2147483648,2147483647) unsigned(0,4294967295) 大整数值
bigint 8byte signed(-2^63,2^63-1) unsigned((0,2^64-1)) 极大整数值
小数
float 4byte 单精度浮点数值 float(5,2):5表示整个数字长度,2 表示小数位个数 ——000.00
double 8byte 双精度浮点数值 double(5,2):5表示整个数字长度,2 表示小数位个数——000.00
decimal 小数值(精度更高) decimal(5,2):5表示整个数字长度,2 表示小数位个数(不常用)
字符串
char bytes(0-255) 定长字符串 char(10):最多10个字符,不足10个字符,占10个字符 (性能高,浪费空间)
varchar byte(0-65535) 变长字符串 varchar(10):最多10个字符,不足10个字符,按实际长度存储(性能低,节省空间)
时间 范围 格式 描述
date 3byte (1000-01-01至9999-12-31) YYYY-MM-DD 日期值
time 3byte (-838:59:59至838:59:59) HH:MM:SS 时间值或持续时间
year 1 1901至2155 YYYY 年份值
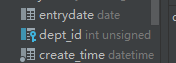
datetime 8byte YYYY-MM-DD HH:MM:SS 日期和时间混合
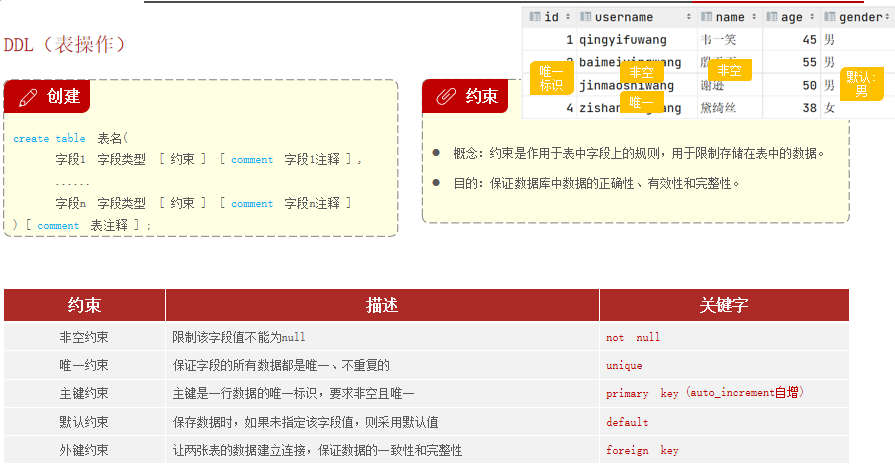
表
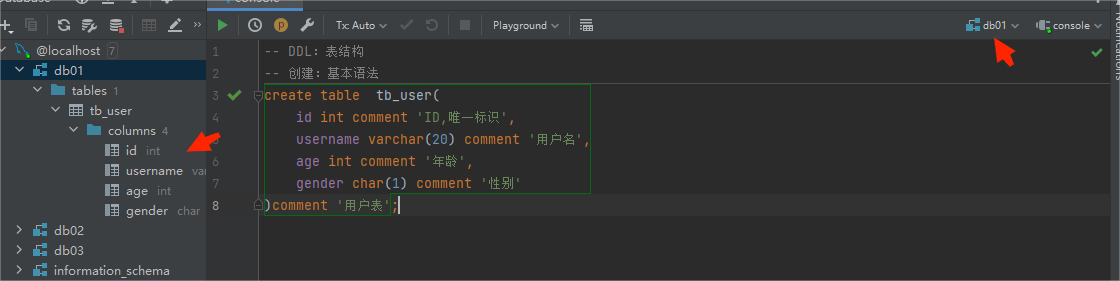
表创建
[ ]可以写也可以不写
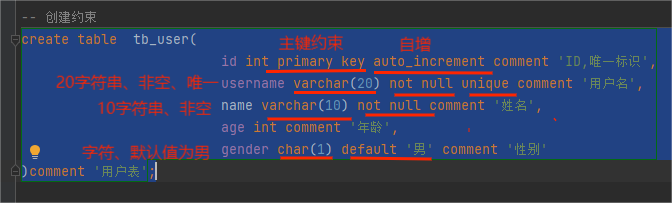
创建约束
表查询
查询当前数据库所有表

查询表结构
查询建表语句

保存表,直接保存建表代码就可以了,表删了,执行一次建表代码就可以恢复,数据没有了
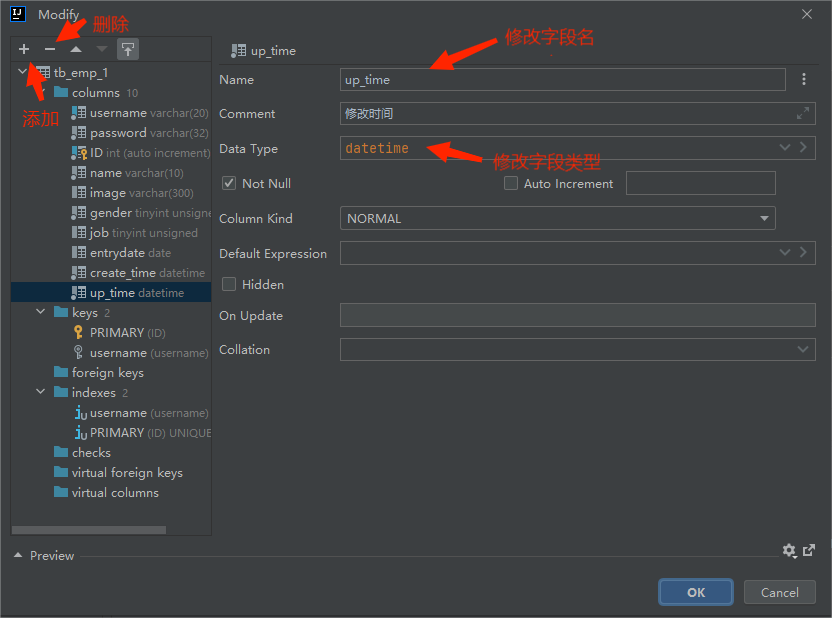
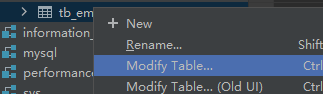
表修改
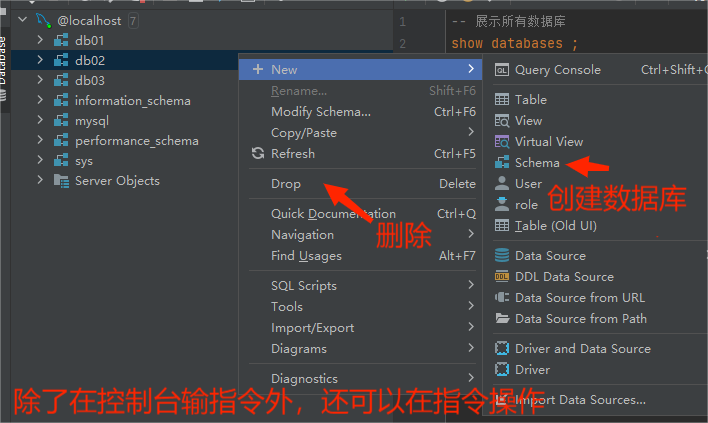
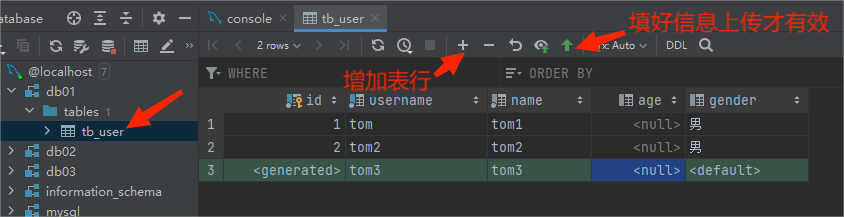
图形化界面操作
修改表名
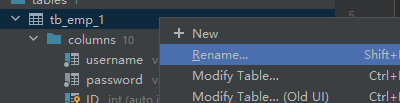
添加字段,删除字段,修改字段名和类型
表删除
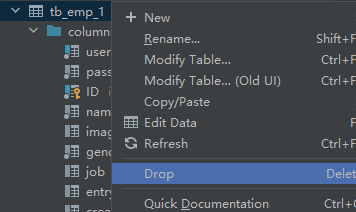
注意:删除表,表中的全部数据也会被删除
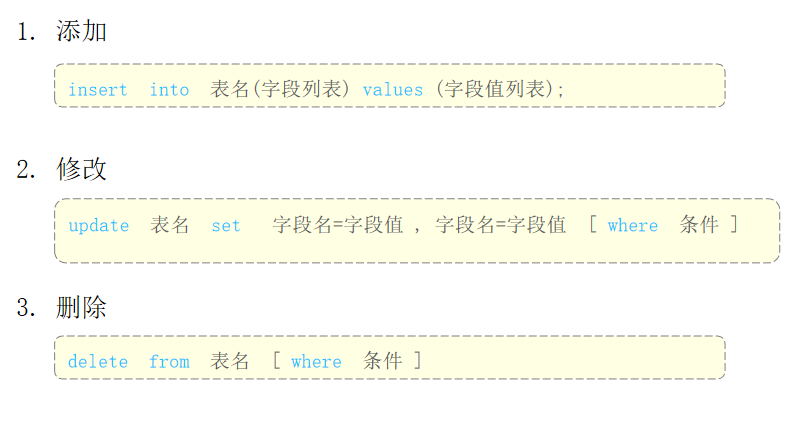
DML(数据操作语言)
DML英文全称是Data Manipulation Language(数据操作语言),用来对数据库中表的数据记录进行增、删、改操作。
增加字段数据


数据之间用逗号分开

数据之间用逗号分开

注意事项:
插入数据时,指定的字段顺序需要与值的顺序是一一对应的。
字符串和日期型数据应该包含在引号中。
插入的数据大小,应该在字段的规定范围内
更新字段数据


where修改语句的条件可以有,也可以没有,如果没有条件,则会修改整张表的所有数据。
删除字段数据
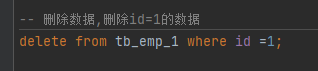
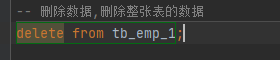

delete 语句的条件可以有,也可以没有,如果没有条件,则会删除整张表的所有数据。
delete 语句不能删除某一个字段的值(如果要操作,可以使用UPDATE,将该字段的值置为NULL)。
小结
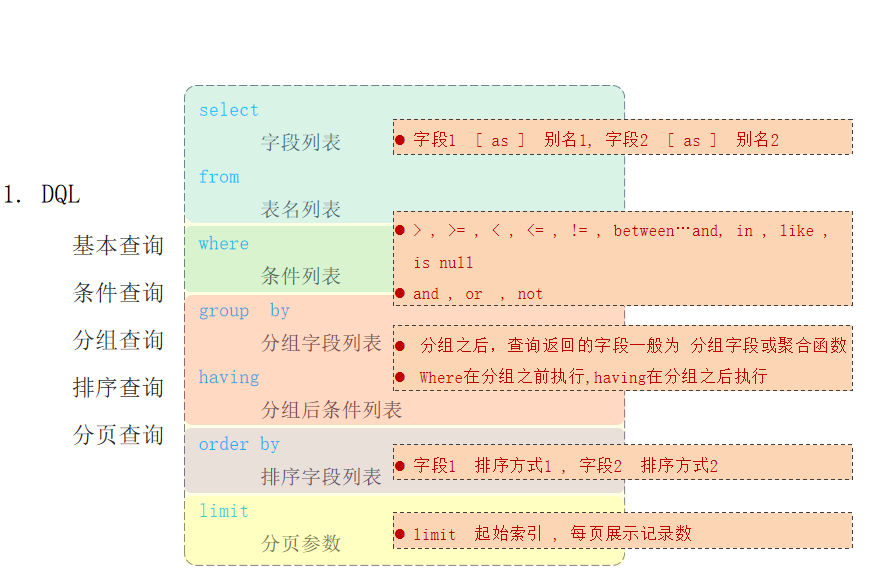
DQL(数据查询语句)
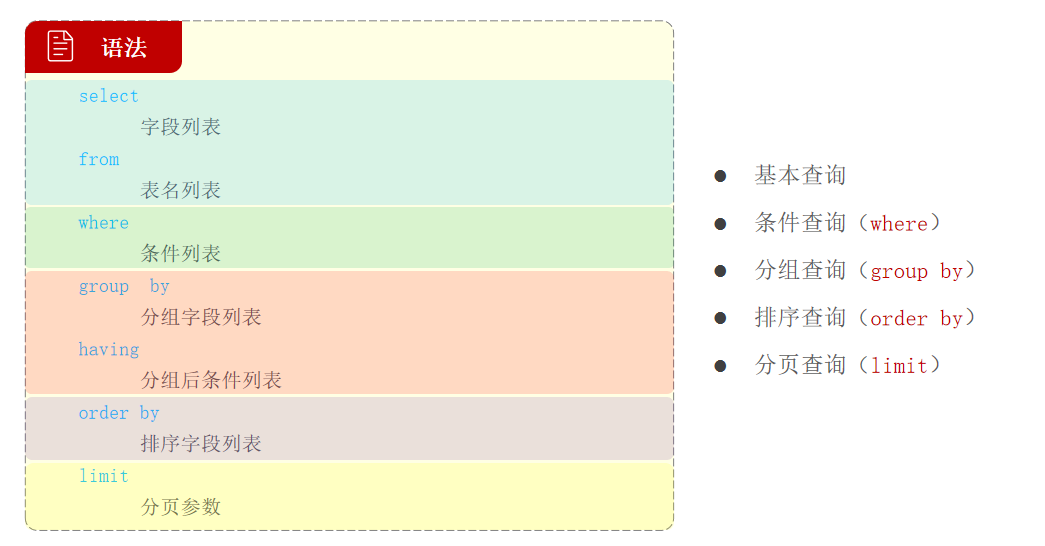
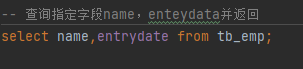
基本查询


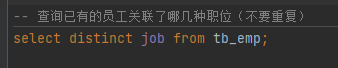
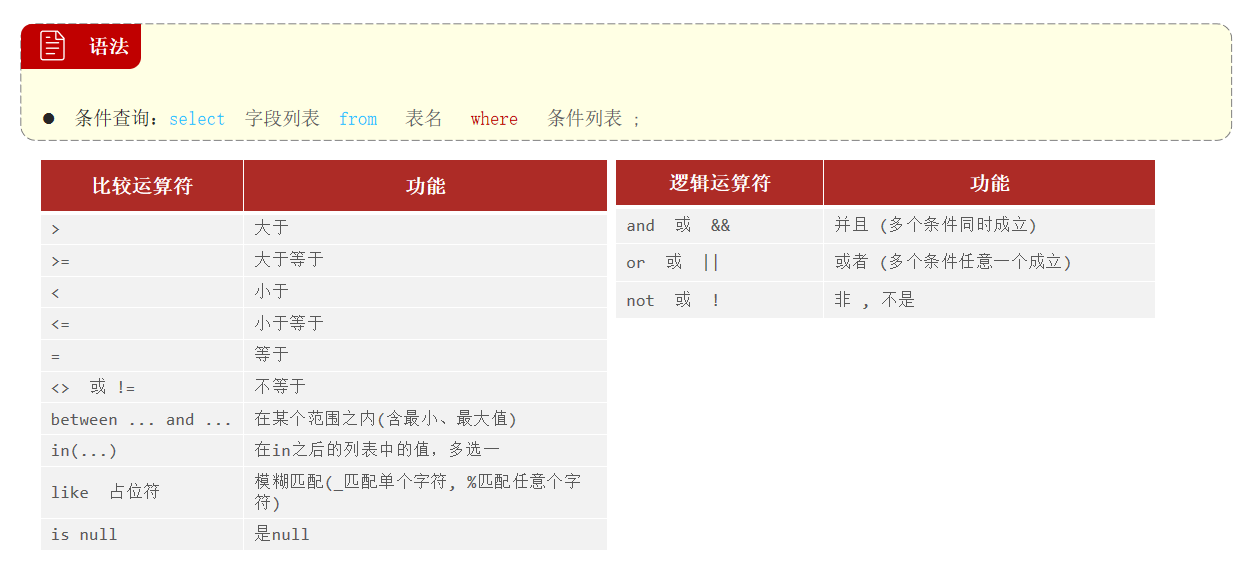
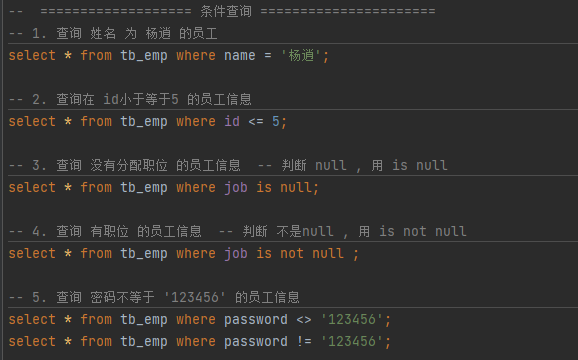
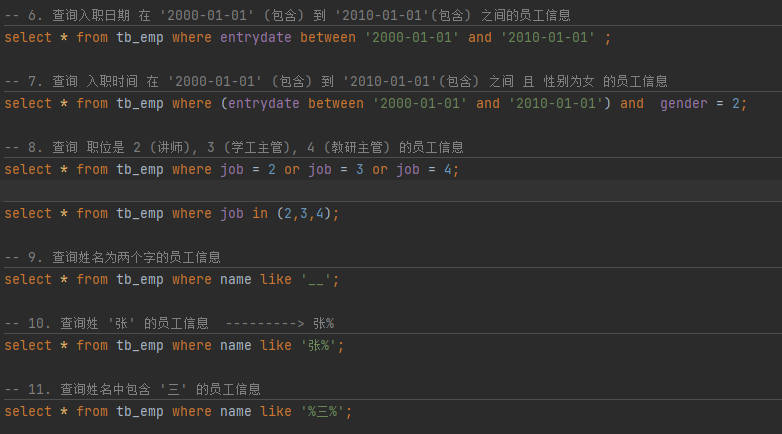
条件查询
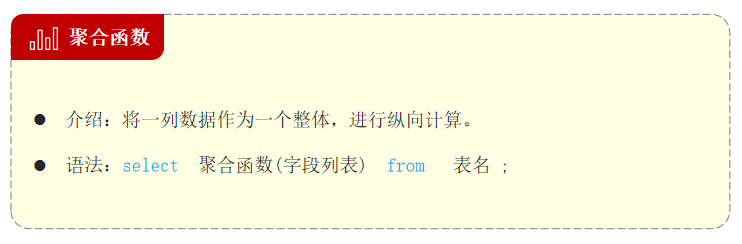
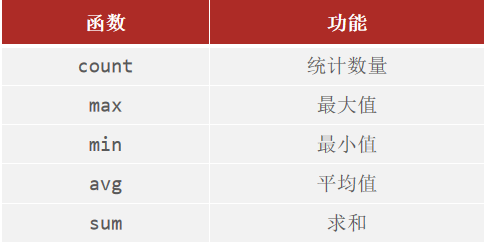
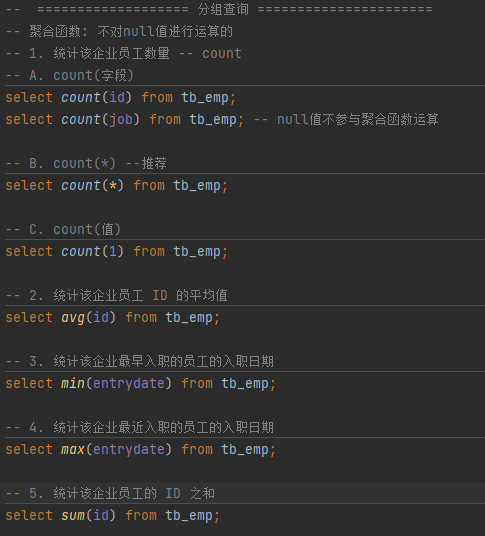
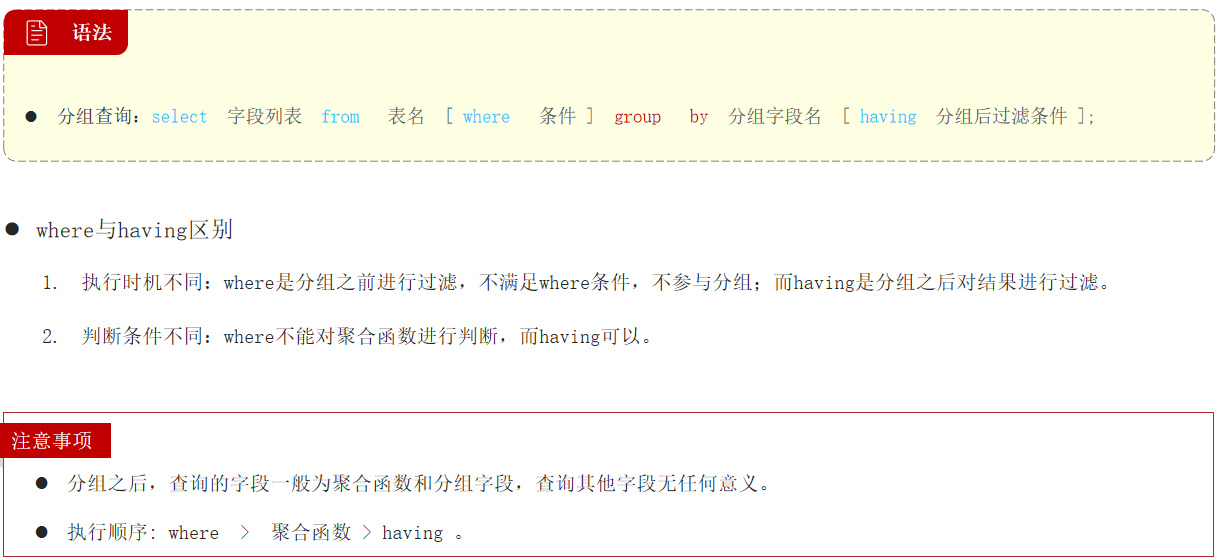
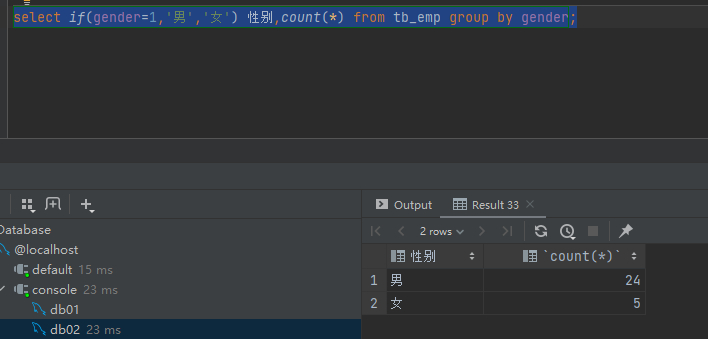
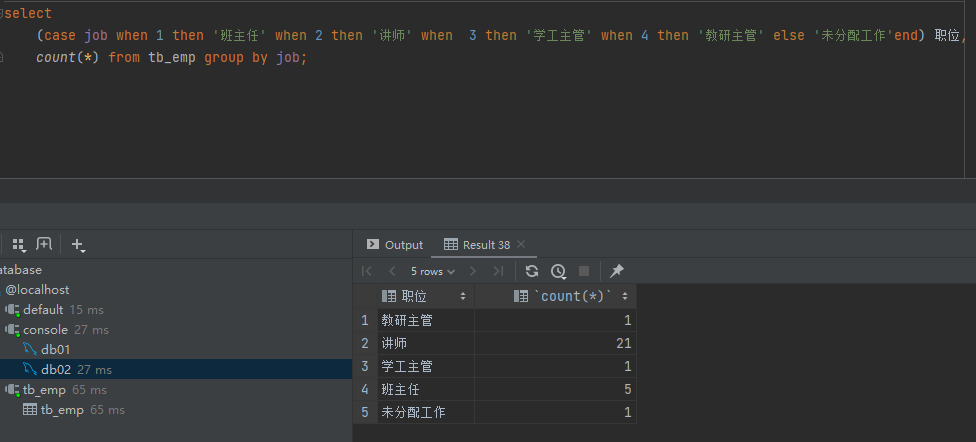
分组查询


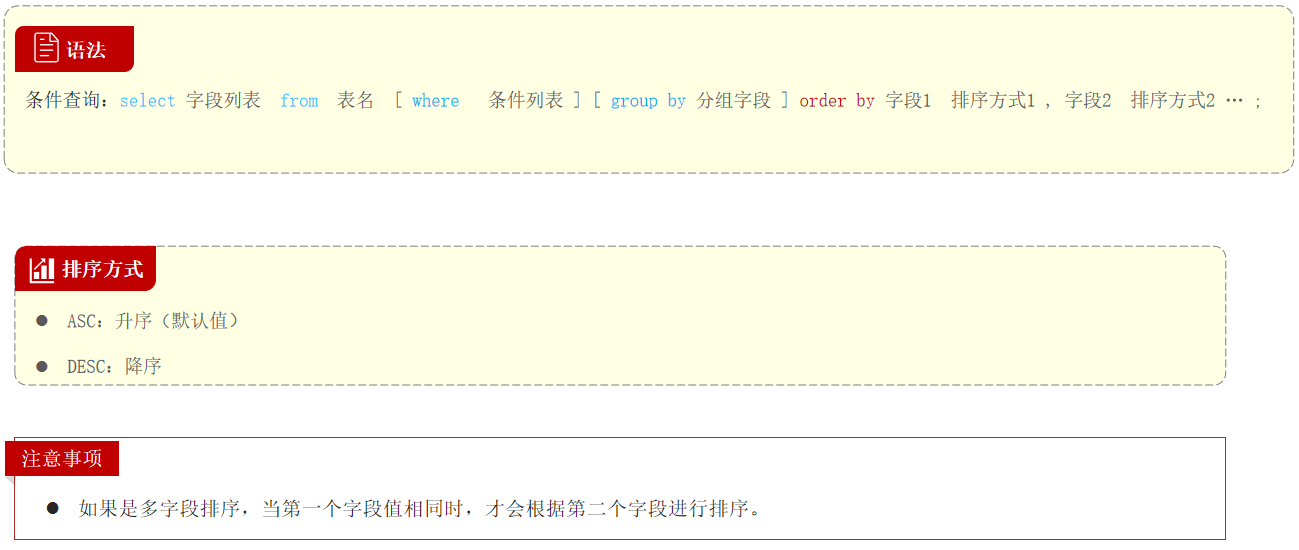
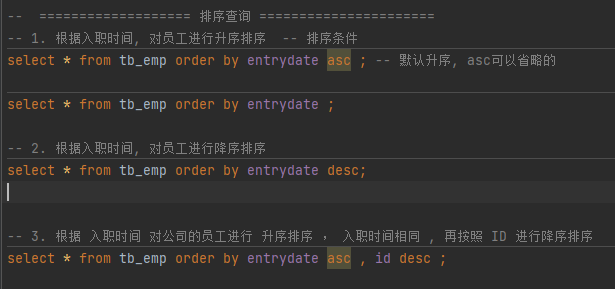
排序查询
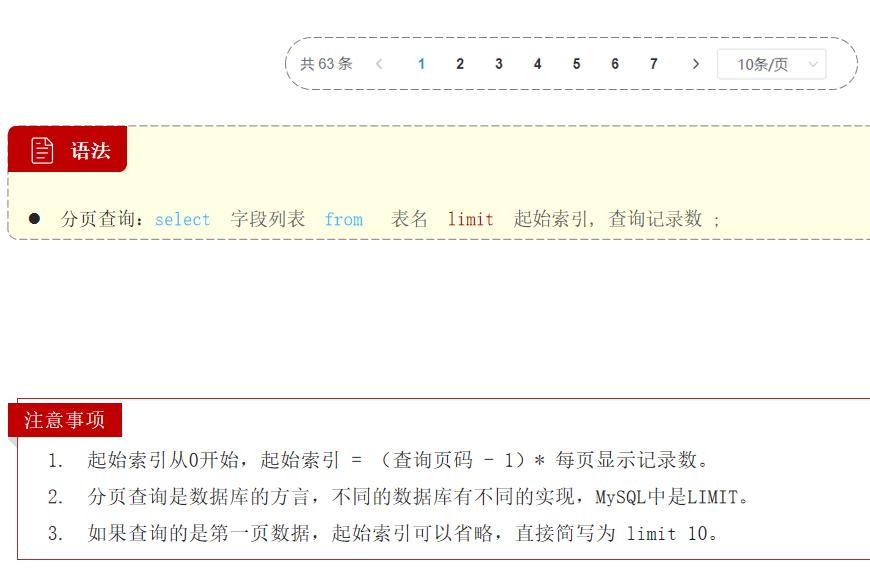
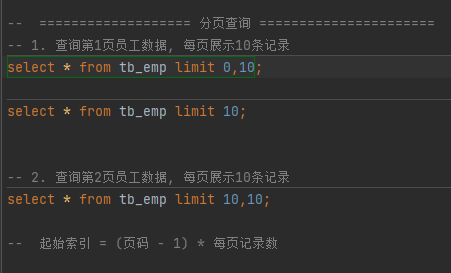
分页查询
案例
小结
多表设计
一对多
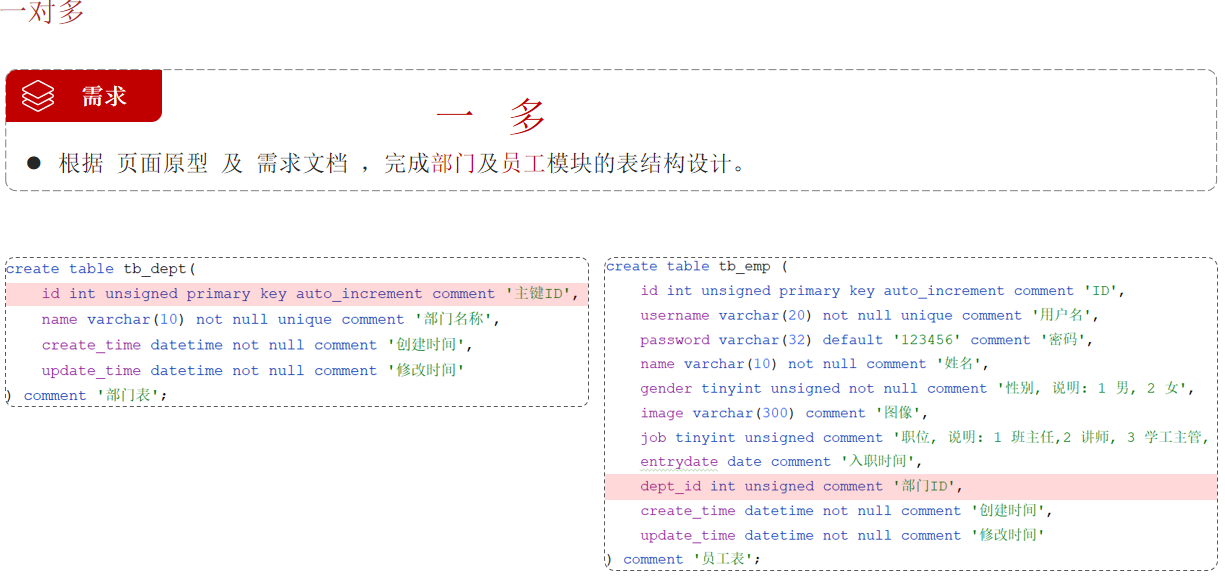

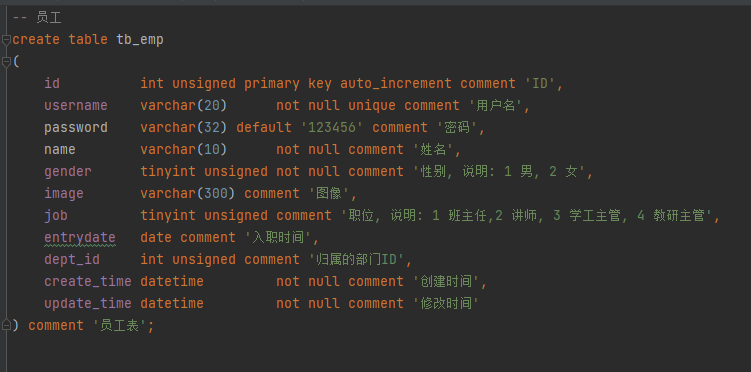
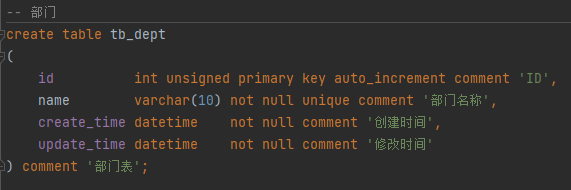
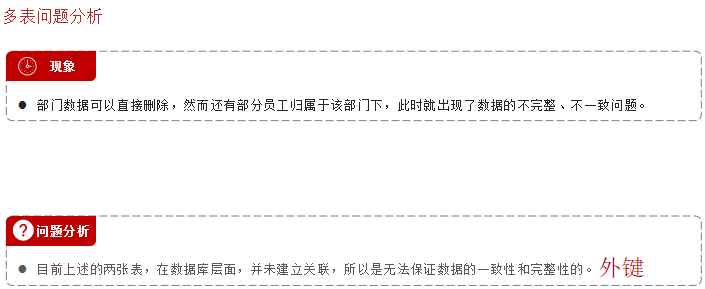
通过外键来关联

有个蓝钥匙就是有了
也可以用语法来关联
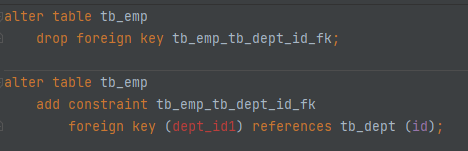
这里是我已经加过了dept_id了,所以只能加dept_id1,因为没有dept_id1表,所以只供参考语法关联外键,这是建完表后的语法
一对一
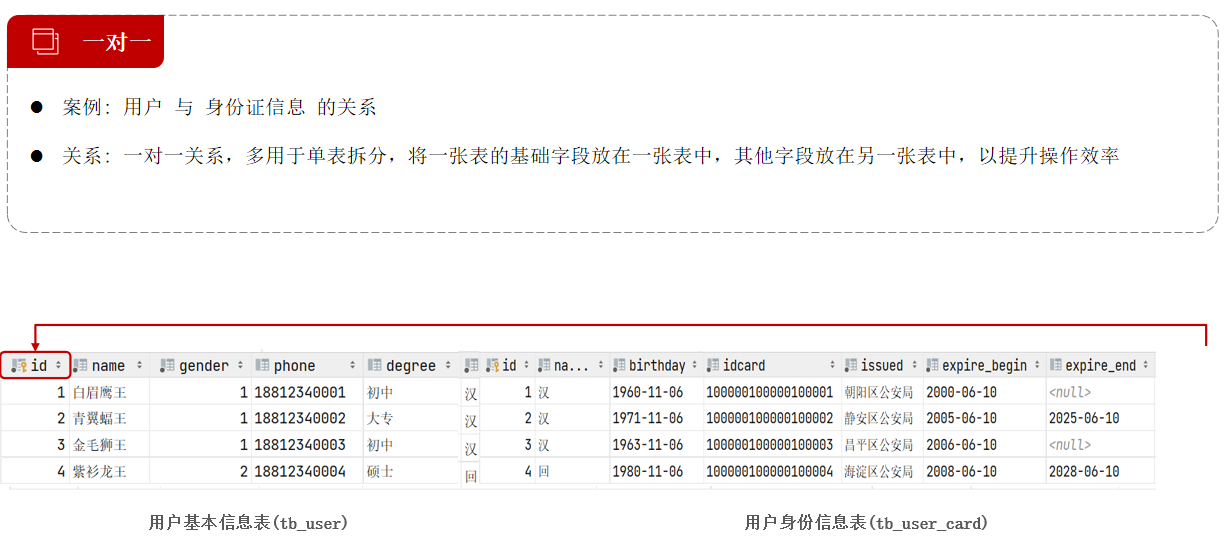
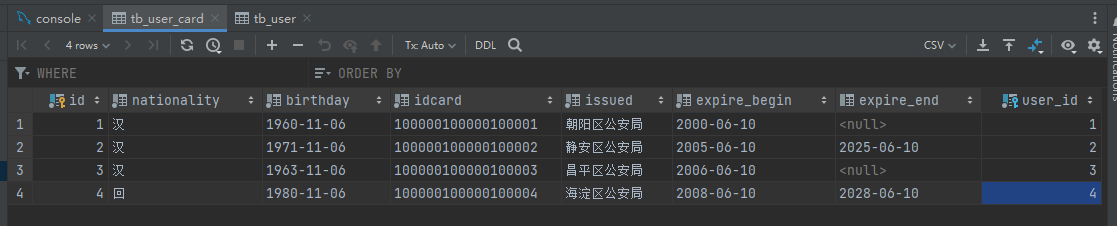
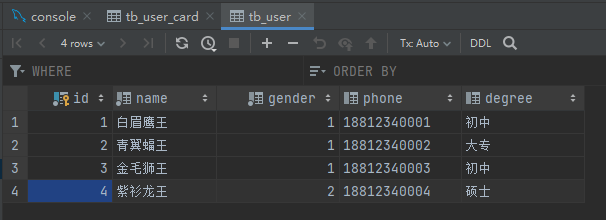
一一对应,通过物理外键绑定id,一一对应,就可以实现一对一的关系
多对多
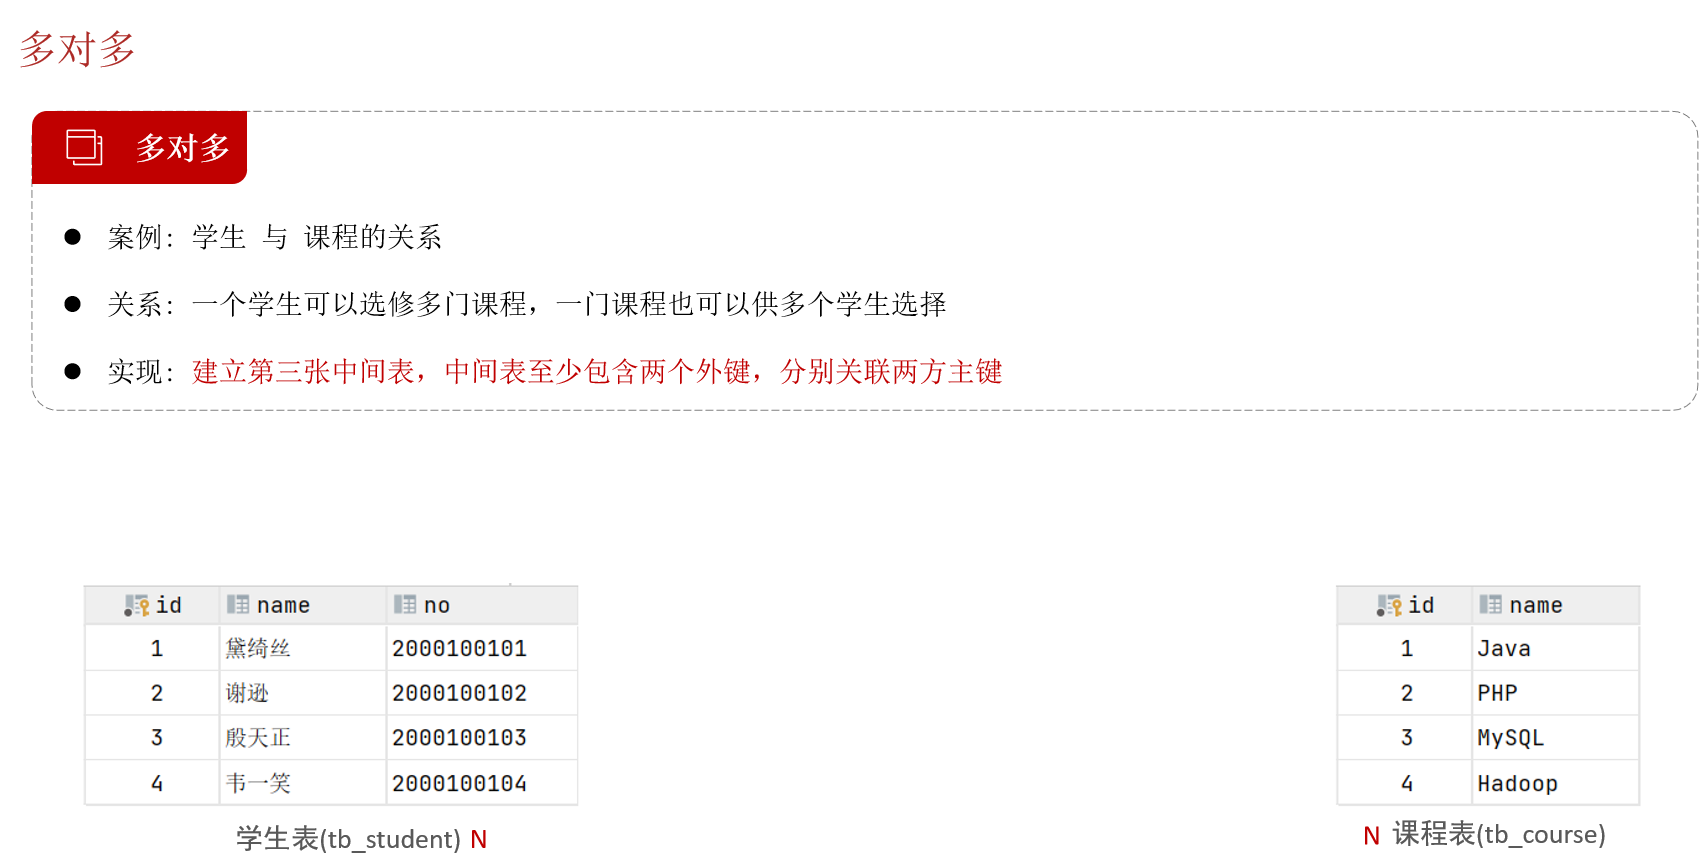
通过一个关系表可以把学生和课程关联起来,表中的元素分布绑定学生id和课程id,通过查找学生就可以知道学生选了什么课,通过查找课程也可以知道什么学生选了课
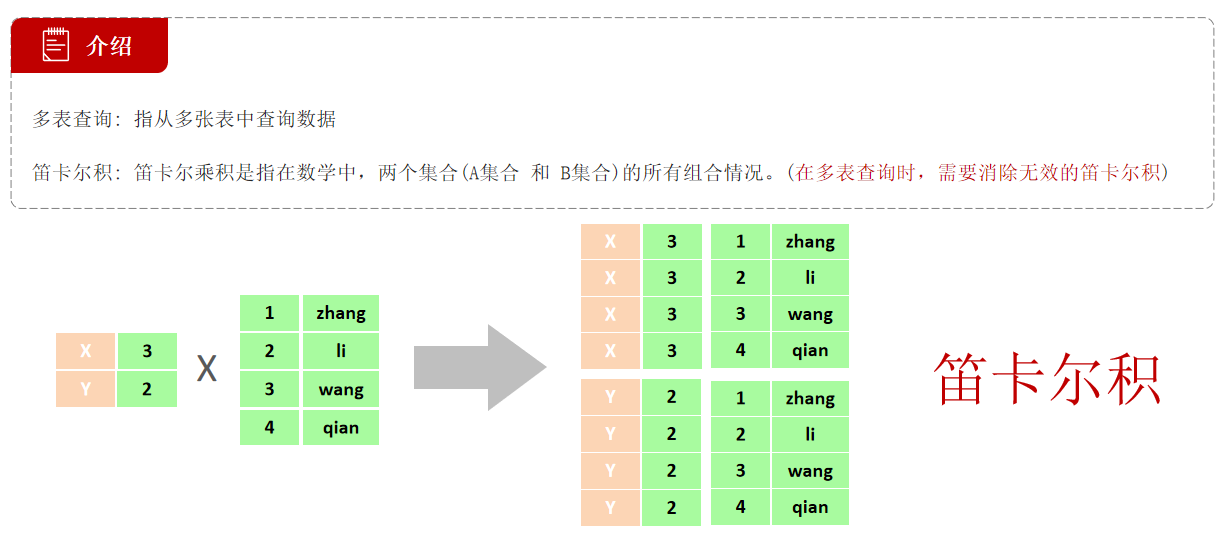
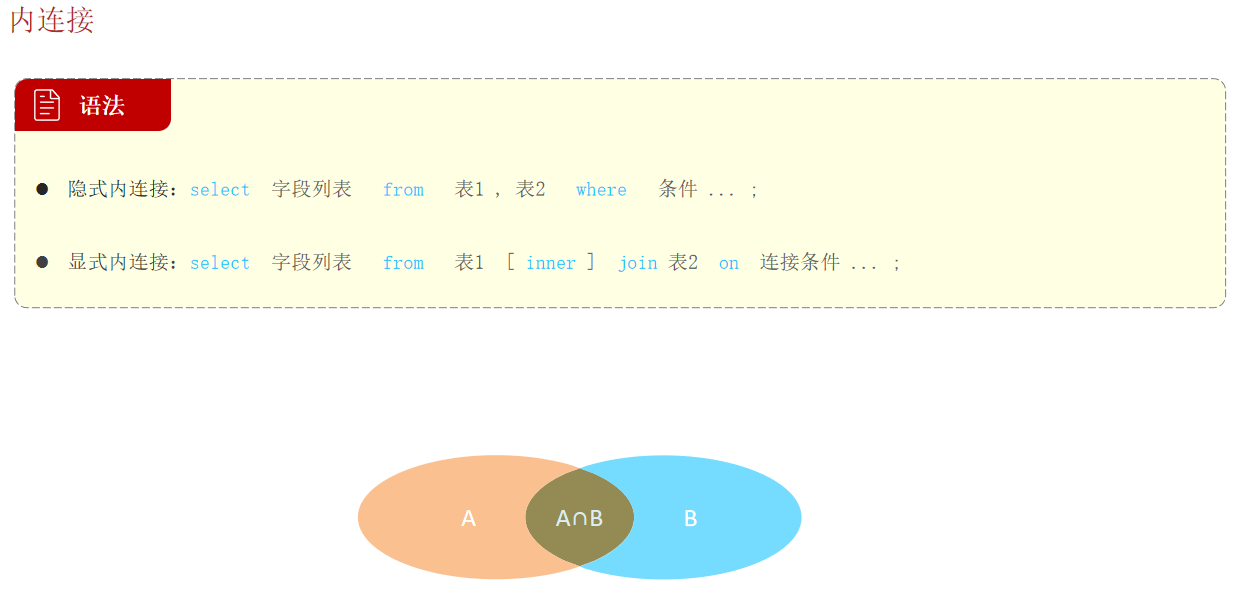
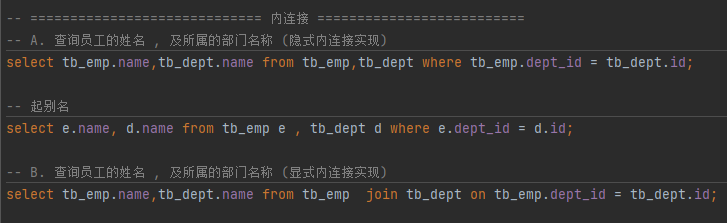
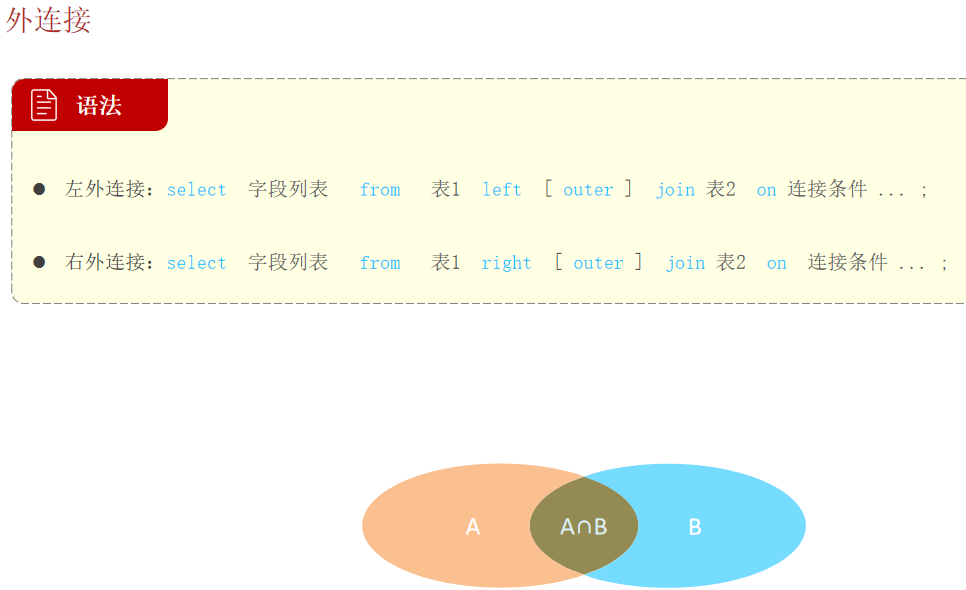
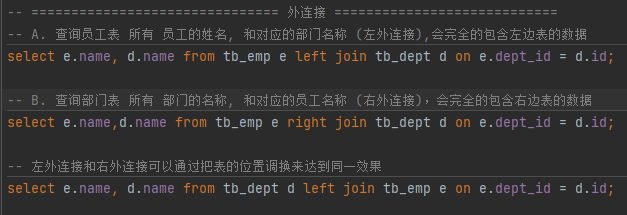
多表查询
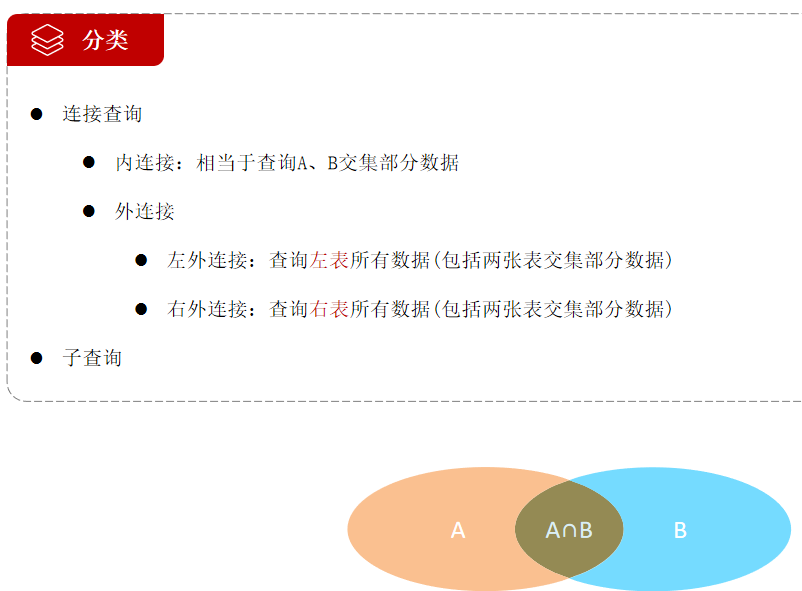
内外连接
子查询
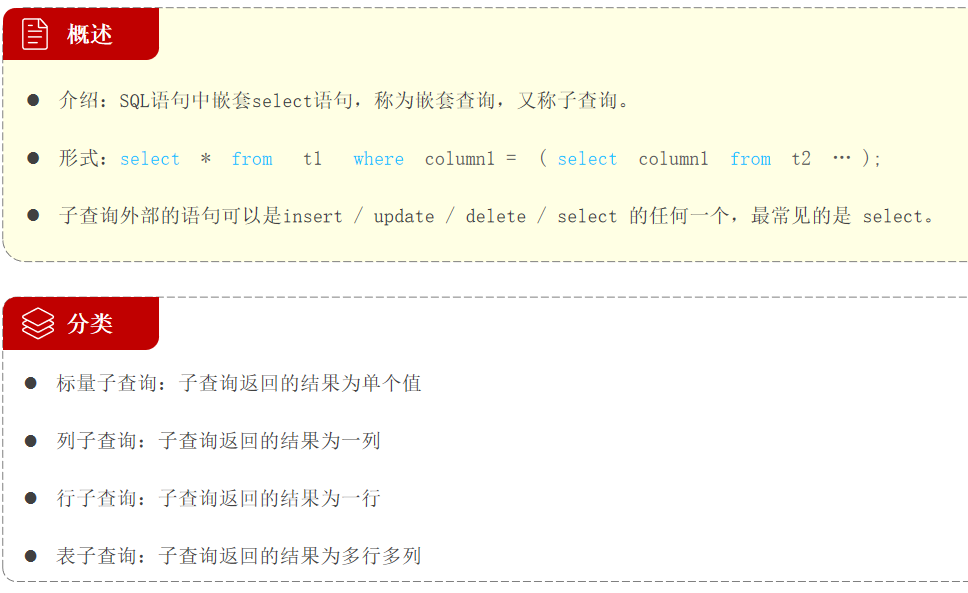
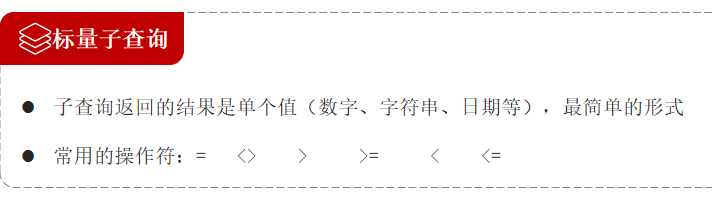
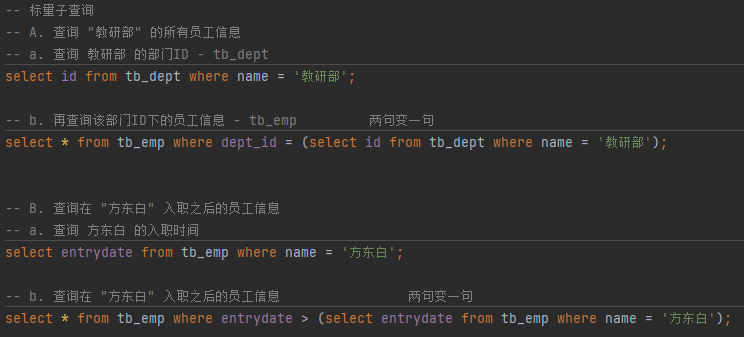
标量子查询
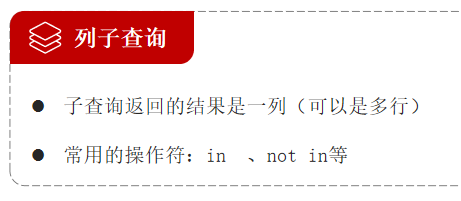
列子查询

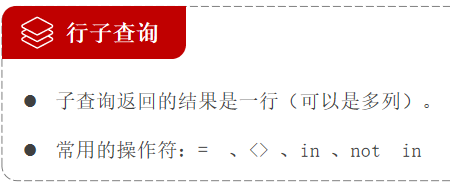
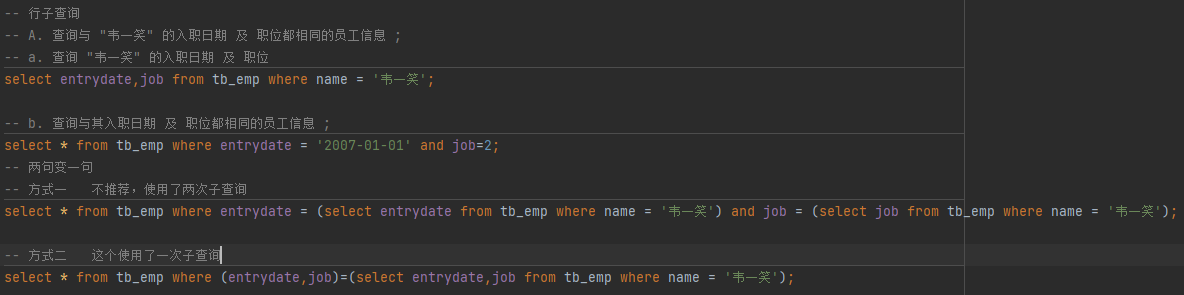
行子查询
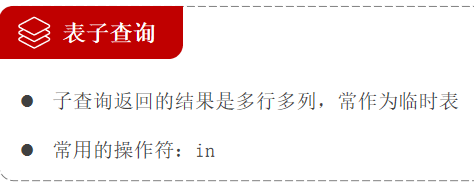
表子查询

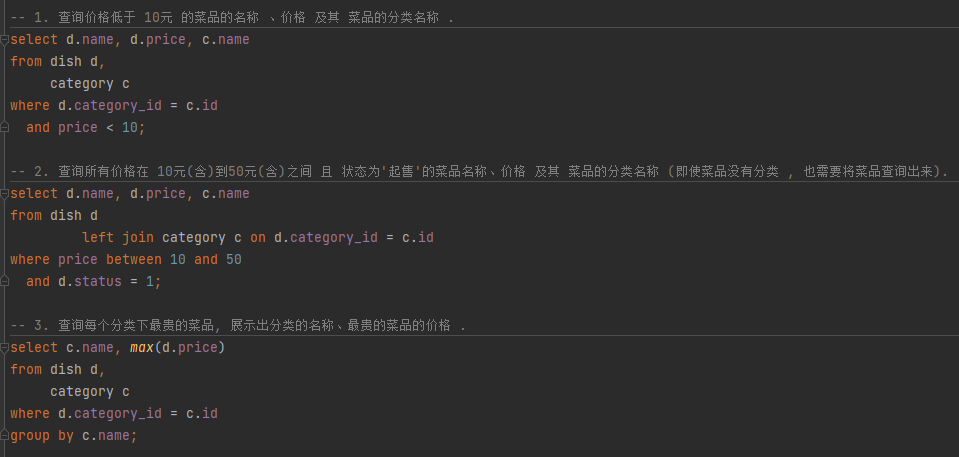
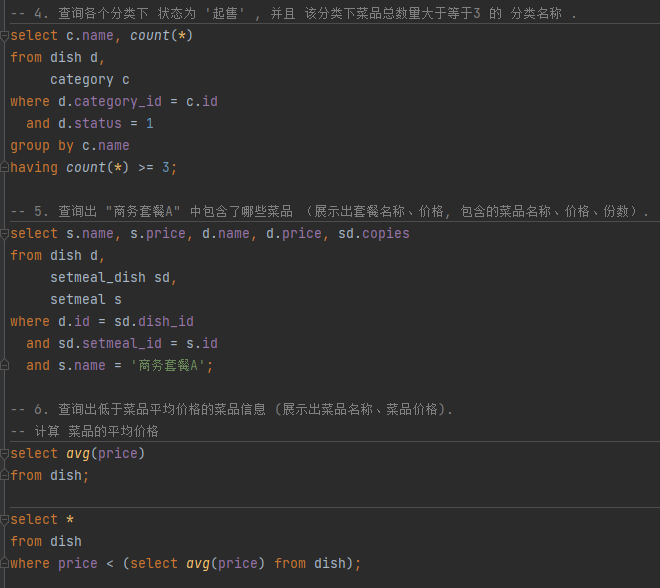
练习
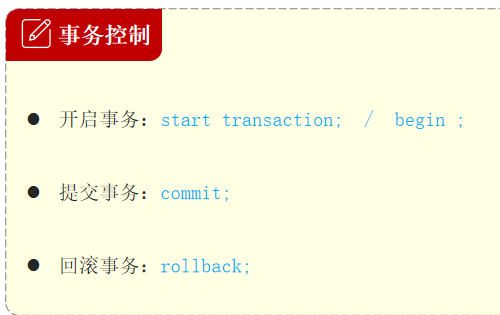
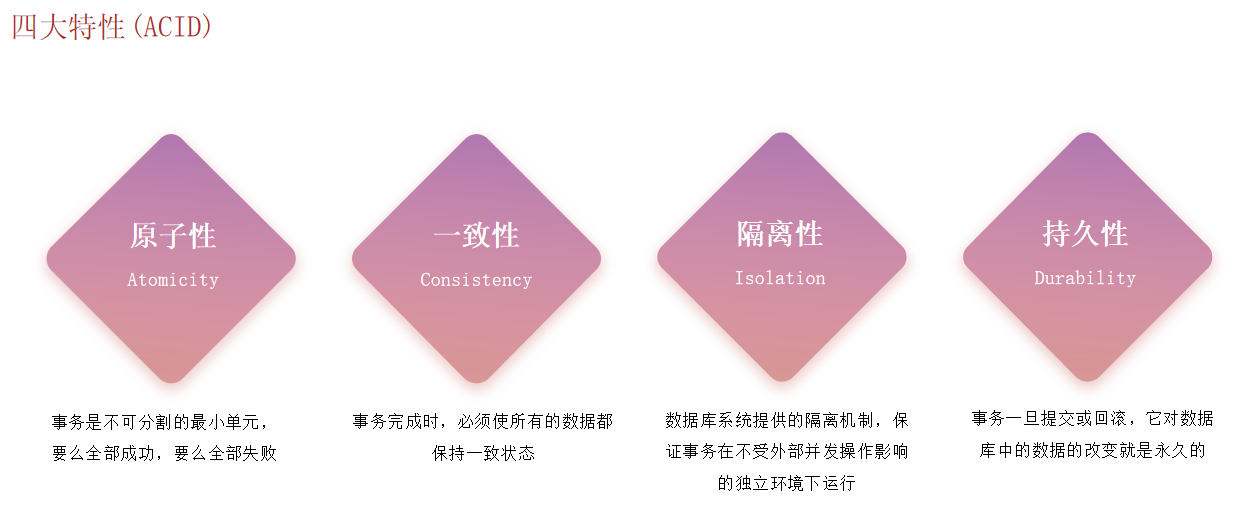
事务
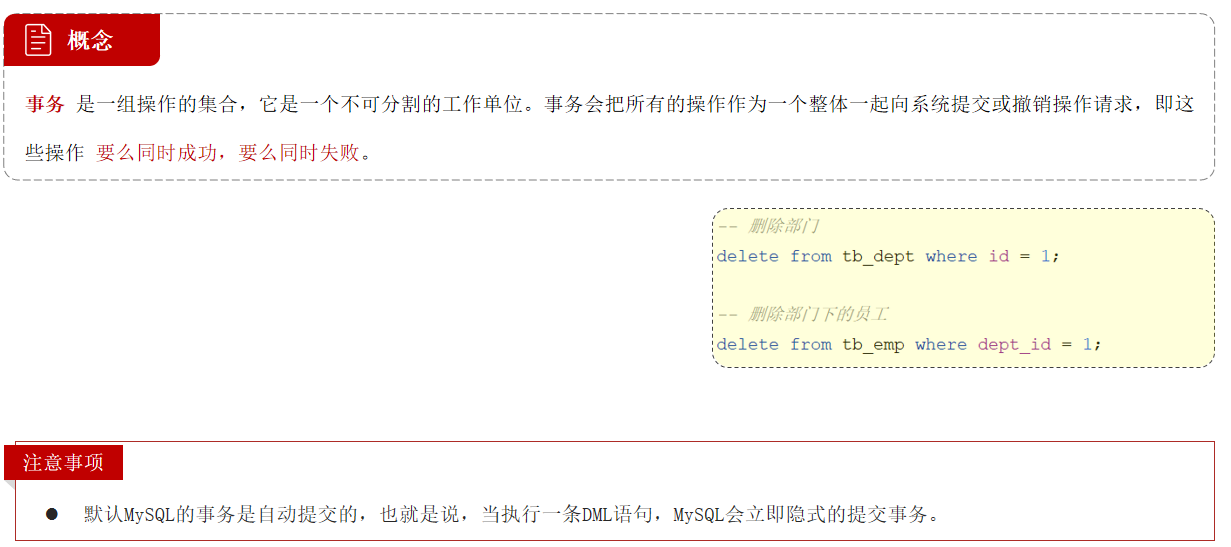
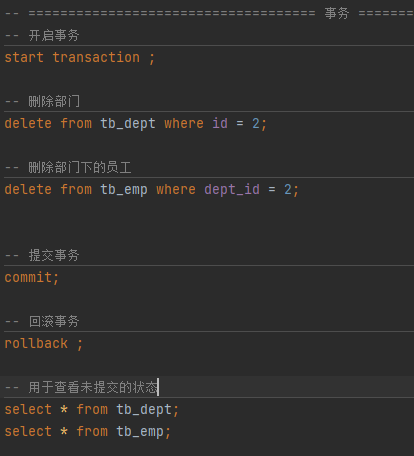
删除部门和删除部门下的员工同时进行,如果有一个执行失败,则不能执行提交,而是执行回滚,若都成功了,就可以执行提交,执行状态可以通过查看表来观看,只能在控制台输入观看,在图像化界面是看不到的
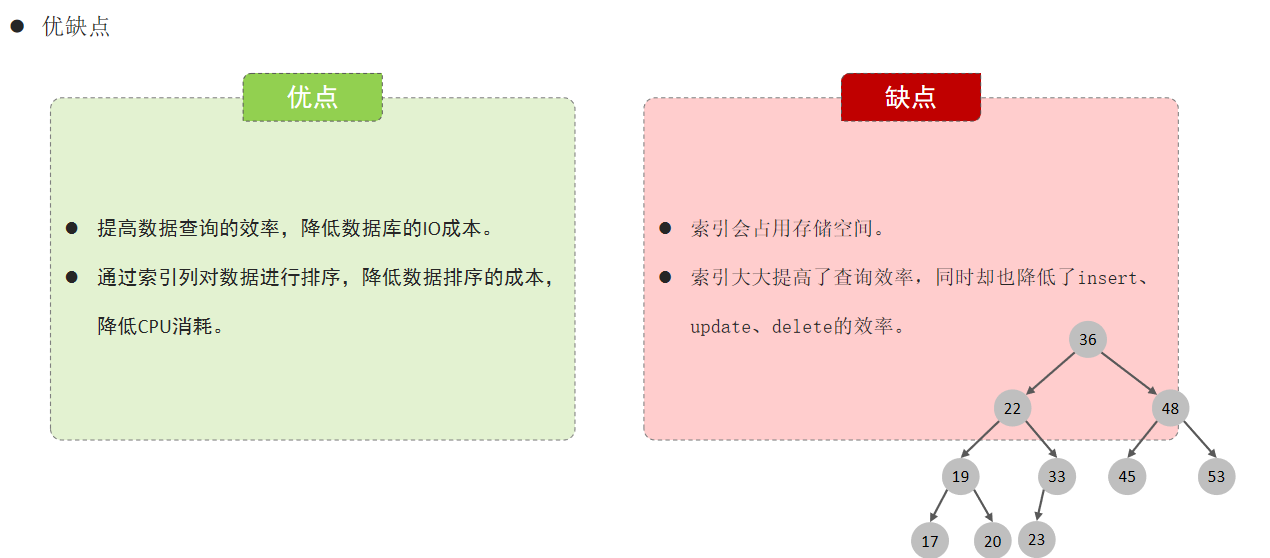
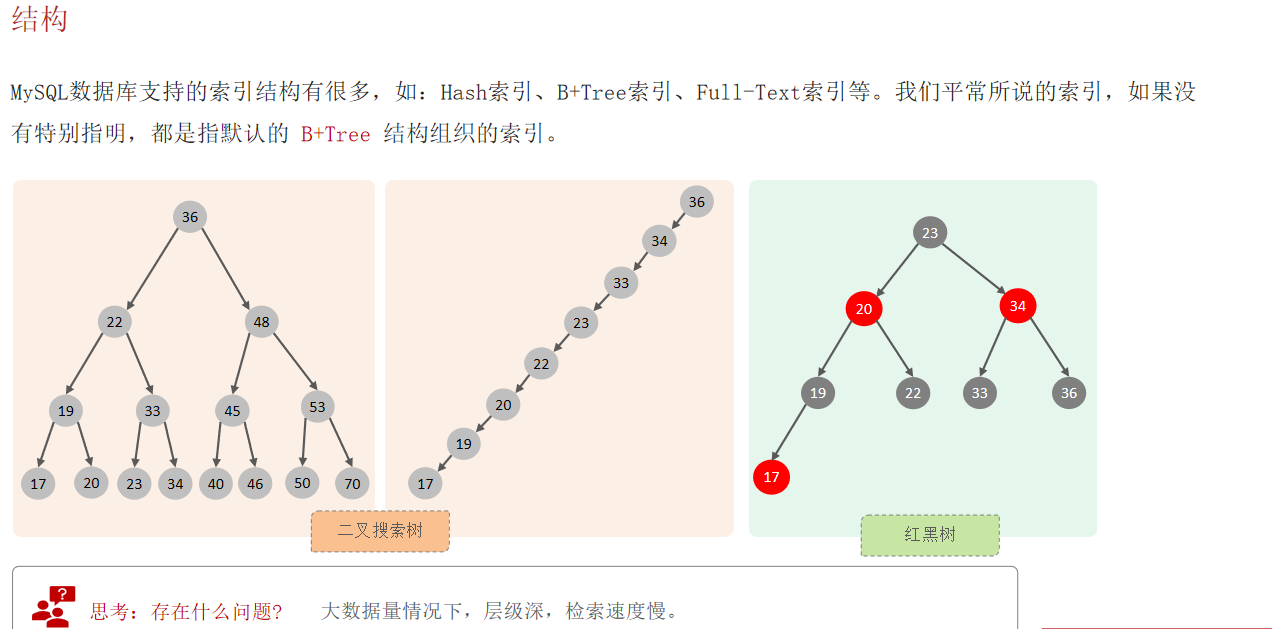
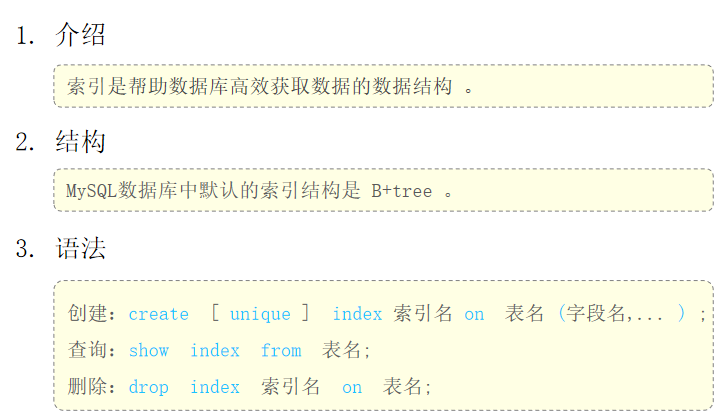
索引
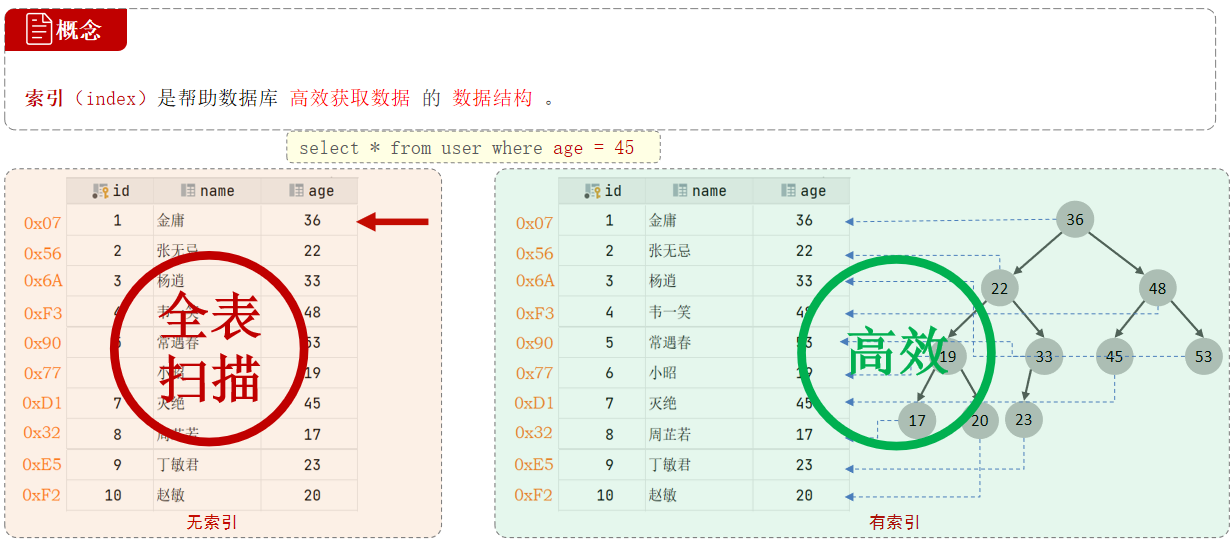
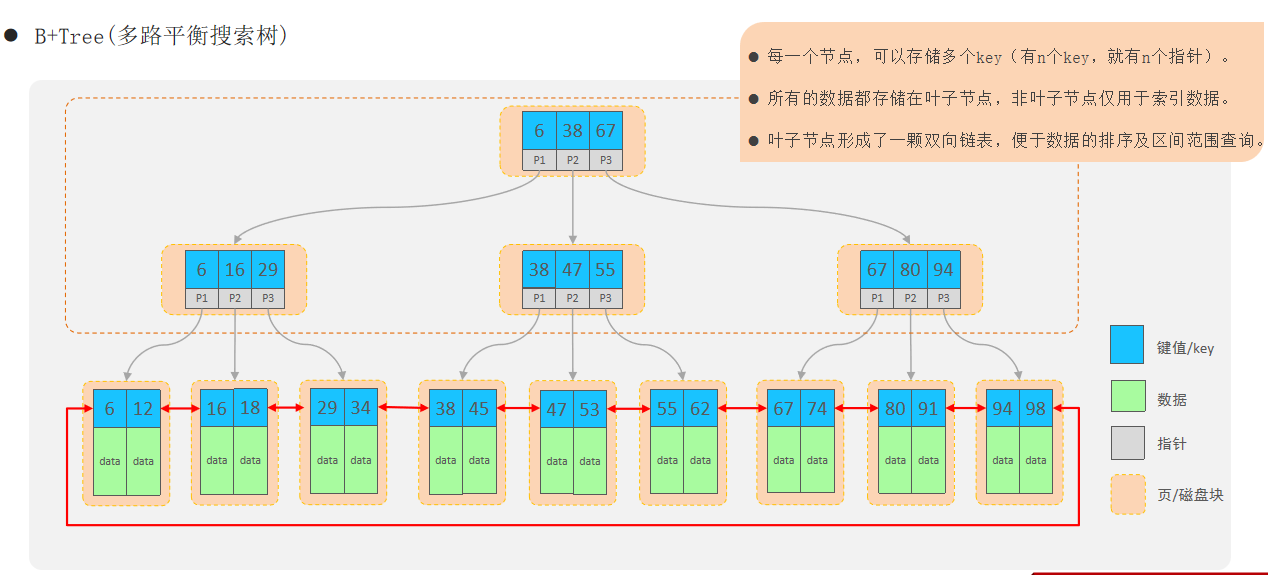
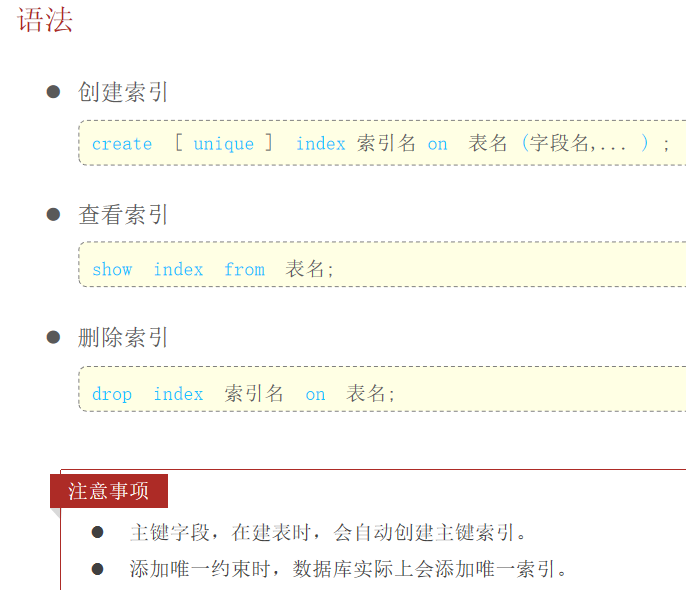
也就是说主键字段一般是ID和加了unique约束的字段都会默认的有索引

上面是默认的
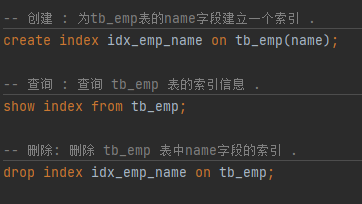
这里是为name创建索引
小结
Mybtis
使用Mybatis查询所有用户数据
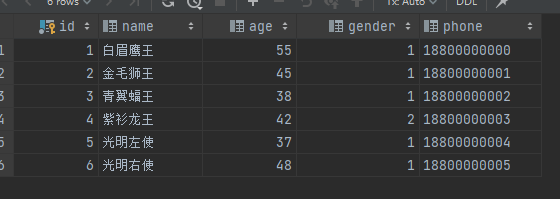
在数据库输入
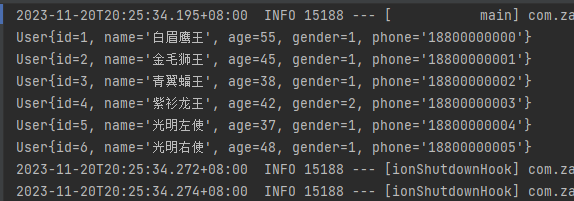
查看是否可以正常输出信息
在IDEA中创建Spring Initializr,类型是Maven
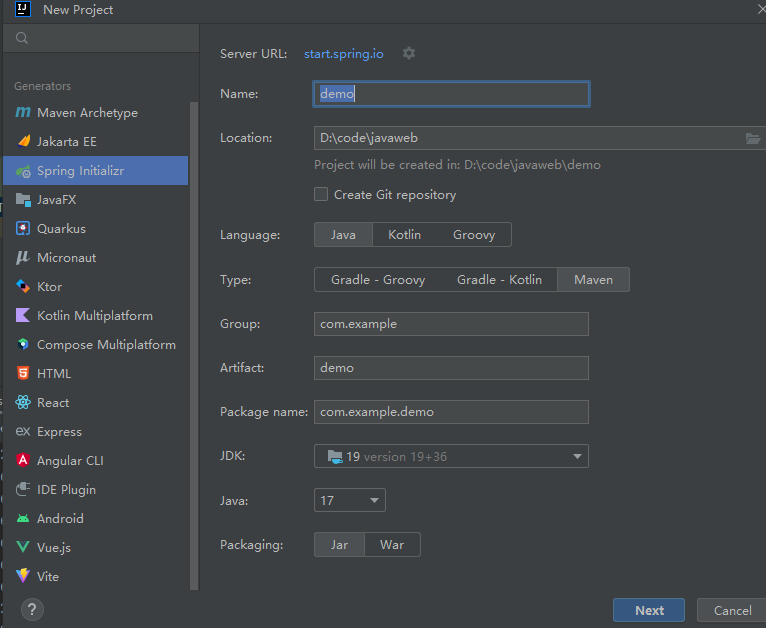
这里要加入两个配置SQL下的MyBatis Framework和MySQL Driver

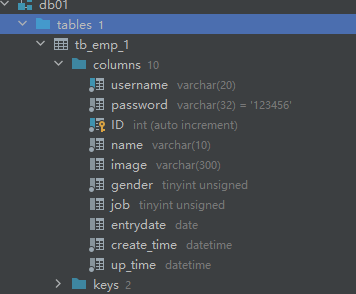
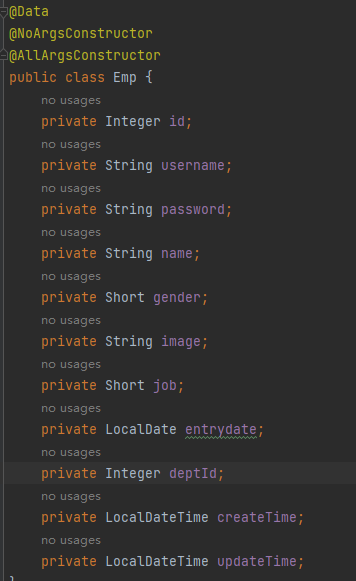
在专门放数据的包下创建对象,数据库的表里有什么,这里的对象就要有什么
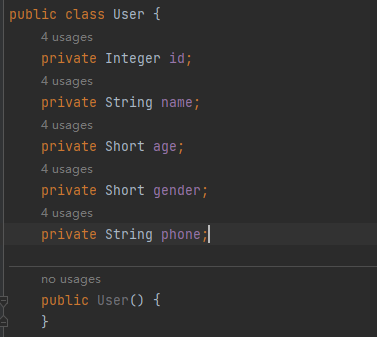
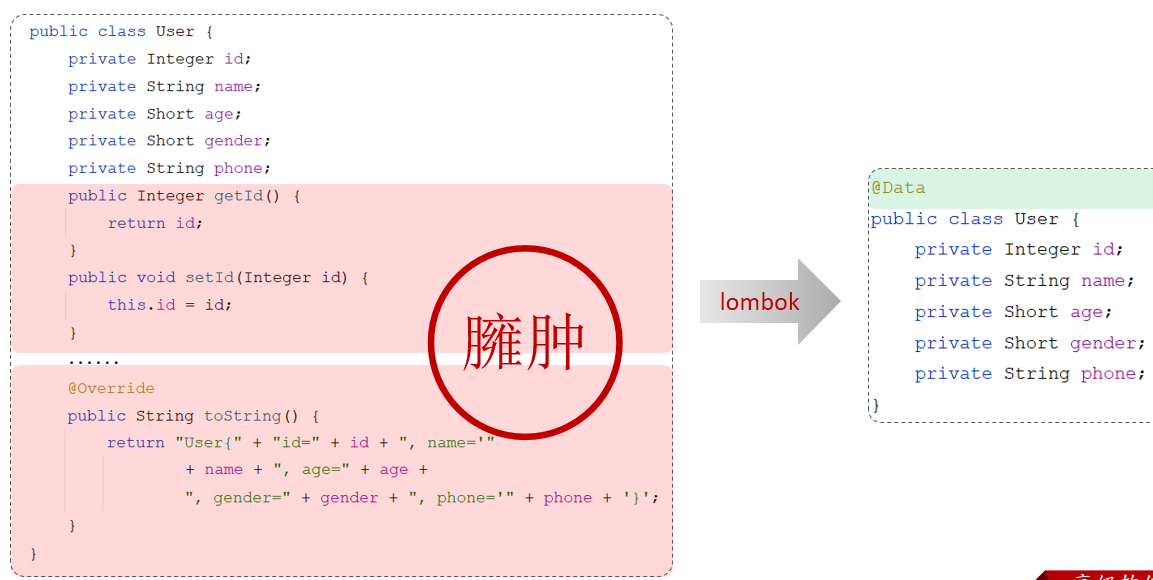
还要配置一下无参带参构造方法,各个属性的get和set方法,还有toString方法
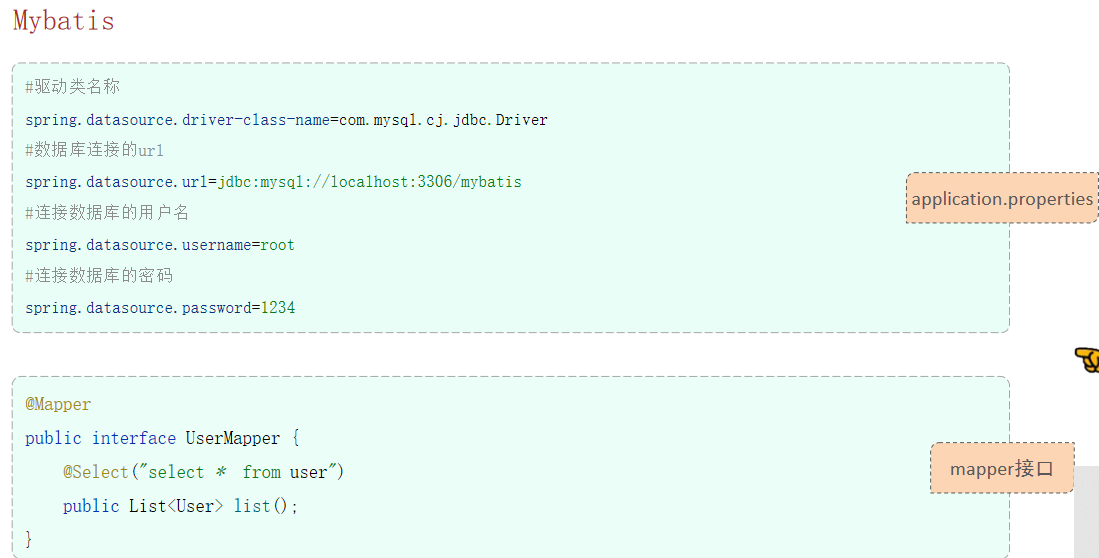
在resources包下的application.properties文件里加入配置信息
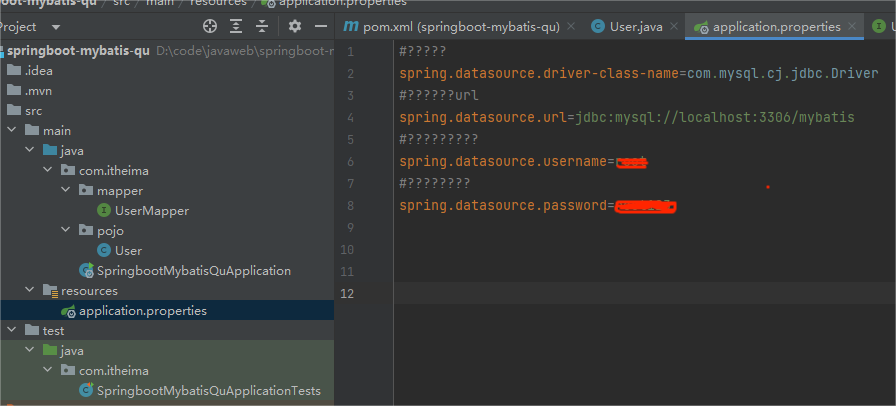
在专门接口的包下创建接口,代码如图
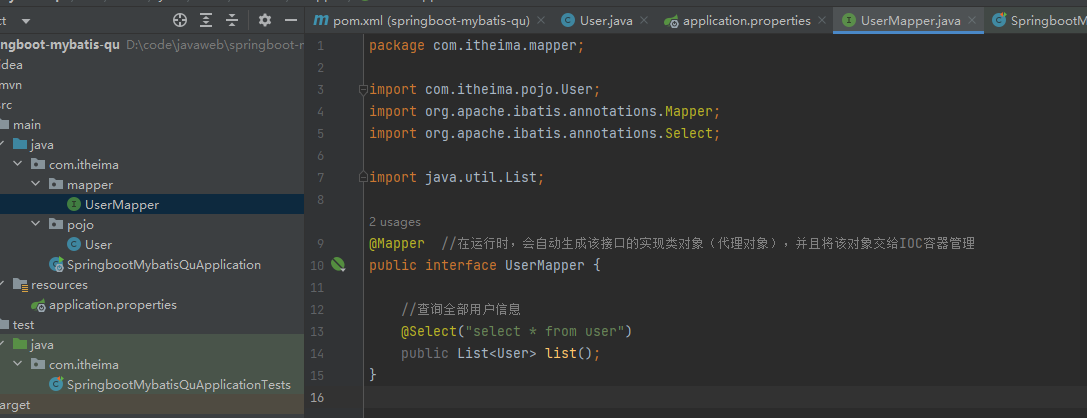
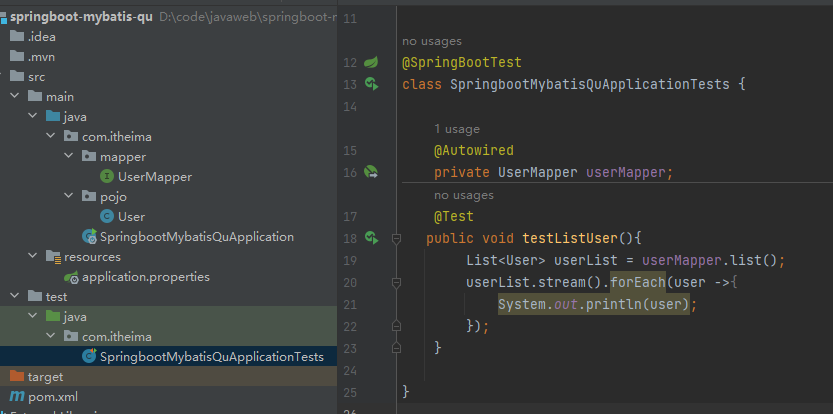
在test测试接口中,对数据库的数据进行读取输出
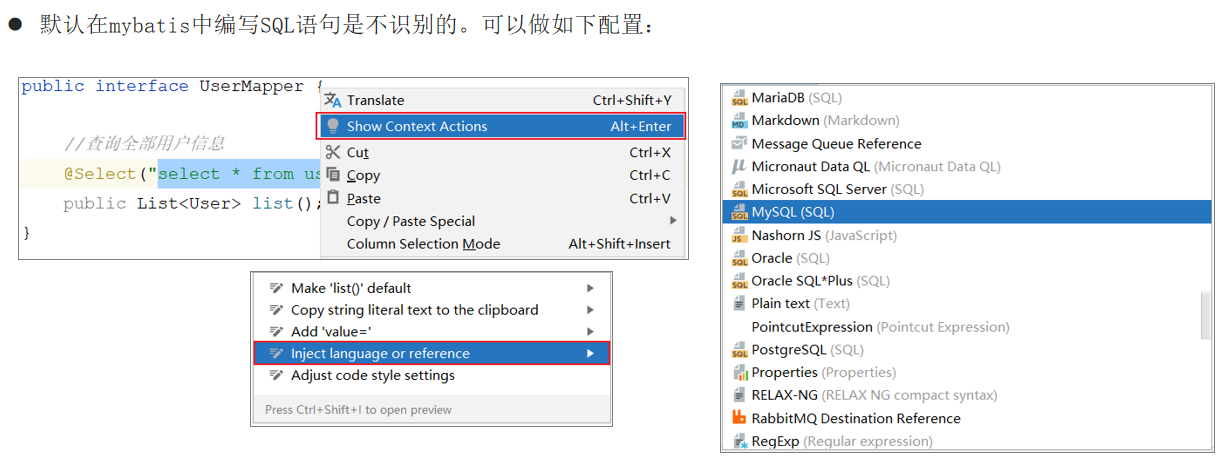
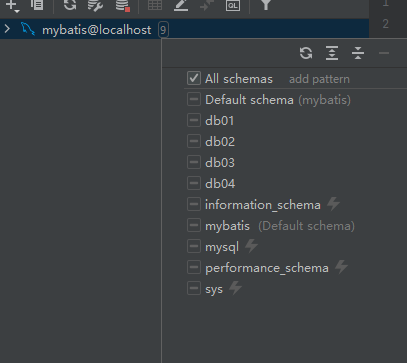
配置SQL提示
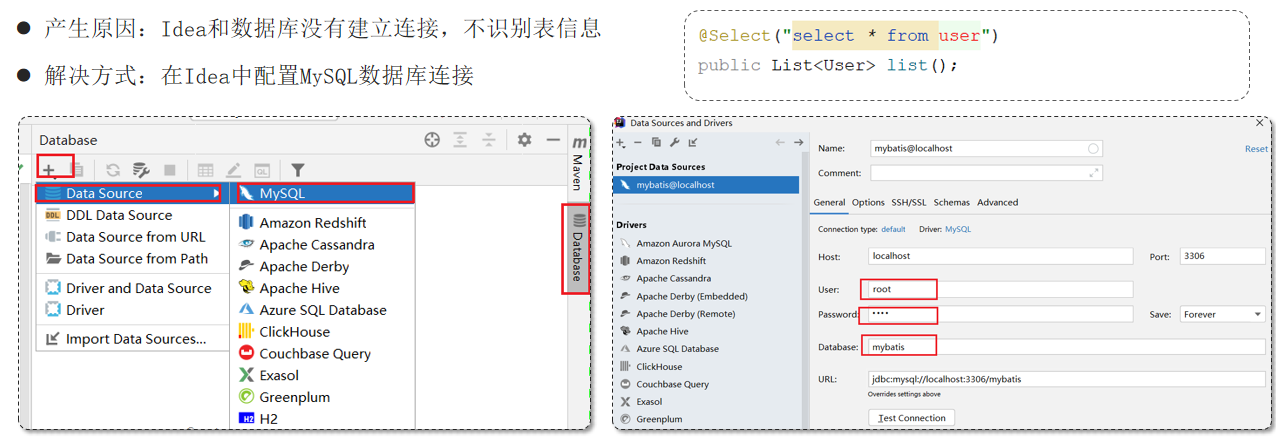
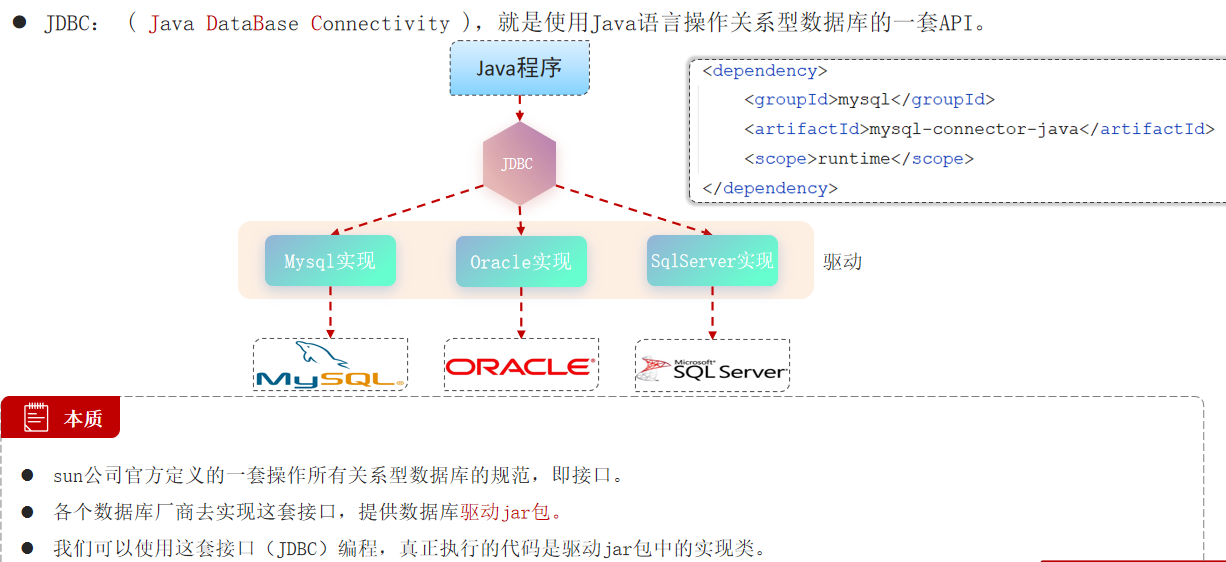
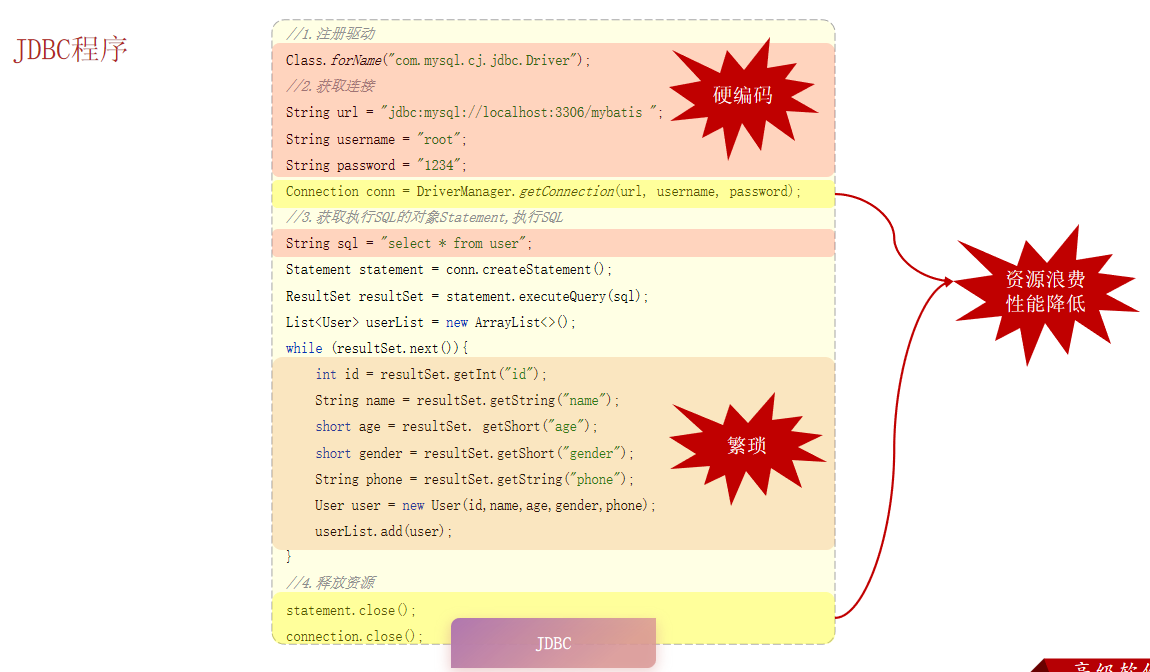
JDBC介绍
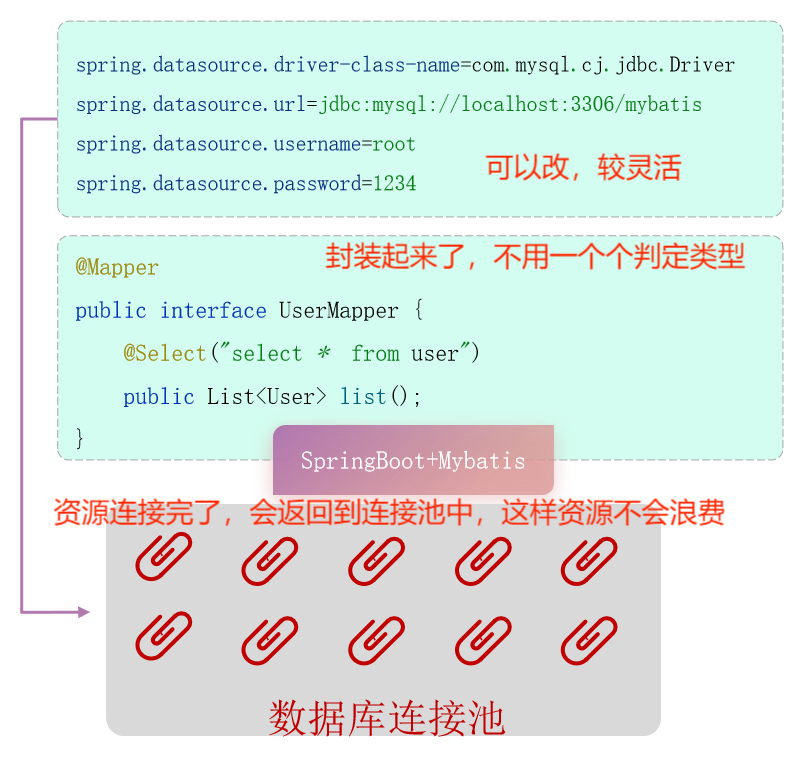
Mybatis
主要掌握这两点就可以了
小结

数据库连接池

没有连接池是用户访问一次数据库就要创建一个连接,等用户用完了,连接就取消了,耗时多,浪费资源
有连接池,一次性创建多个连接,当用户需要时,从连接池里获取,当用户用完了,连接回到连接池,供下一个用户使用,当连接没有操作的时间大于系统设置的闲置时间,连接会被自动回收
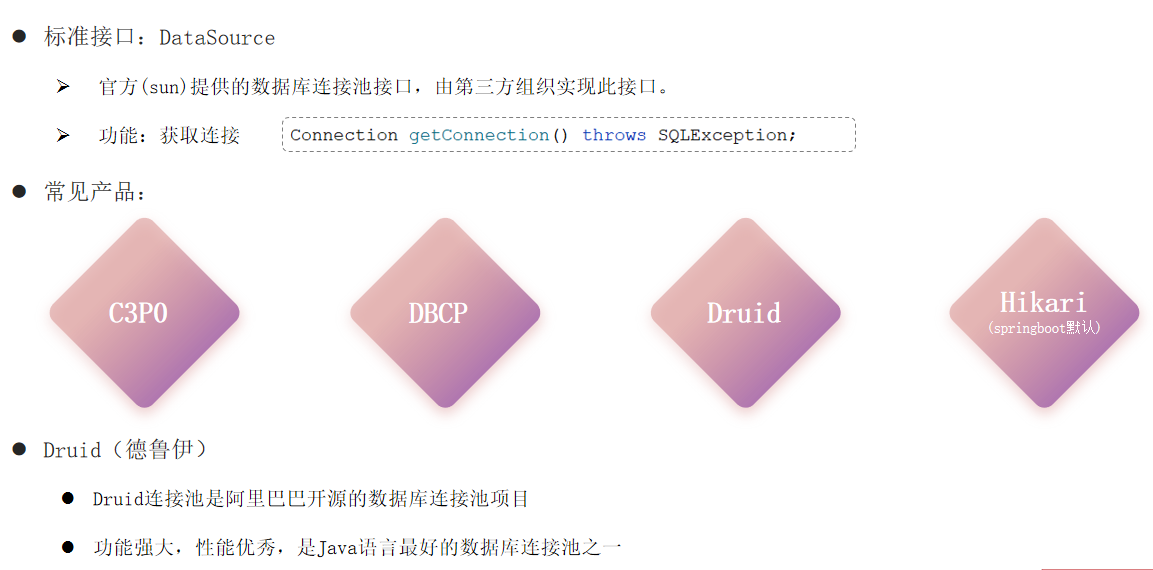
后面两个是现在企业常用的
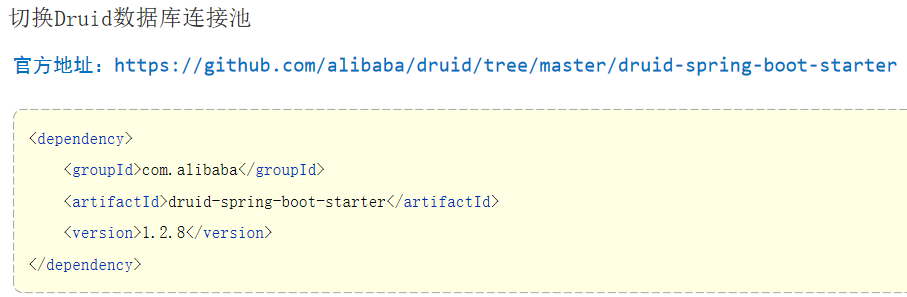
加入德鲁伊数据库连接池的依赖,然后再运行就可以了
小结

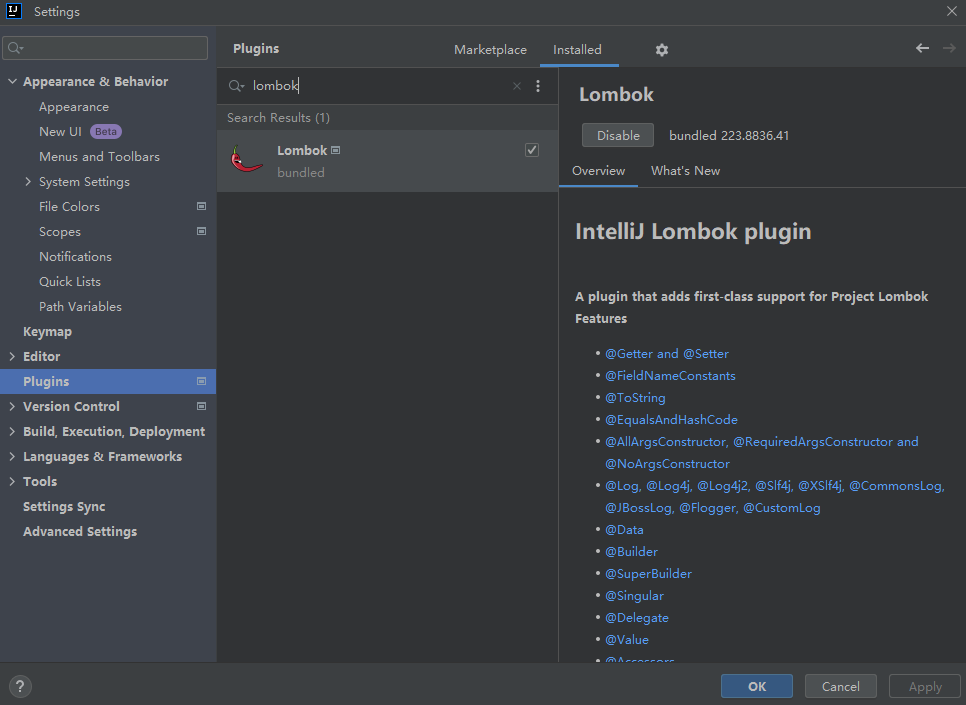
lombok
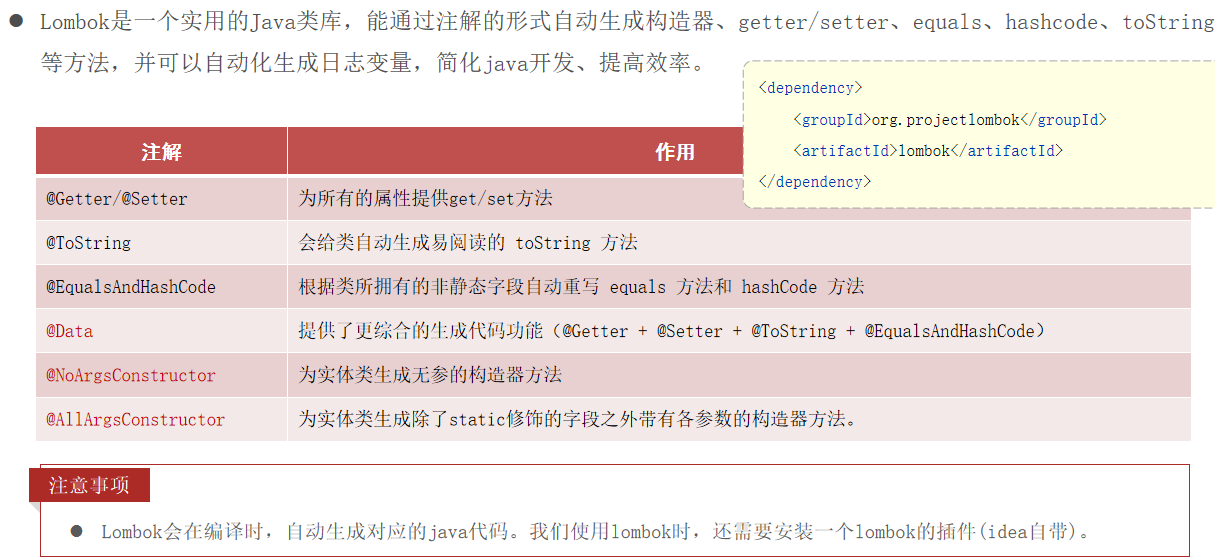
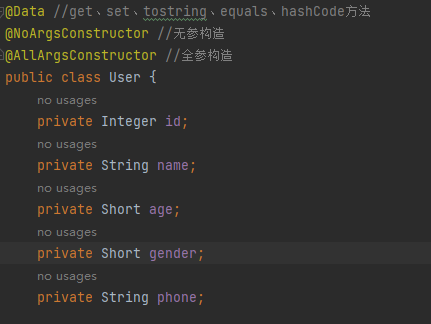
用lombok还要安装一个插件(IDEA自带,不用安装)
基础操作
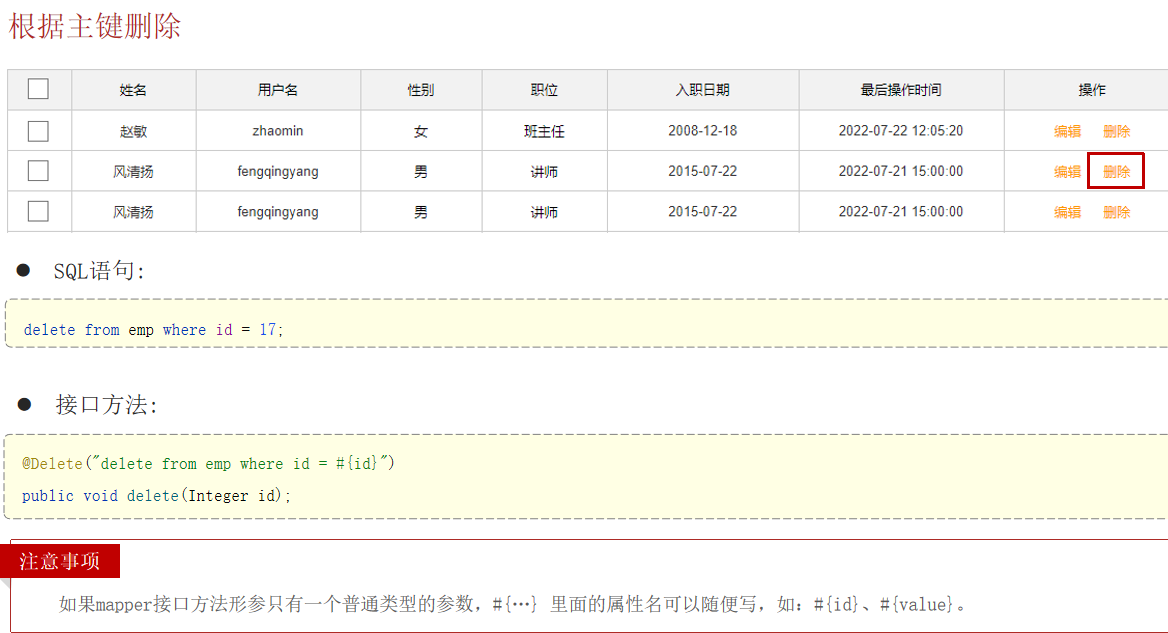
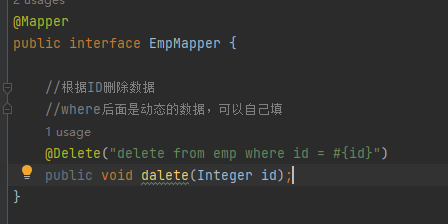
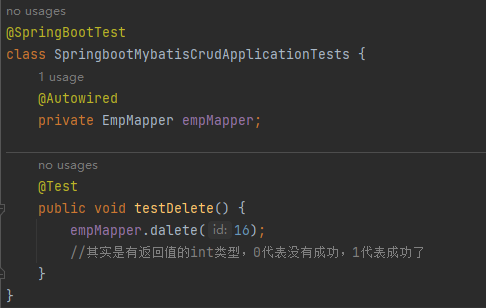
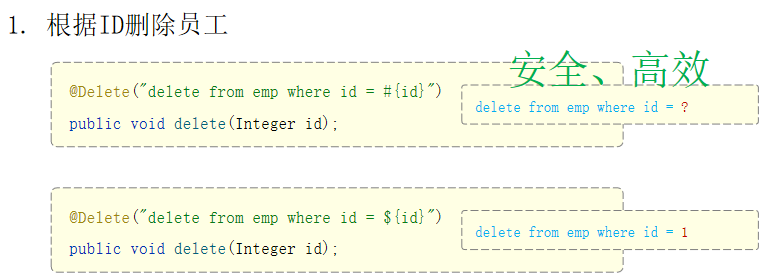
删除
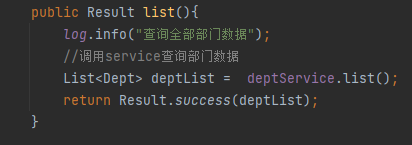
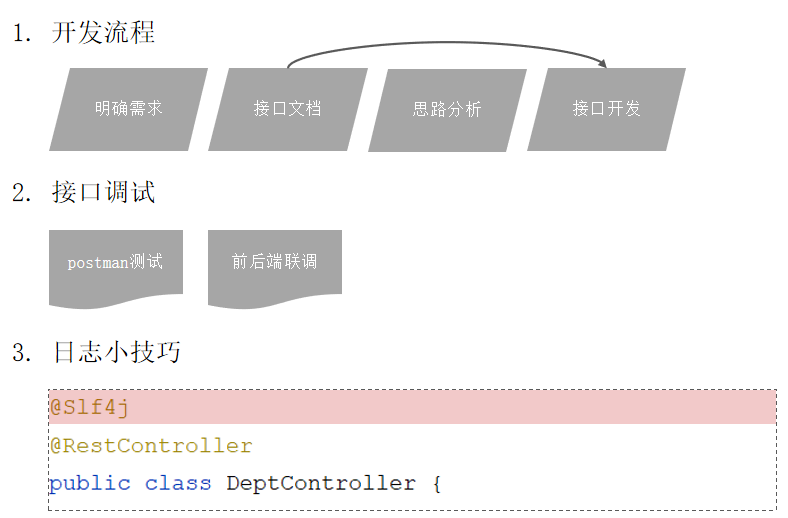
日志输出
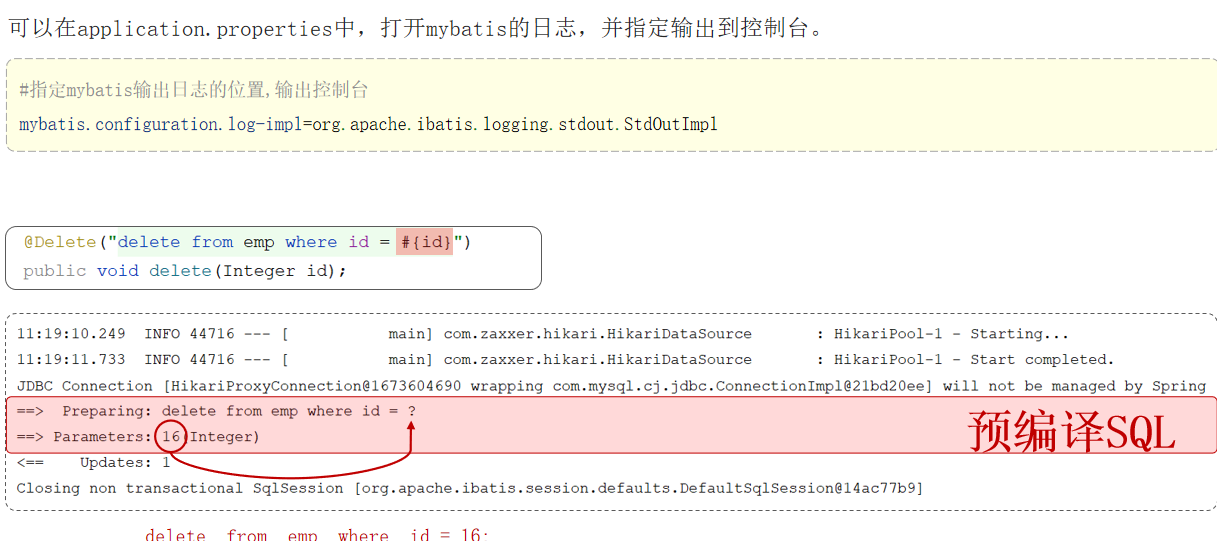
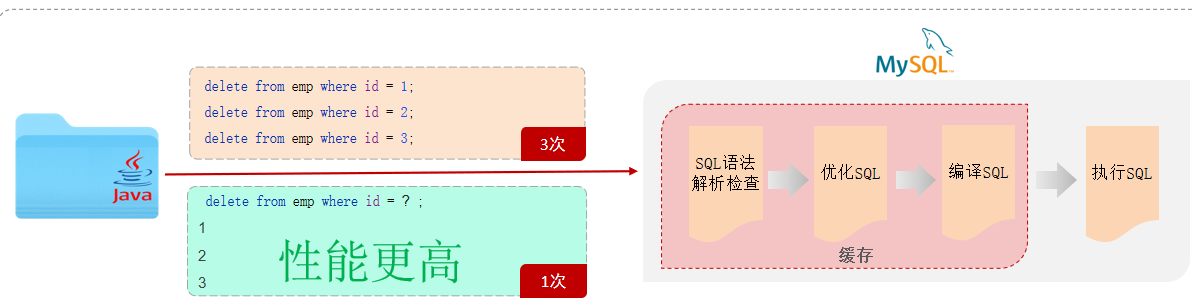
性能更高是因为对于参数变化只需要把前面相同的代码只需编译一次,原始的MySQL流程是整句代码经过解析、优化、编译三个步骤后缓存起来,第二个句子和第一个句子不一样,无法直接用缓存的数据,就只能再次做3个步骤,但是用SQL预编译就可以只做一次3个步骤,所以性能更高了
SQL注入
SQL注入是通过操作输入的数据来修改事先定义好的SQL语句,以达到执行代码对服务器进行攻击的方法。
像通常的账号密码都是用String类型存储的,SQL注入就是利用了这一点,把字符串拼接起来,像在密码字符串里拼接'or true',这样就无论什么账号都可以登录平台了
利用预编译可以有效的防止SQL注入,预编译是把你输入的账号和密码都分别作为String类型输入到平台中,而不是通过拼接的方式,也就是说平台的代码不会和账号密码同时运行,是分开运行的,通过拼接的方式就是平台代码和账号密码同时运行才会导致'or true'的有效
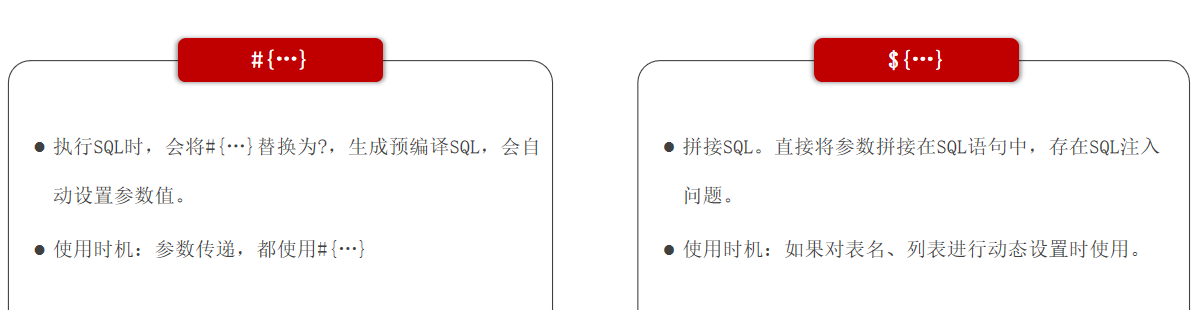
#{...}就是预编译的用法,把你的参数名称放进里面,编译时参数会变成?,在后面再进行参数的传递

${...}这个有SQL注入的风险,因为这个是参数拼接在一起同时运行的

小结:
新增
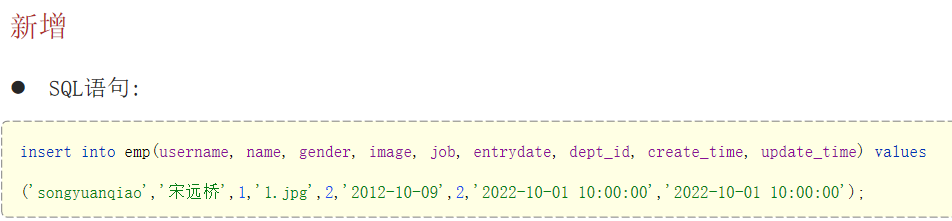


由于有多个参数值,所以用Emp类把参数值封装起来
在代码输入时#{Emp类的对应参数名}
test测试

结果是数据库emp表增加了Tom的信息
主键返回(没有成功)
在EmpMapper类的代码中加一句

test测试

按照视频来走,不知道为什么数据是上传了,但是有报错,而且没有返回数据给我
更新

在EmpMapper类加入SQL语句

在test测试
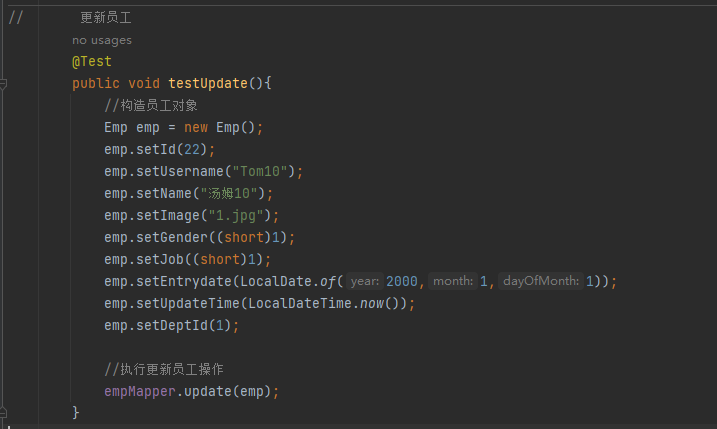
结果是id为22的数据更改
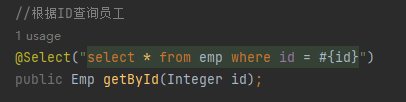
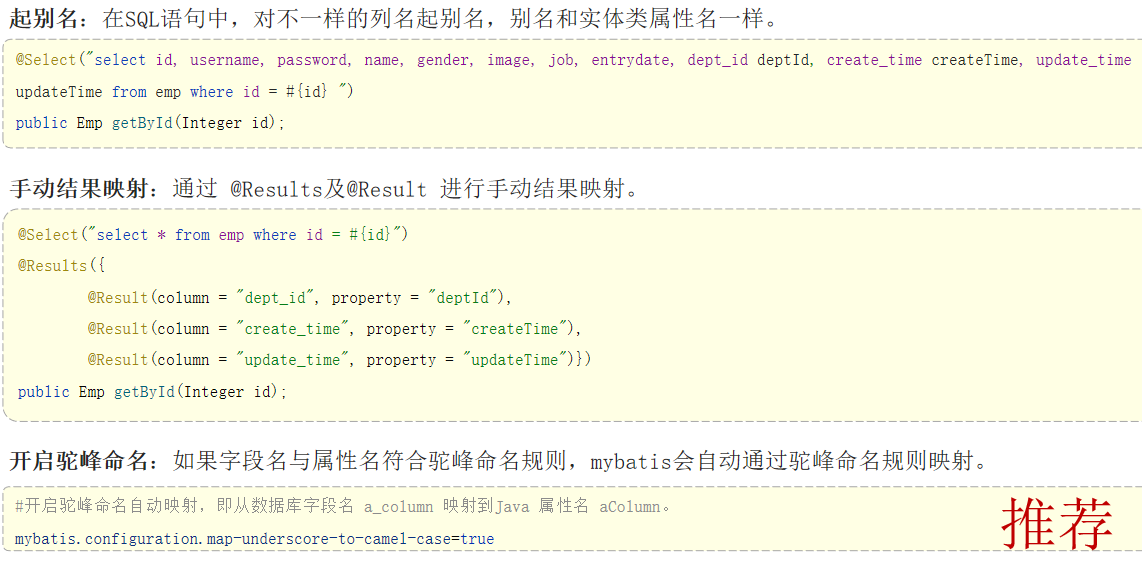
查询
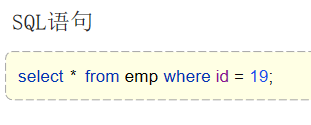
在EmpMapper类加入SQL语句,也叫接口方法
test测试
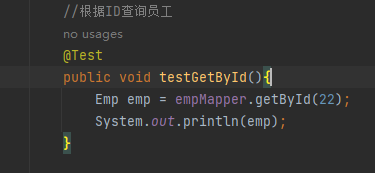
结果是得到id为22的数据,但是有一些没有数据


解决办法
之前的查询语句要注释掉,在EmpMapper类中

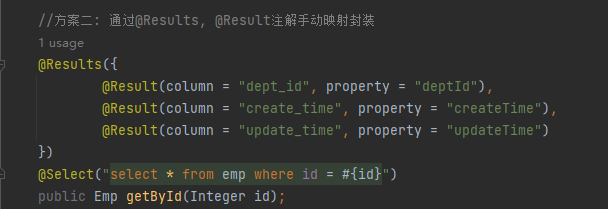
第三种方案,在resources包下的application.properties中加入

之后用回最开始的代码,有一个前提是数据库用下划线命名,而java中用驼峰命名

三种方案都快解决部分数据为null的情况
小结
条件查询

在EmpMapper类中,因为要进行模糊匹配,所以要用到' ',而#{}不能用在' '中,但是${}可以

test测试,这种方式有SQL注入风险

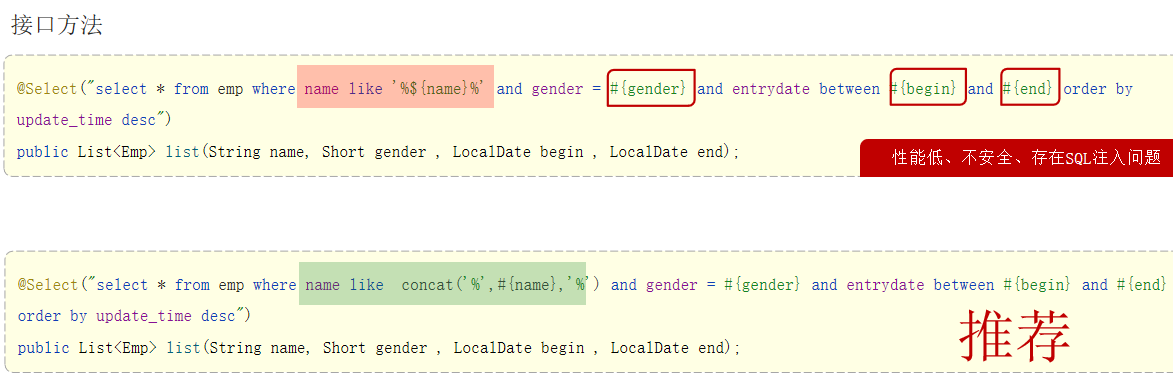
可以用,这样可以解决SQL注入的问题

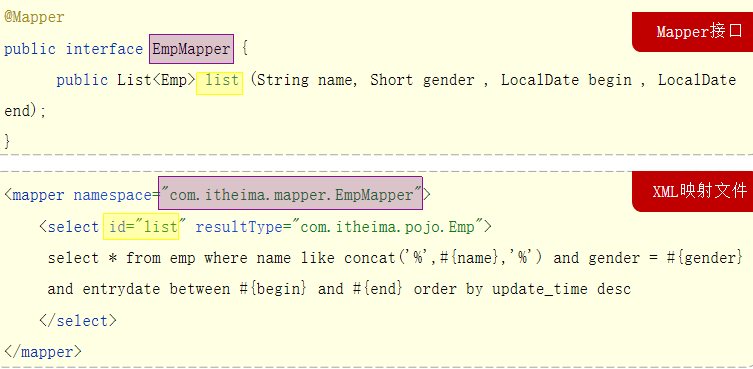
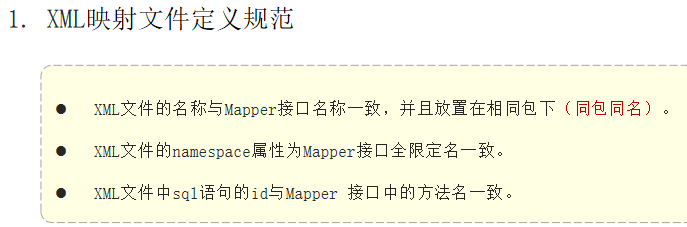
XML映射文件

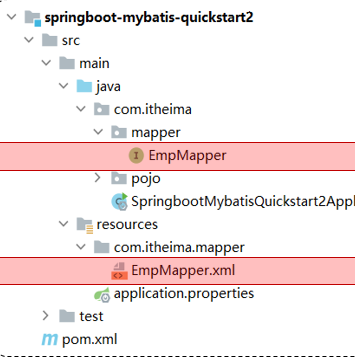
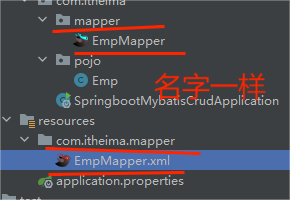
在resources包下创建一个Directory包,包的命名和上面类的包名一样,不要用点来分隔,用/来分隔,创建出来的是一级一级的文件夹,而不是只有一个文件夹

创建一个新的文件

名字和类名相同,后缀为xml

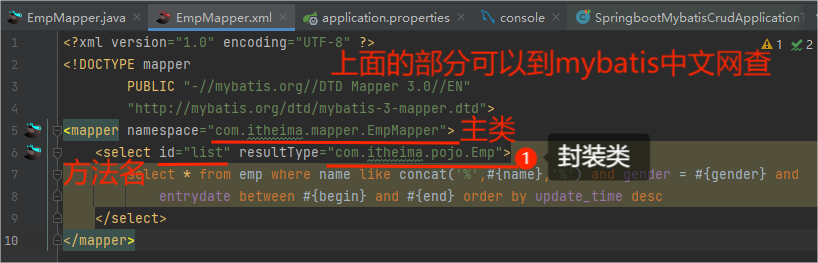
在文件里加入配置文件


在EmpMapper类里本来的查询代码注释掉,只留下方法语句

再次test测试,结果和之前的一样
必须要严格按照XML映射的规范来才可以找到你要执行的SQL语句
按装一个插件
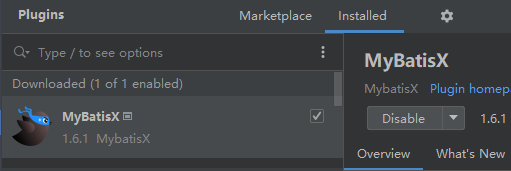
更好的管理XML映射文件
推荐是较复杂的SQL语句用XML映射,简单的增删改查就直接用注释语句。
小结
动态SQL
随着用户的输入或外部条件的变化而变化的SQL语句,我们称为 动态SQL。
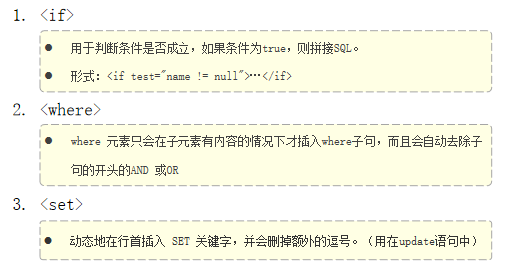
if
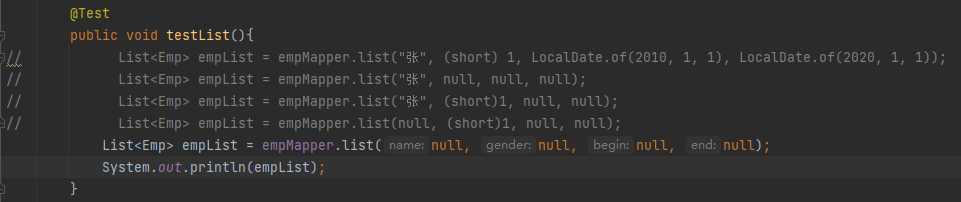
当用户只输入用户名时进行查询,而没有输入其他信息,或是输入了其他信息来查询,显然之前的代码写死了,要所有信息来查询,所有就有了动态查询
XML映射文件中,通过if标签来判定用户是否输入,若输入则添加这个信息搜索,在这个过程中可能会多出来and和where这个语句,所以可以用where标签来解决这个问题,当有语句时就会有where,没有语句就没有where,当有拼接信息时就有and,没有拼接就没有and

test测试可以根据你的输入信息进行不同的查询
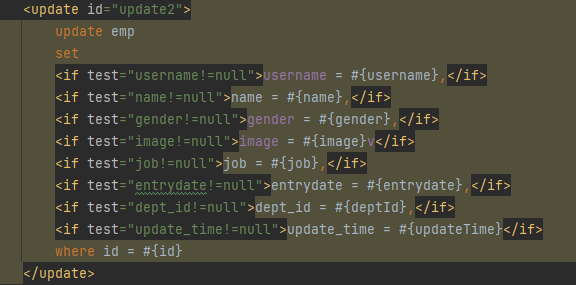
原来的更新当你更新部分数据时,其他的数据就会都是null

解决
动态更新员工信息,如果更新时传递有值,则更新;如果更新时没有传递值,则不更新。
在EmpMapper类中
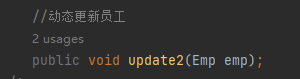
在EmpMapper.xml中,可以鼠标放到方法名后按alt+回车,自动跳转,里面是sql语句,用if加工了,这里踩了坑,是Emp封装类的参数非空,而不是数据表的
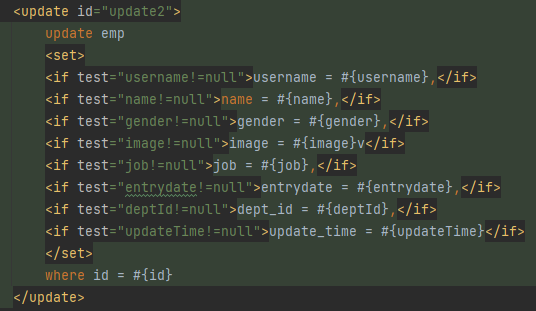
<set>:动态地在行首插入 SET 关键字,并会删掉额外的逗号。(用在update语句中),set是防止有多余的逗号,效果和where标签一样
test测试
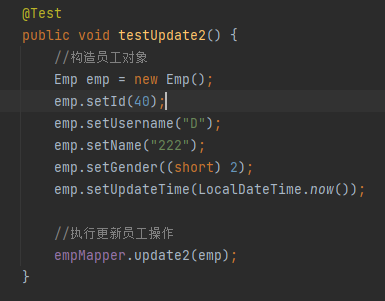
这样输入的数据修改了,没有输入的数据的就不变
小结
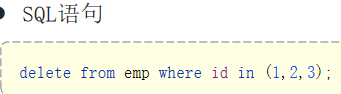
foreach
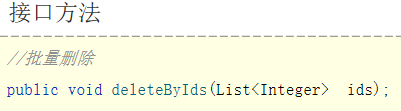
EmpMapper类中

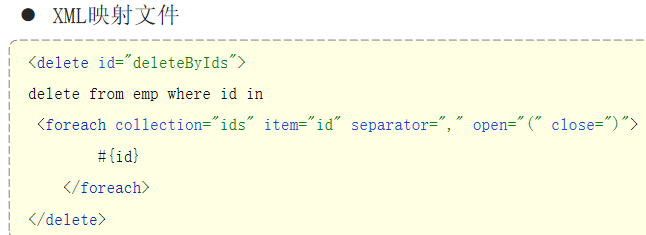
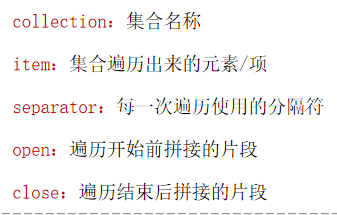
EmpMapper.xml中
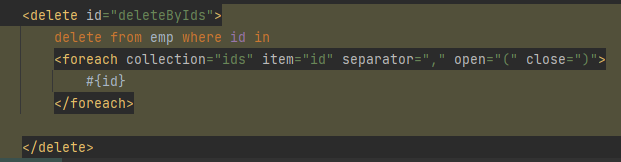
test测试
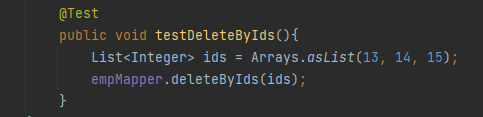
id为13,14,15的数据删除了
SQL片段
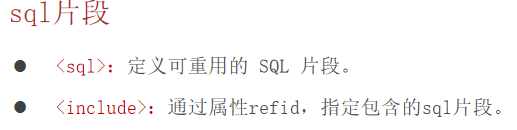
像select所有数据表中的项,这就需要打很多代码,而且我们不推荐使用select*来代替,当你在多处用到select所有数据表中的项时,你要修改其中一项,那么就需要找到全部用到的来修改,所以考虑到这点,把select所有数据表中的项封装起来就好了,每处用到直接调用即可,修改只需修改一次就可以了,而封装就需要用到<sql>标签,调用需要用到<include>标签
封装代码,最好放到有效范围的最上面

调用代码

数据库看报错
找到最后一个Caused by

拉到这个的最后找到near

错误的地方就在那里
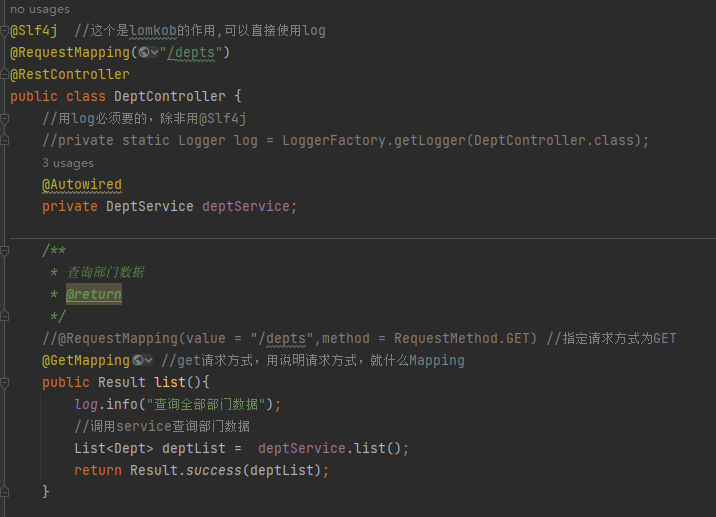
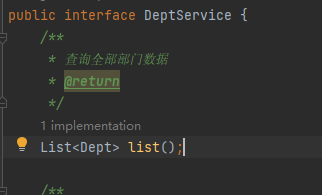
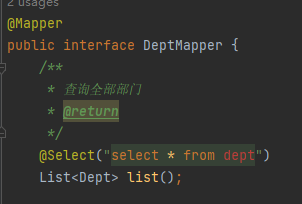
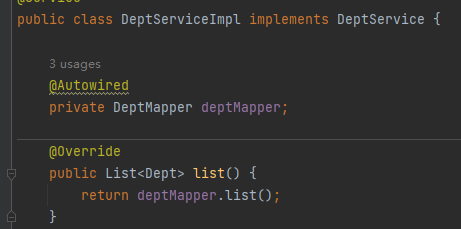
案例——tlias智能学习辅助系统
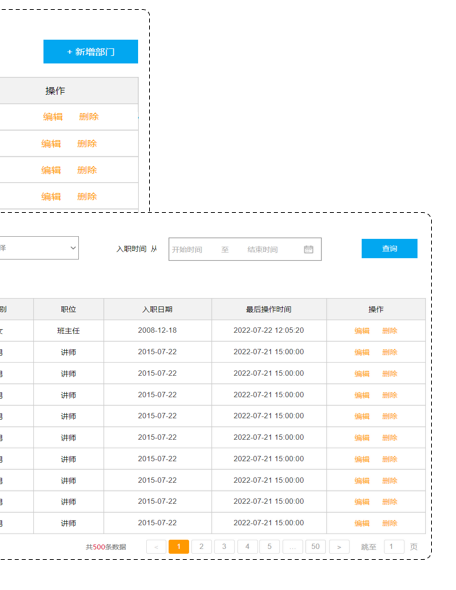
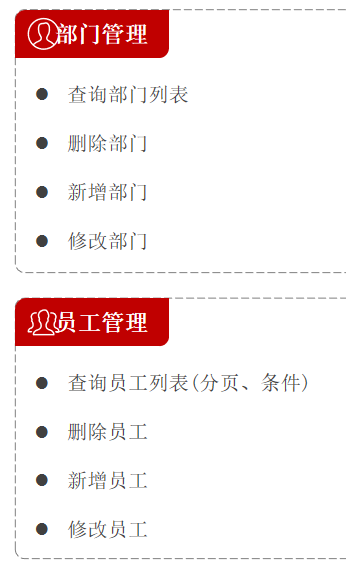
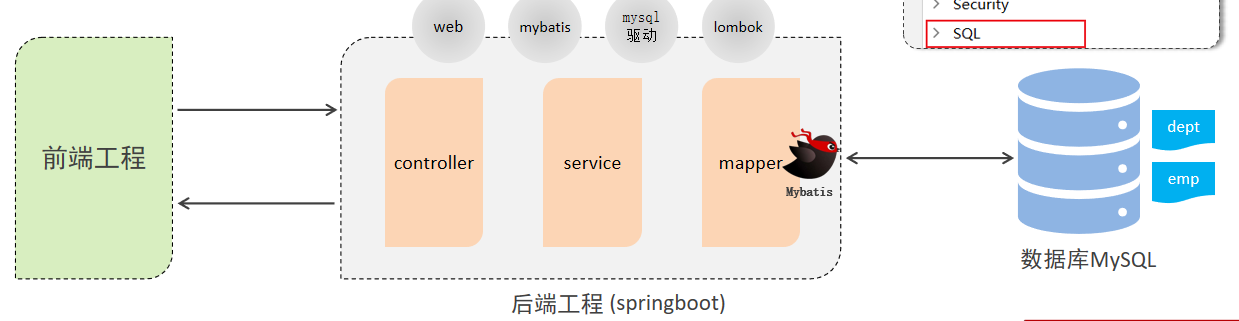

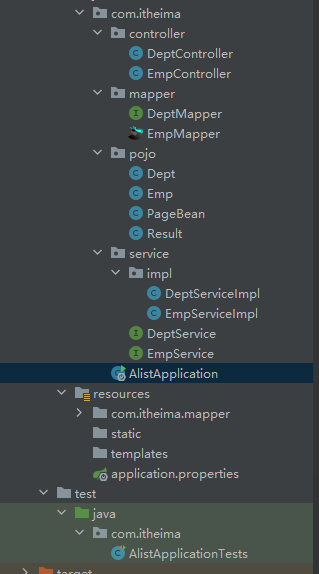
DeptController类发生请求到DeptService接口,再传到DeptMapper接口,再传到DeptServiceImpl类,DeptServiceImpl类返回数据到DeptController类,DeptController类返回数据给网页