type
status
date
slug
summary
tags
category
icon
password
web标准
HTML:负责网页的基本结构(页面元素和内容)
CSS:负责网页的表现效果(页面元素外观、位置等页面样式,如:颜色、大小)
JavaScript:负责网页的行为(交互效果)
HTML常用标签
CSS的引入方式
行内样式:
内嵌样式:
外联样式:
CSS选择器
元素选择器:标签名{......}
id选择器:#id属性值{......}
类选择器:.class属性值{......}
优先级:id选择器>类选择器>元素选择器
CSS属性
颜色表示
关键字表示法:red、green....
rgb表示法:rgb(255,0,0)、rgb(134,100,89)
十六进制表示法:#ff0000、#cccccc 、#ccc
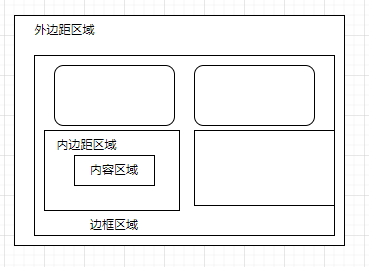
盒子
盒子模型组成:
content:内容区域
padding:内边距区域
border:边框区域
margin:外边距区域
CSS属性:
width:设置宽度
heigth:设置高度
border:设置边框属性,如:1px solid #000; ————边框1px ,实线,颜色#000
padding: 内边距
margin: 外边距
注意:如果要设置某一方位的边框、内边距、外边距,可以在属性名后加上—位置,如:padding-top、padding-left、padding-right ...
JavaScript
输出语句
变量
数据类型
运算符
类型转换
函数(方法)
Array
String
JavaScript自定义对象
JSON
BOM
DOM
原生事件绑定
常见事件
Vue
常用指令
生命周期
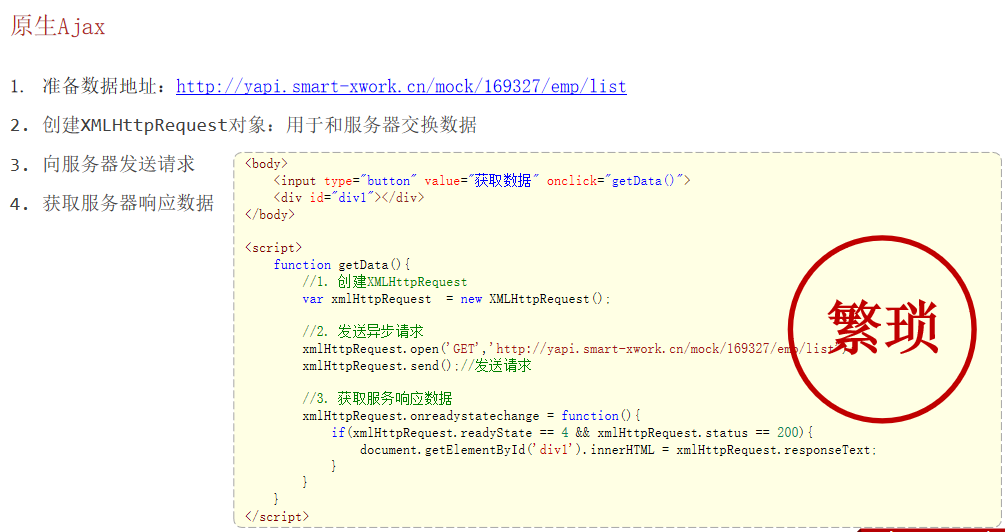
Ajax
这个一个原生Ajax模板,现在基本不用了
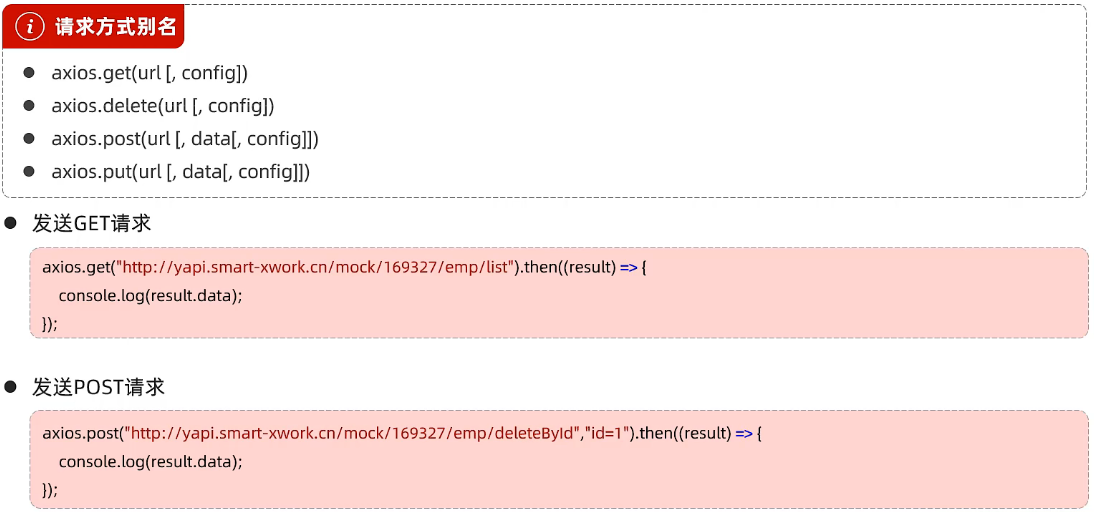
Axios入门
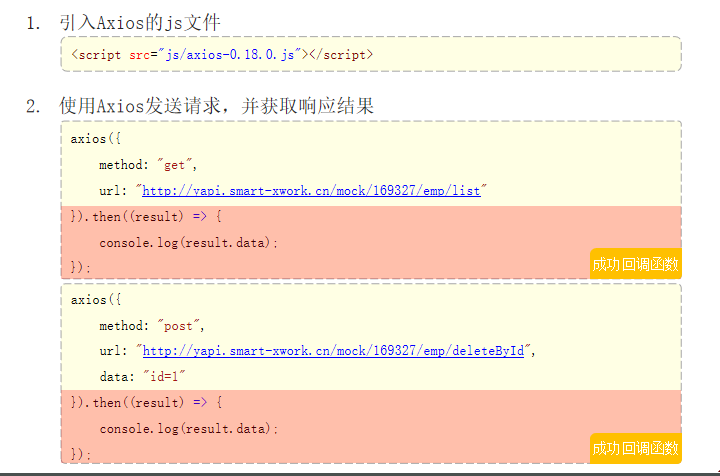
简写方法
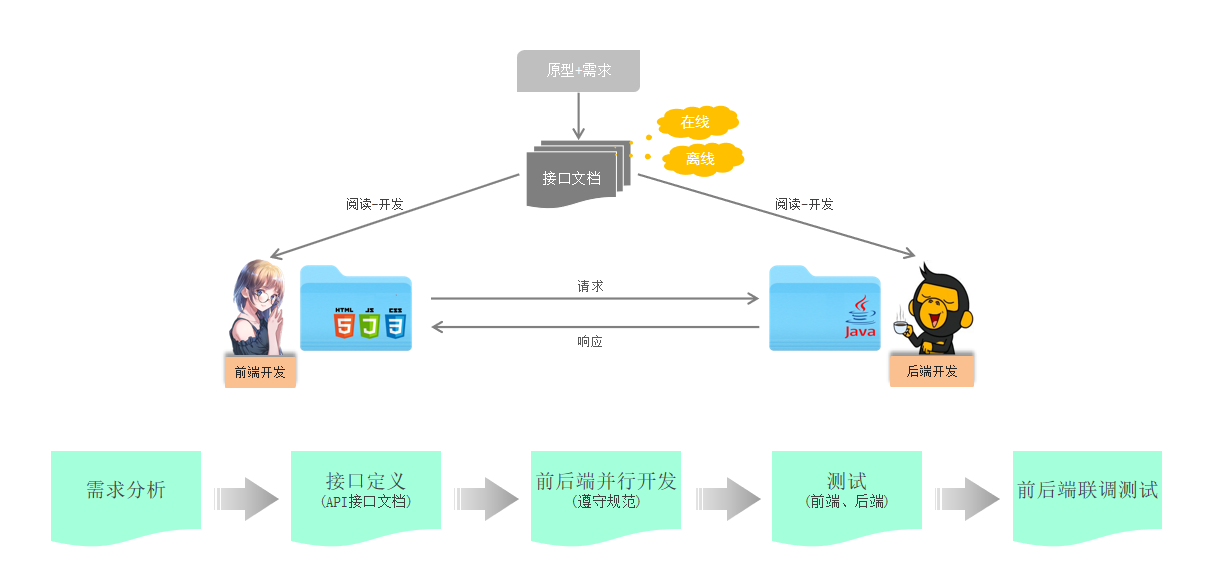
前后端分离开发
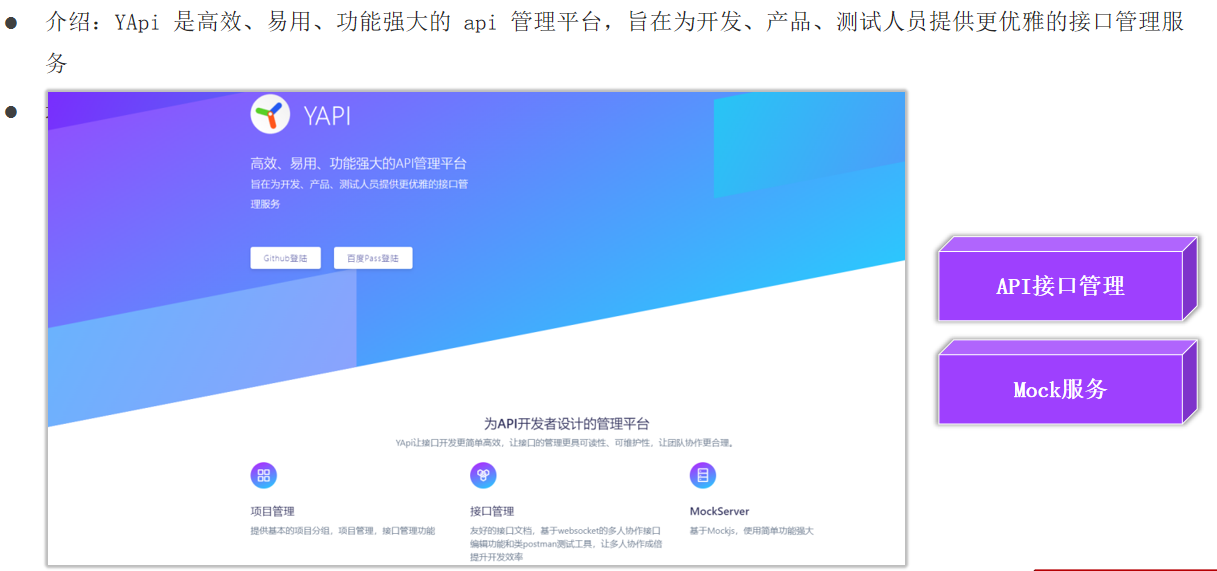
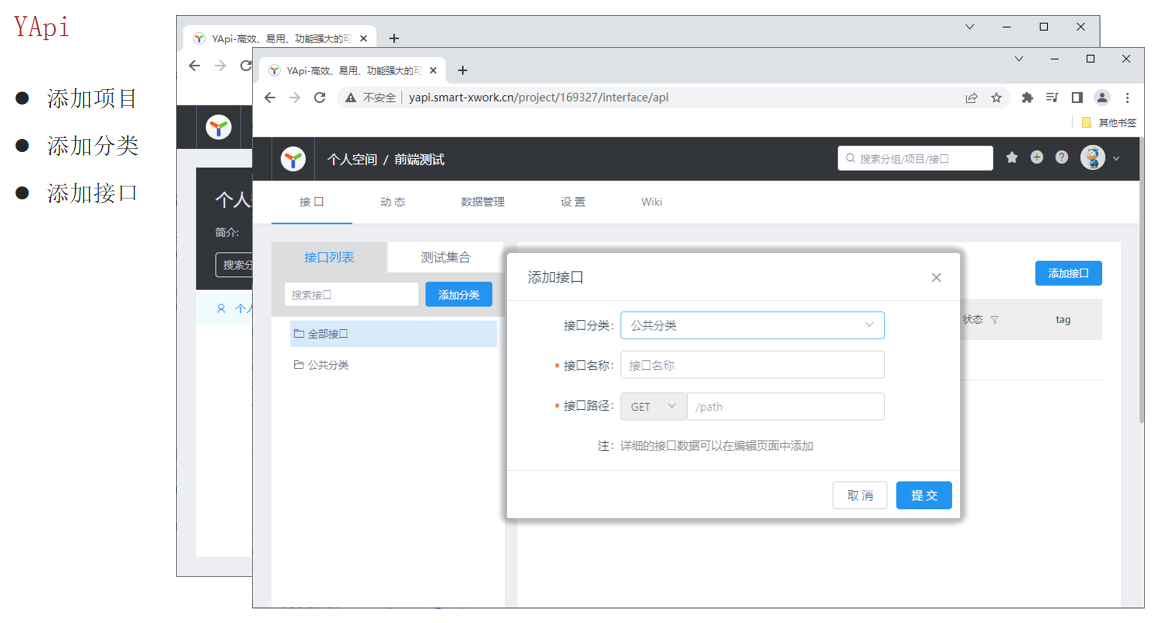
YAPI
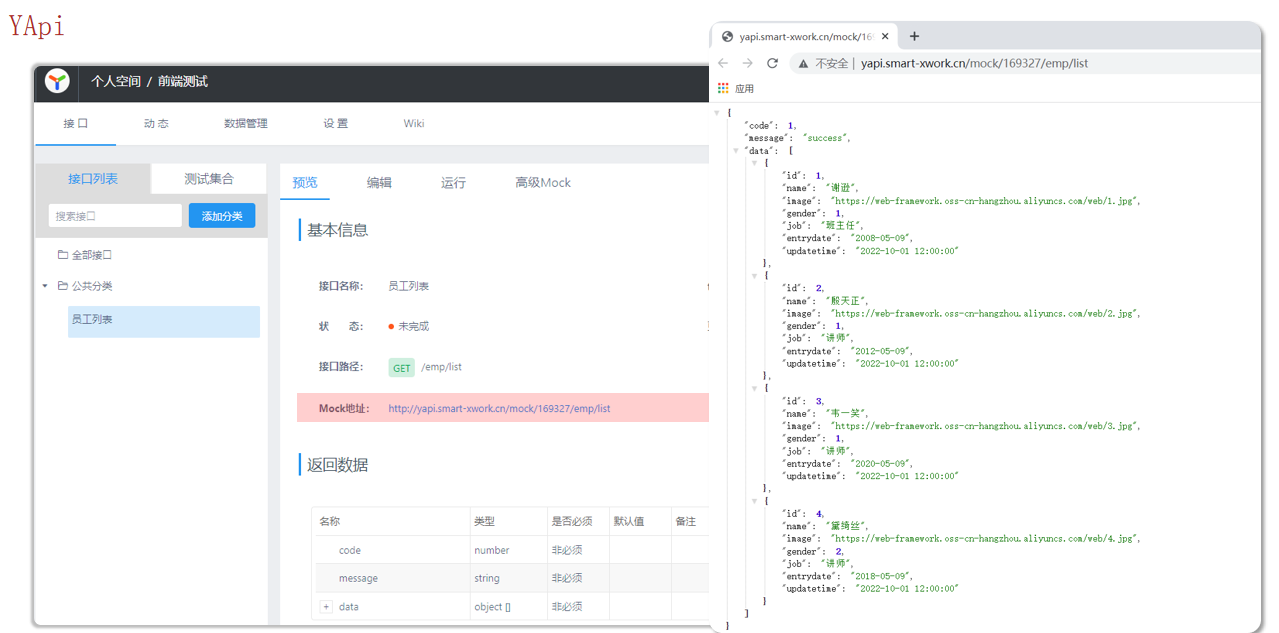
高级Mock可以设置你想返回的数值
前端开发工程化
前端工程化: 是指在企业级的前端项目开发中,把前端开发所需的工具、技术、流程、经验等进行规范化、标准化。

Node.JS安装
安装Node.js
直接下载稳定版本,然后无脑安装(注意:安装路径需要复制一下,等下用得到)
安装好后管理员身份打开命令行
检查是否安装好
配置npm 的全局安装路径
检查是否安装成功
出现安装路径就是安装成功
切换npm的淘宝镜像
安装Vue-cli
确认是否安装成功
出现vue/cli的版本号就是安装成功
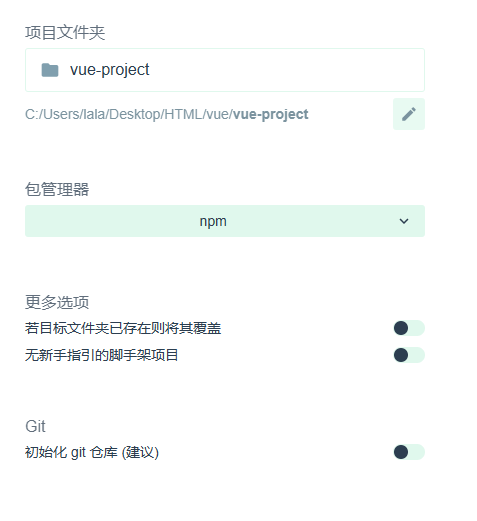
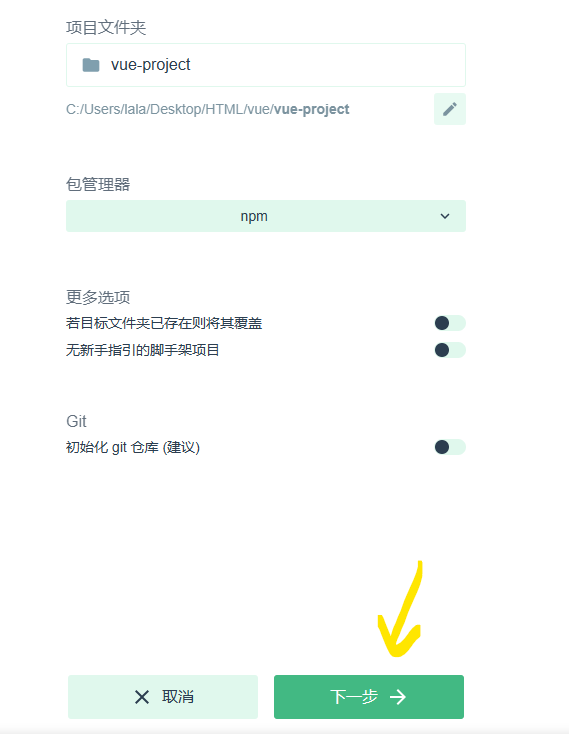
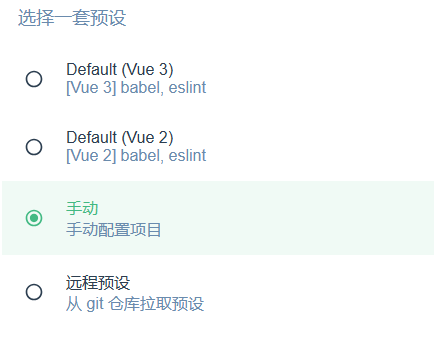
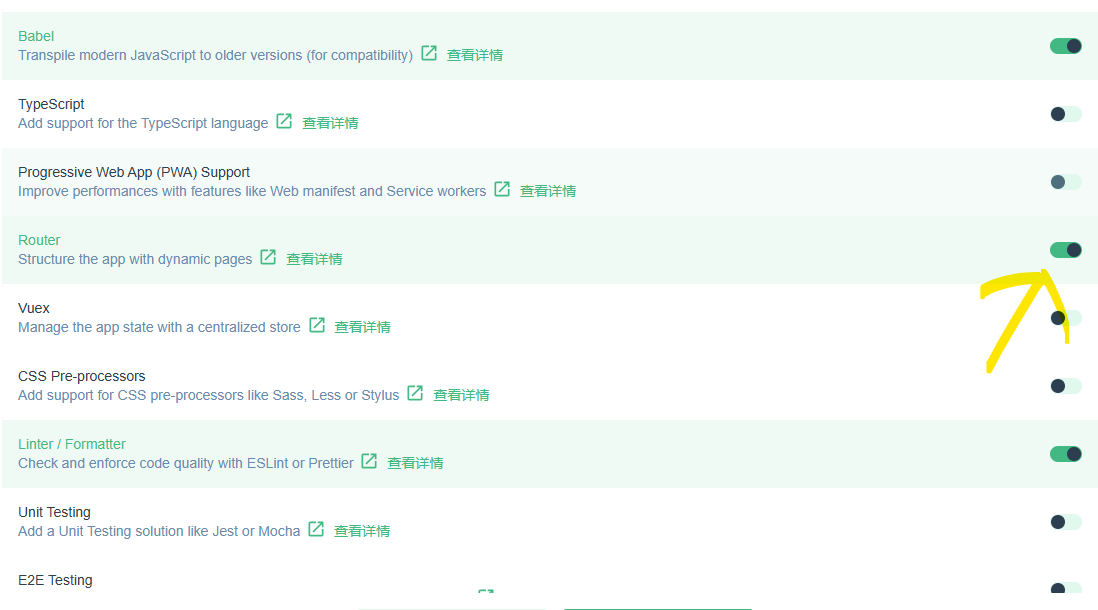
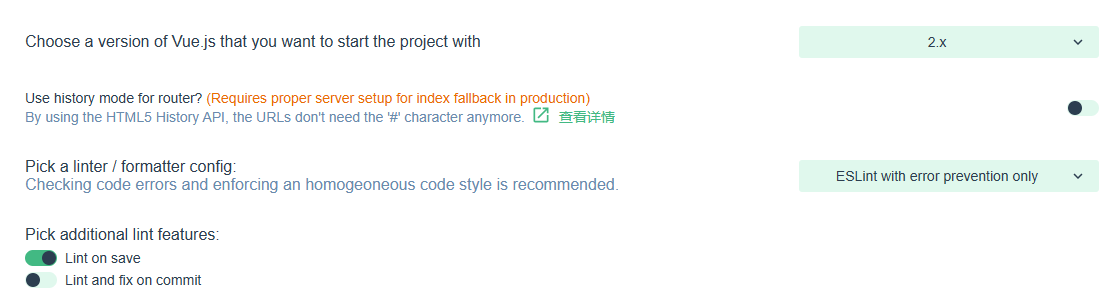
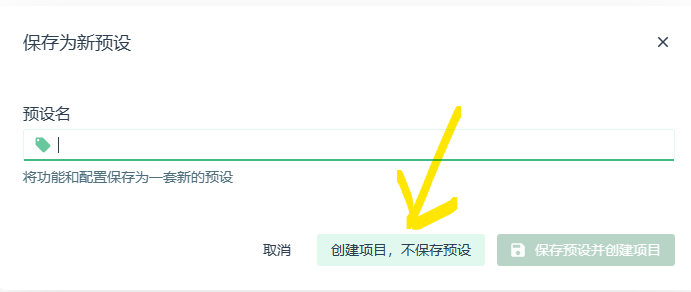
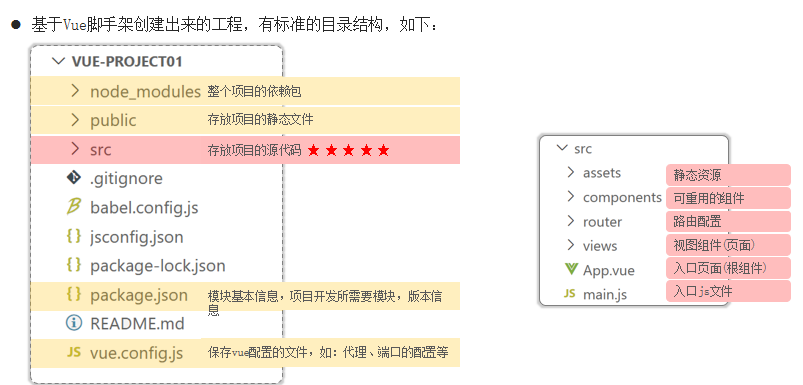
Vue项目-创建


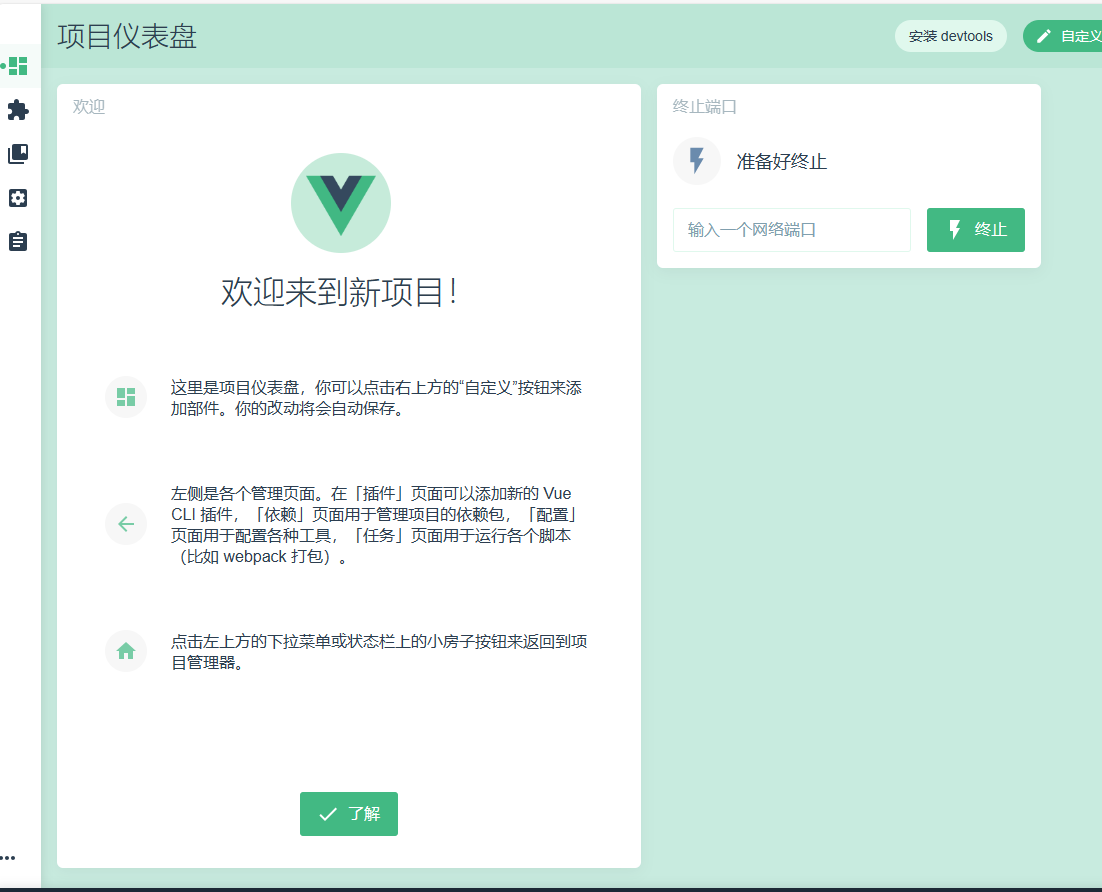
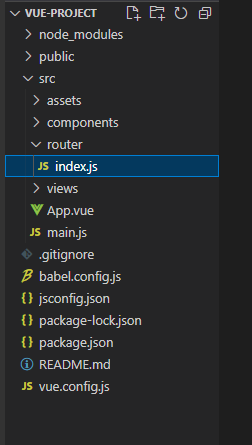
vue项目-目录结构
Vue项目-启动
方法一:vscode的NPM脚本运行
方法二:命令名运行,要在项目的路径下运行npm run serve

---------------------------分割线-----------------------------
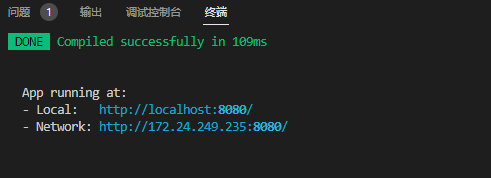
可以打开http://localhost:8080/去访问本地的Vue项目,更改代码保存即可立即更新页面,无需刷新
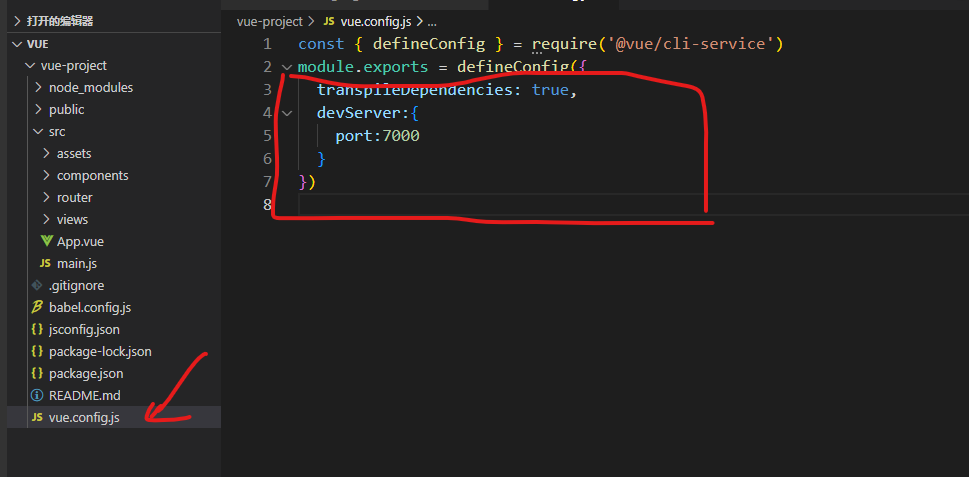
Vue项目-配置端口(更改端口)
在终端Ctrl+C,然后Y,关掉服务
在重启终端服务
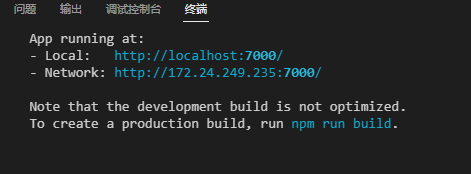
端口改掉了
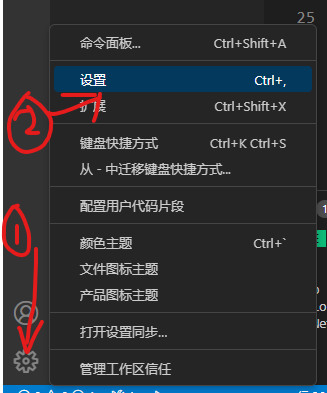
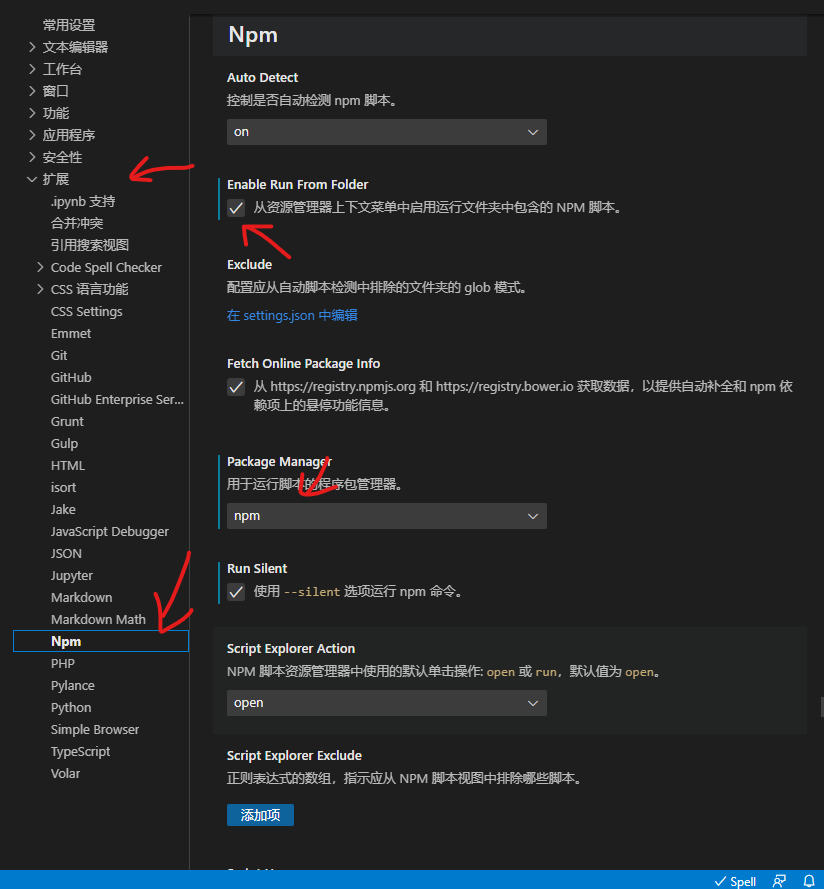
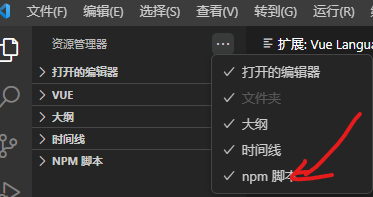
关于vscode右侧没有NPM脚本
打开设置
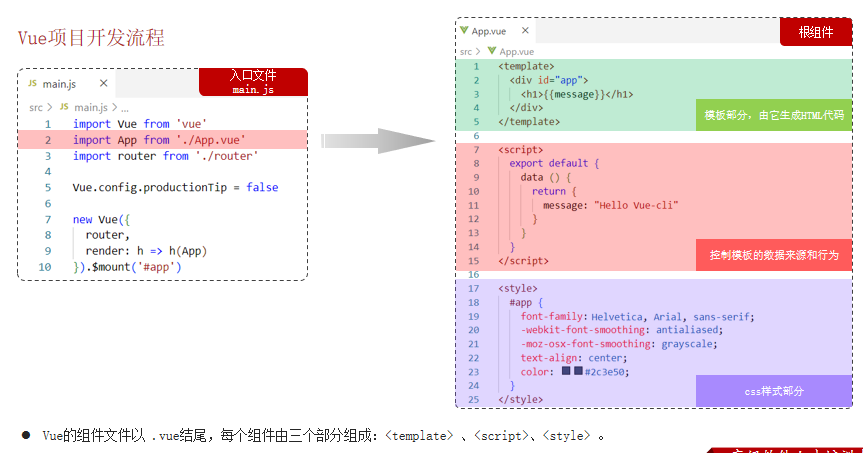
Vue项目开发流程
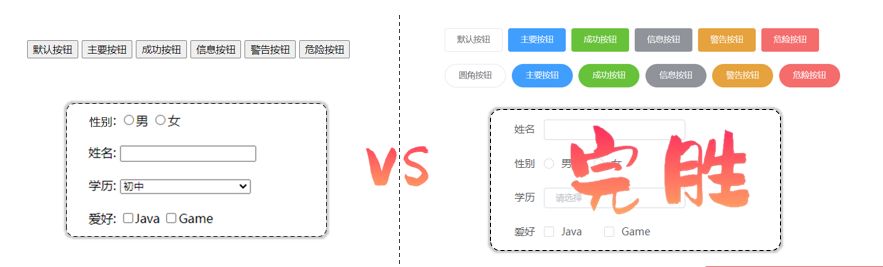
Element
什么是Element
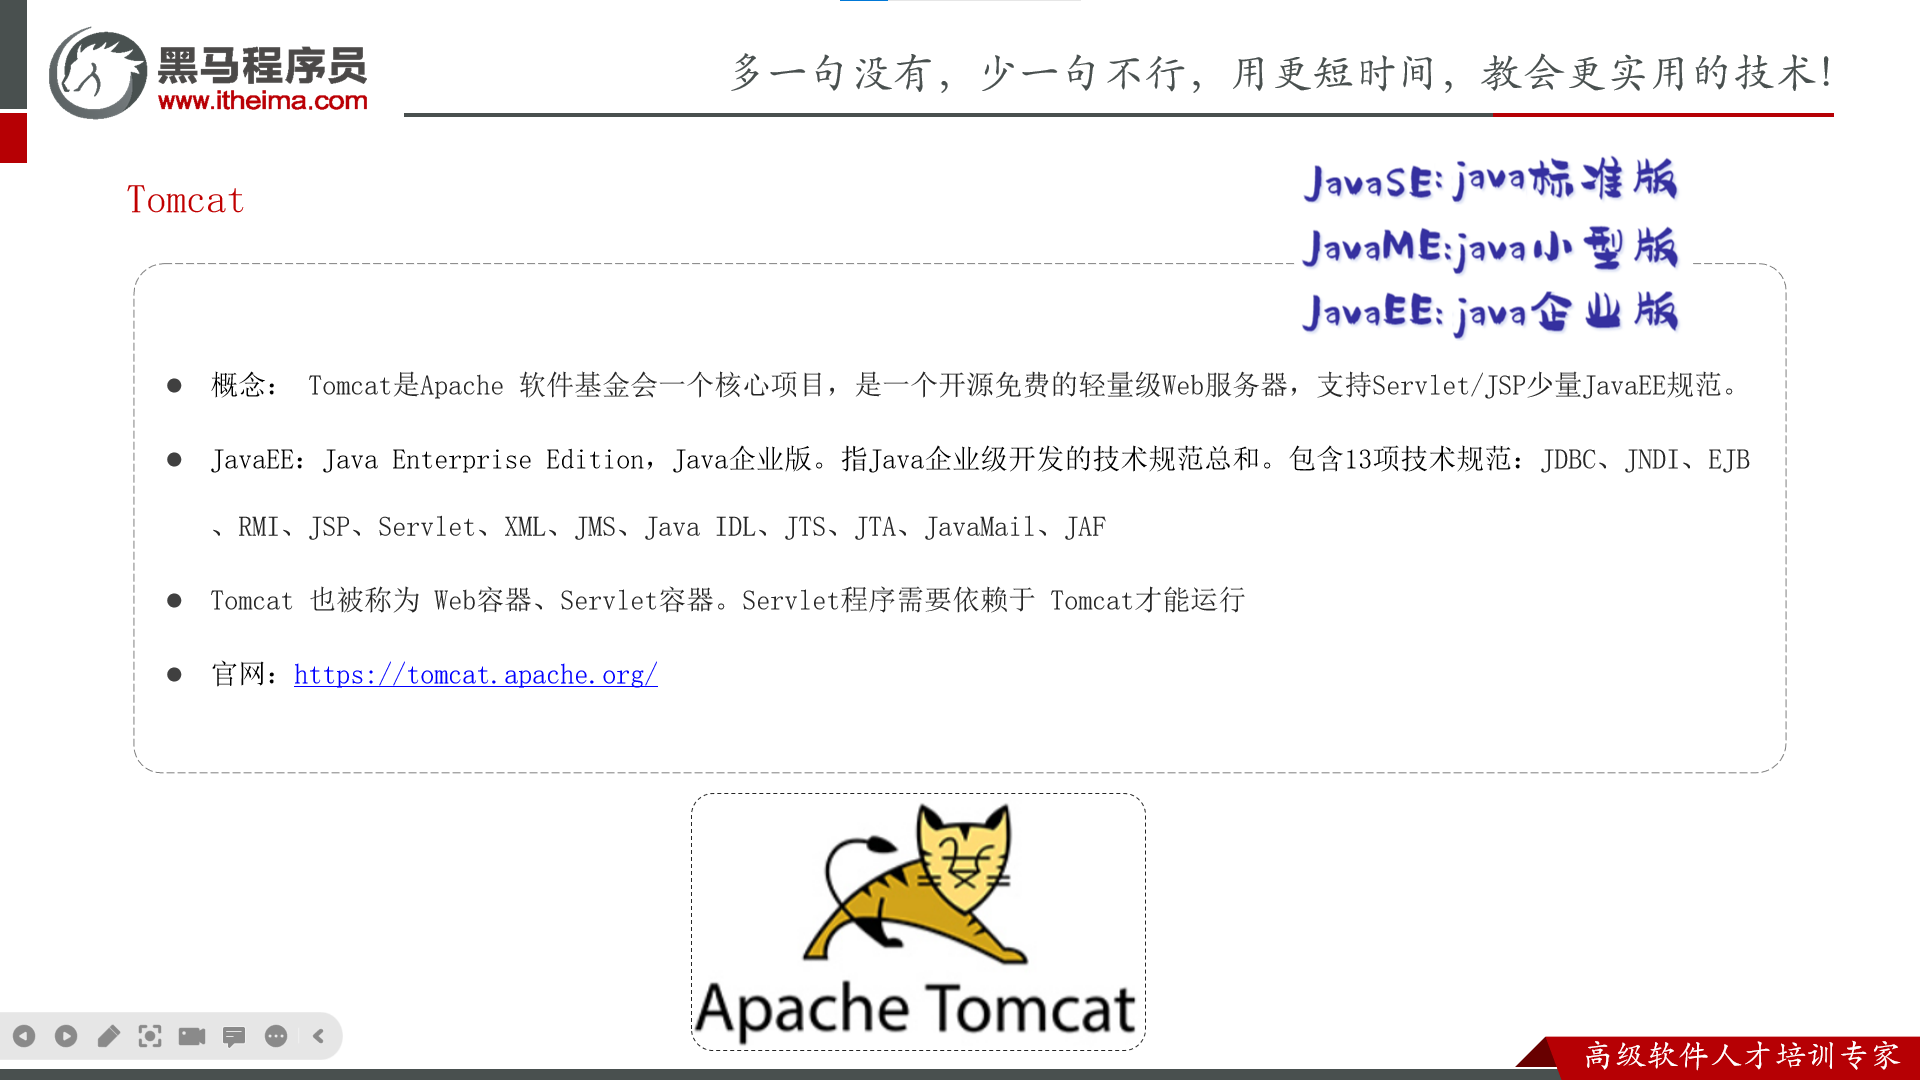
Element:是饿了么团队研发的,一套为开发者、设计师和产品经理准备的基于 Vue 2.0 的桌面端组件库。
组件:组成网页的部件,例如 超链接、按钮、图片、表格、表单、分页条等等。
官网:https://element.eleme.cn/#/zh-CNListener
Element快速入门
安装ElementUI组件库 (在当前工程的目录下),在命令行执行指令:
引入ElementUI组件库(在main.js文件下添加)
访问官网,复制组件代码,调整(自己在views目录下创个文件夹Element,新建文件ElemenView.vue存放)


在App.vue里
常见组件
都是到官网:https://element.eleme.cn/#/zh-CNListener 复制你想要的代码
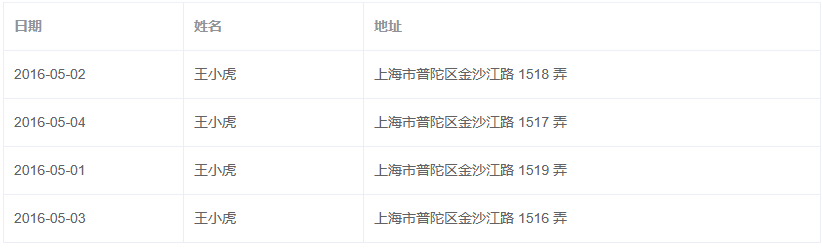
表格
Table表格:用于展示多条结构类似的书据,可对数据进行排序、筛选、对比或其他自定义操作
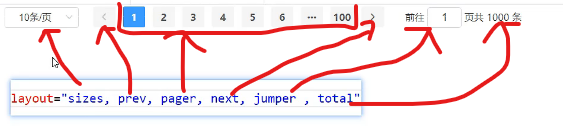
分页
Pagination分页:当数据量过多时,使用分页分解数据

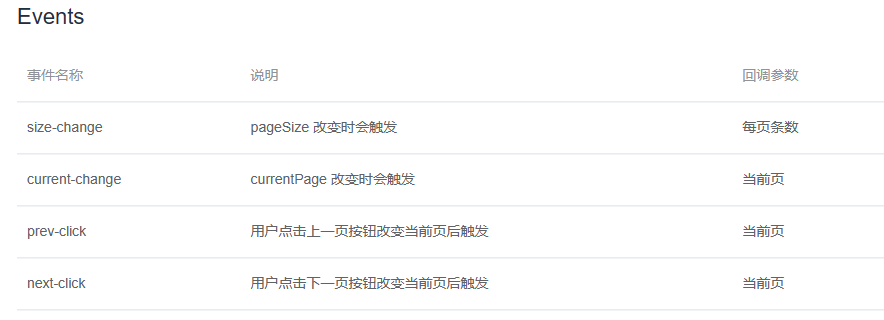
Events事件(和分页一起的)
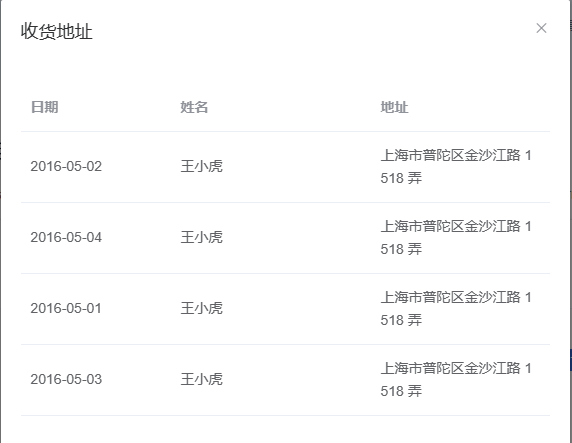
对话框
Dialog对话框:在保留当前页面状态的情况下,告知用户并承载相关操作。
原本页面是不变的,只不过是弹出一个对话框
默认是false,是true则打开对话框

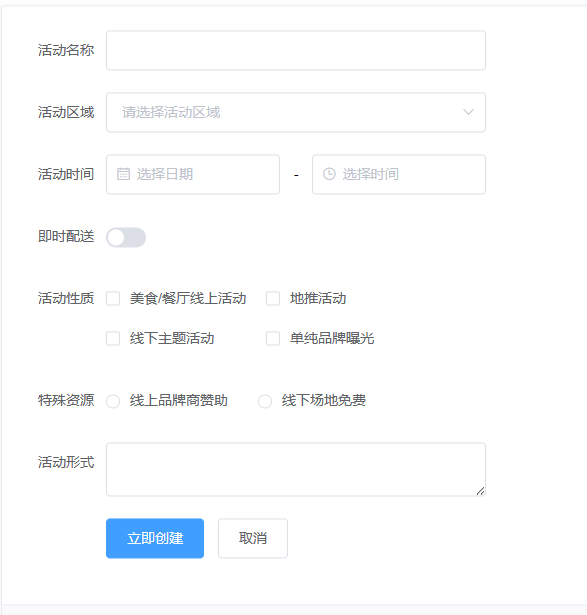
表单
Form表单:由输入框、选择器、单选框、多选框等控件组成、用以收集、校验、提交数据。
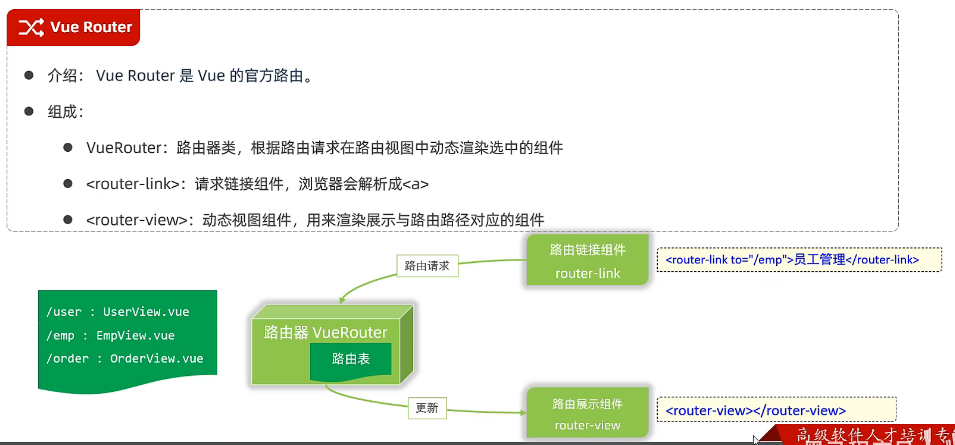
Vue路由
前端路由:URL中的hash(#号)与组件之间的对应关系
安装(创建Vue项目时已选择)
在router的index.js里编辑路由信息
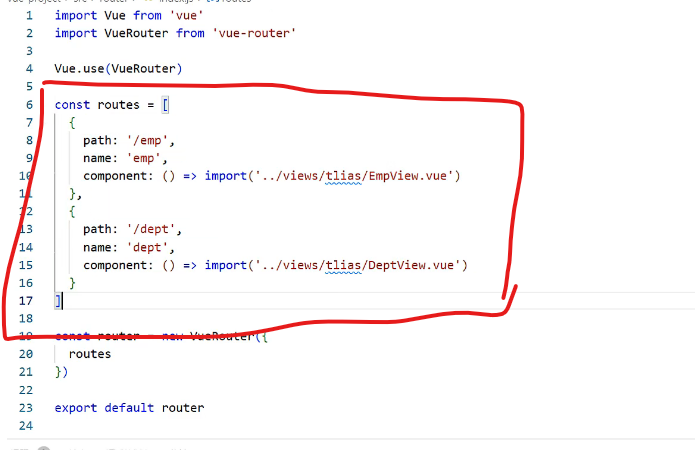
path是在URL最后面加的,相对于域名的一部分,name这个和path相同就可以了,component是导入的文件路径
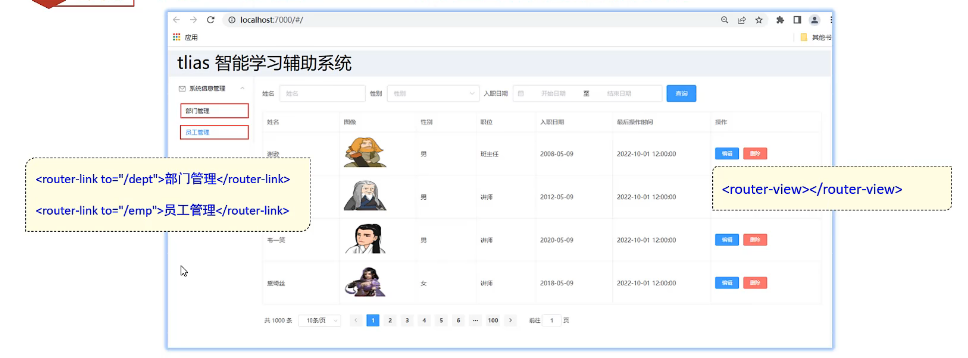
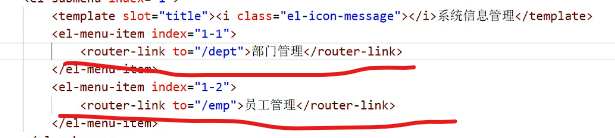
在文件里对应的文本加入router-link,相当于导入超链接,效果是一样的,两个文件都要改
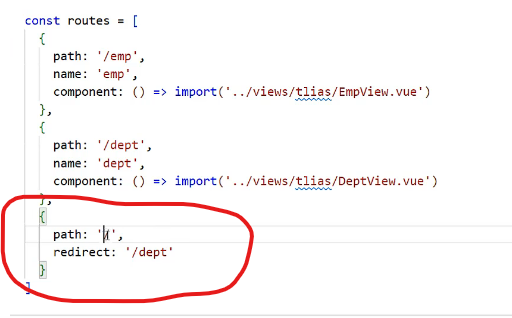
原本的页面#,访问不了,通过在router的index.js里增加,redirect是跳转到的页面
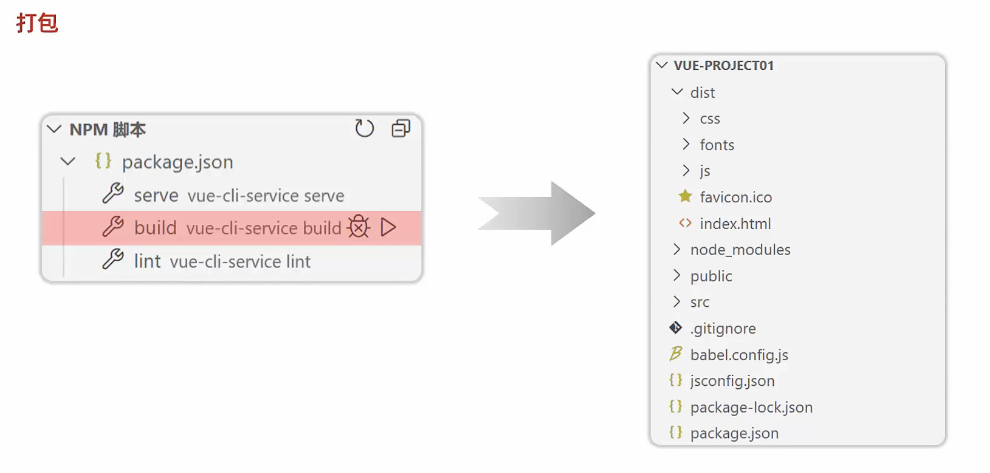
打包部署
直接执行在NPM脚本的bulid进程,执行完毕后,在项目里会有一个dist文件夹
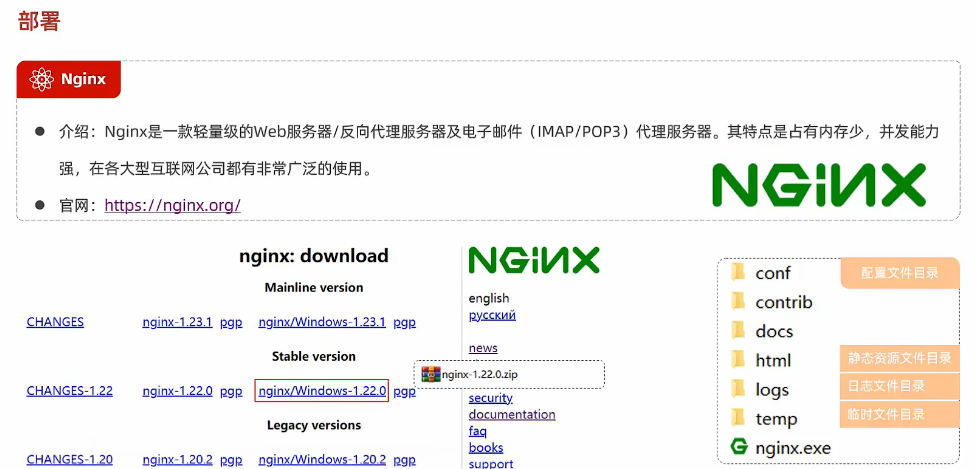
下载当前稳定版本nginx-1.22.0,安装路径不要有中文
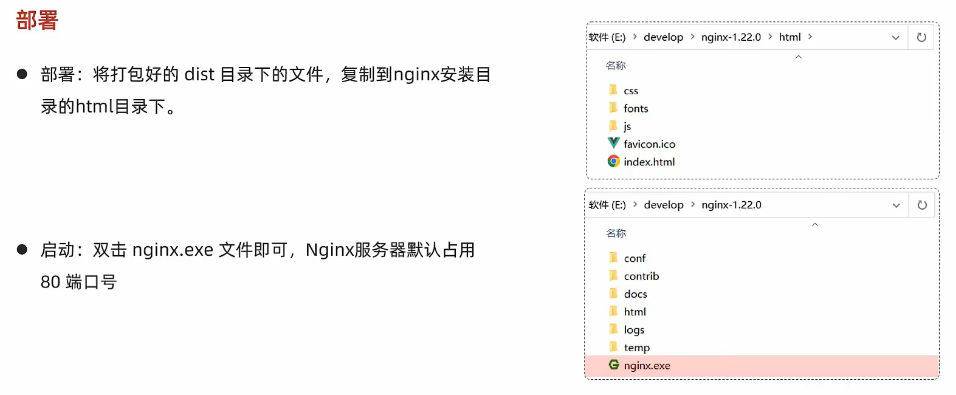
nginx默认有两个html文件,删掉就可以了
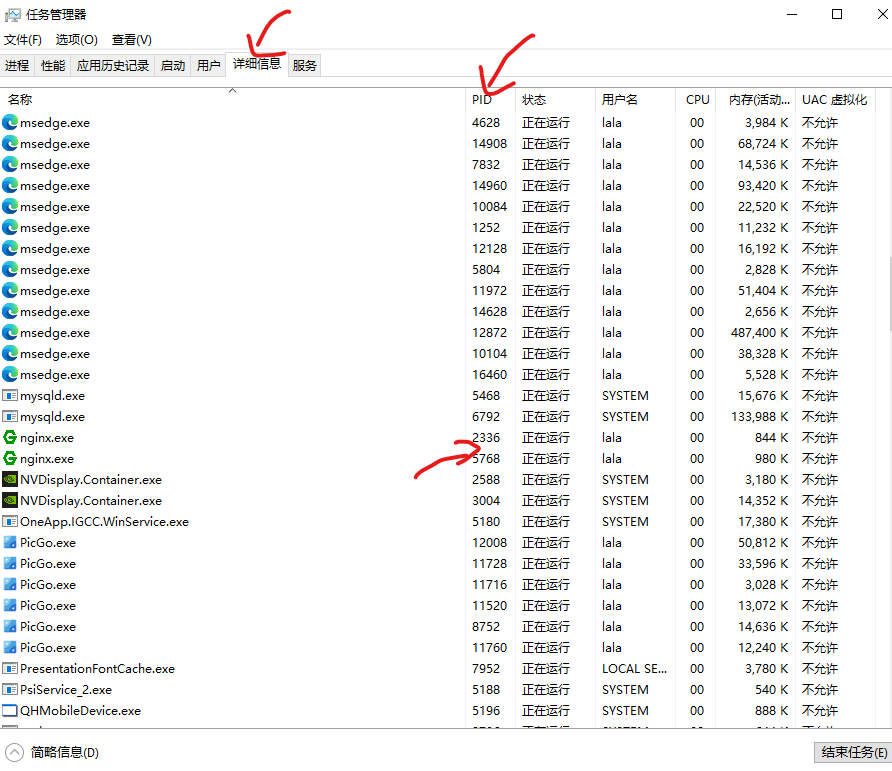
启动nginx文件后,打开任务管理器

看到有nginx进程则是启动了nginx
如果没有,则是你的系统或是其他软件占用了80端口号,这时你需要修改nginx的端口号,如果你想查看是什么软件占用80端口号,可以通过下面的指令在cmd里查看占用80端口的是什么软件(可选操作)
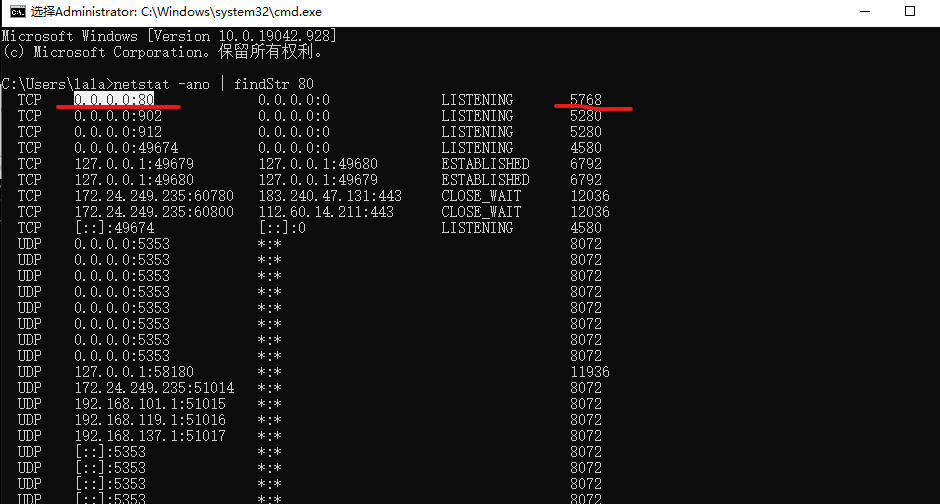
在任务管理器里找到PID为5768的软件,就是这个软件占用了80端口(这里我的就是nignx占用了80端口)(可选操作)
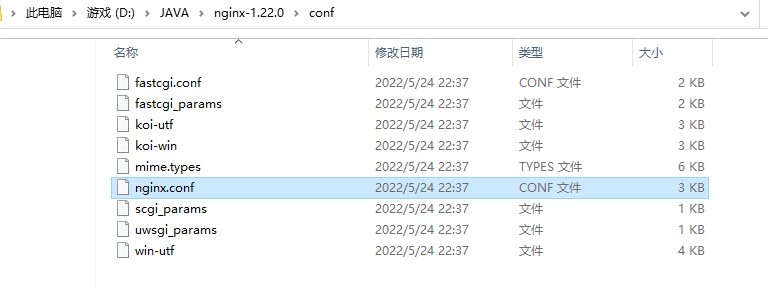
更换端口号,在nginx的conf目录下的nginx.conf文件打开
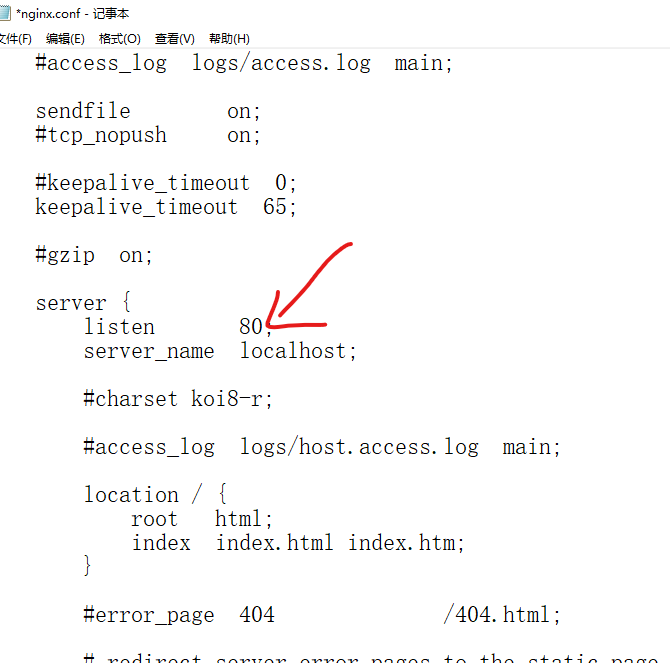
修改80为90或是其他的都可以,修改完成后重新启动nignx.exe,重新打开任务管理器查看进程,如果有两个nignx进程则是打开成功
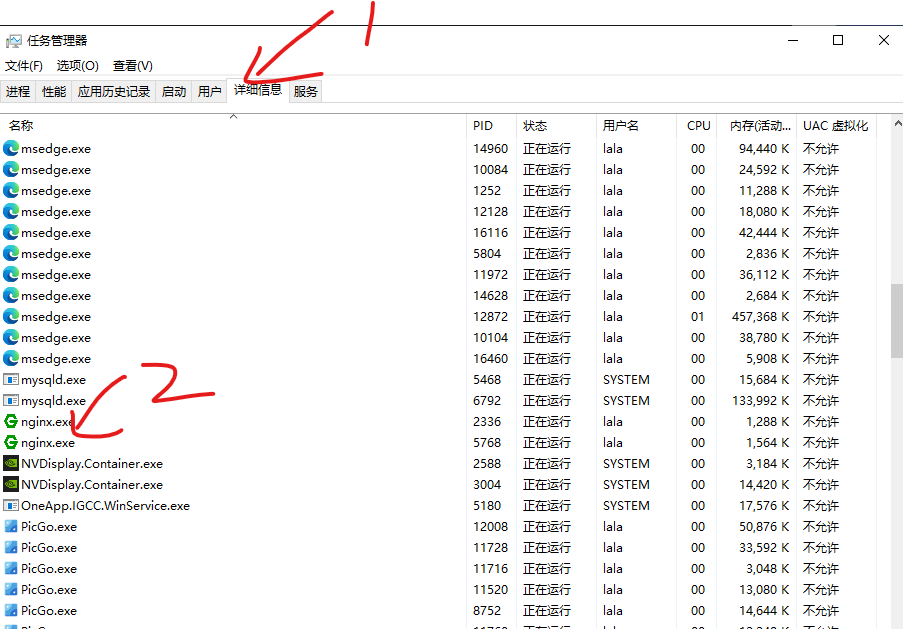
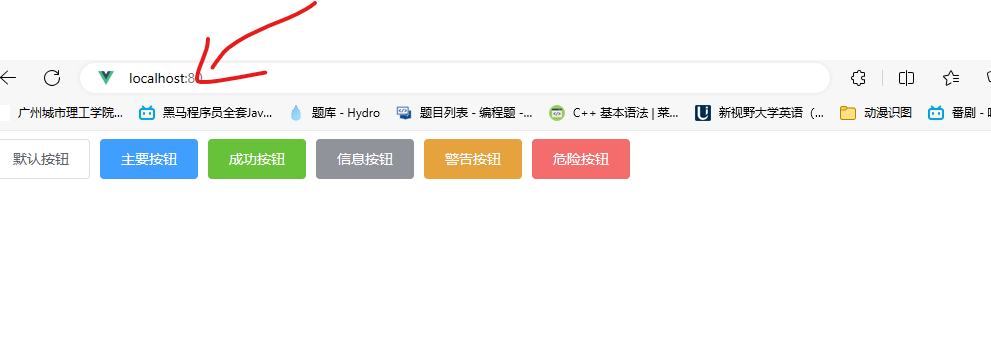
打开浏览器,输入localhost:80,就可以看到我们打包好的项目部署到了本地端口(注意这里我的端口是80)
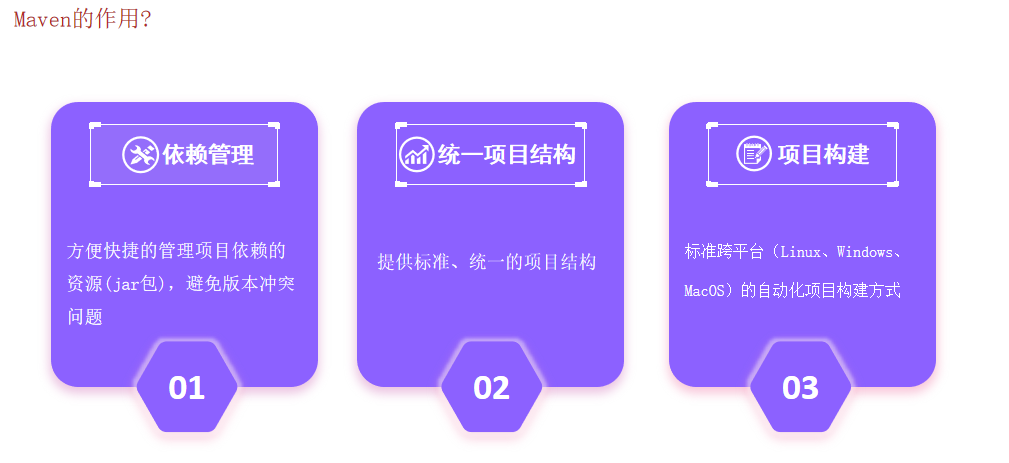
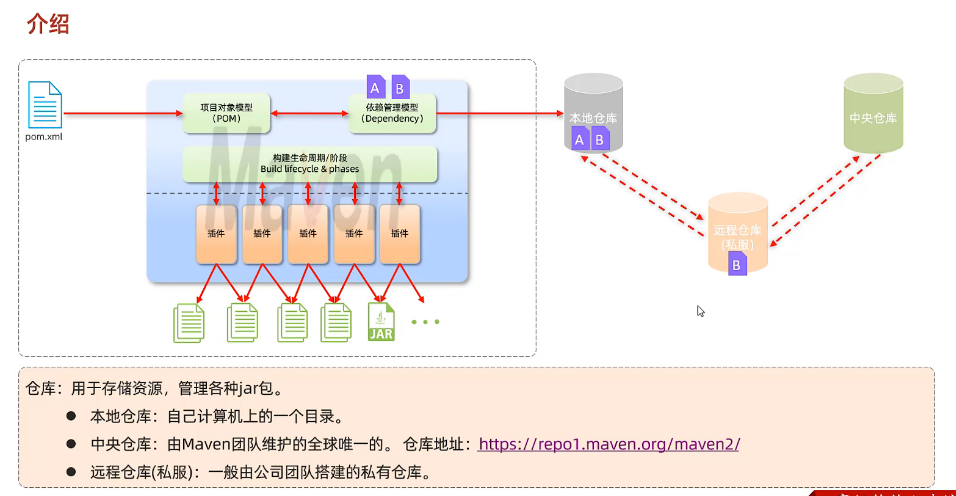
Maven

安装步骤
解压 apache-maven-3.6.1-bin.zip 到一个没有中文的的路径
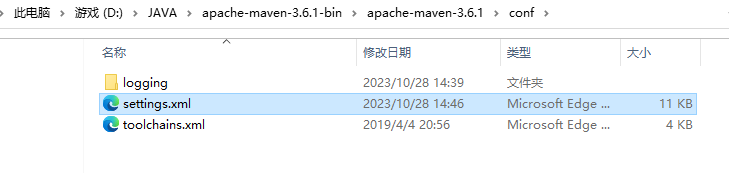
配置本地仓库,打开conf目录,修改conf/settings.xml 中的 <localRepository> 为一个指定目录
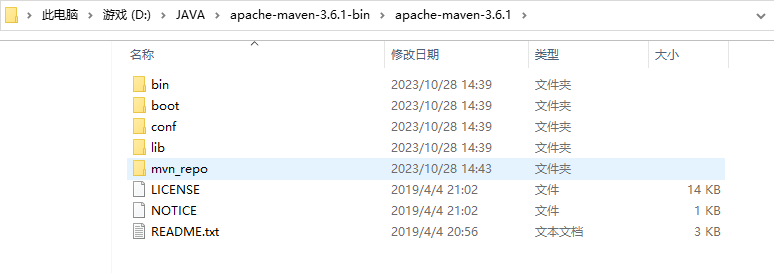
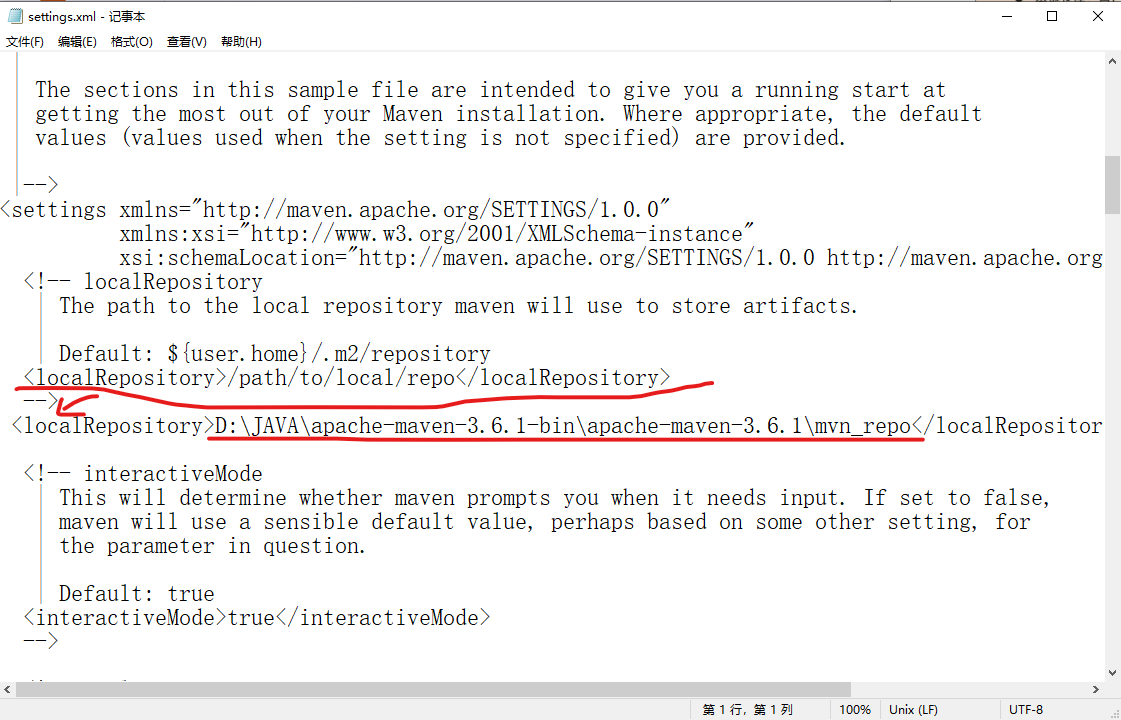
把注释里面的复制粘贴出来,里面的路径换成你要放文件的路径(我是在 apache-maven-3.6.1文件夹下创建一个新文件夹mvn_repo作为存放文件),记得保存
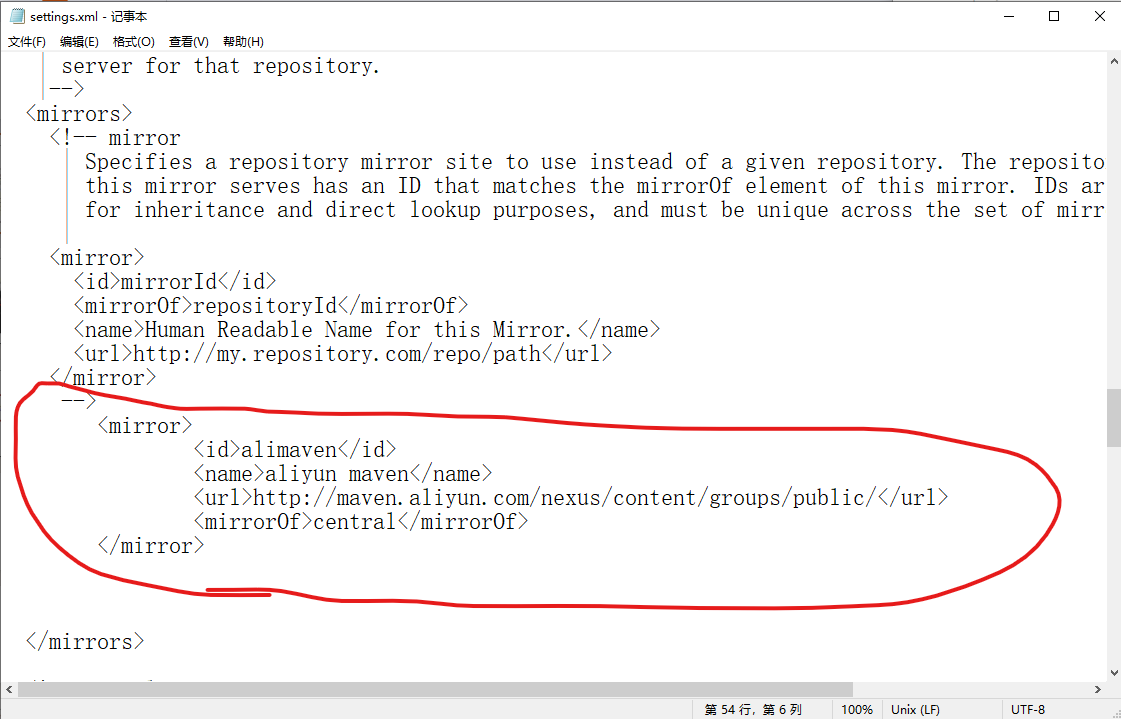
配置阿里云私服:修改 conf/settings.xml 中的 <mirrors>标签,为其添加如下子标签:
把上面的代码复制,粘贴如图
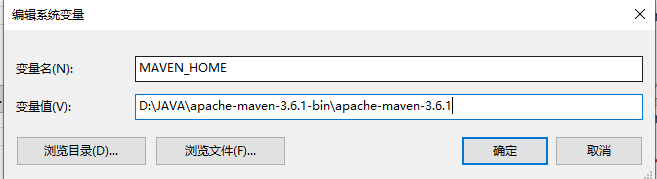
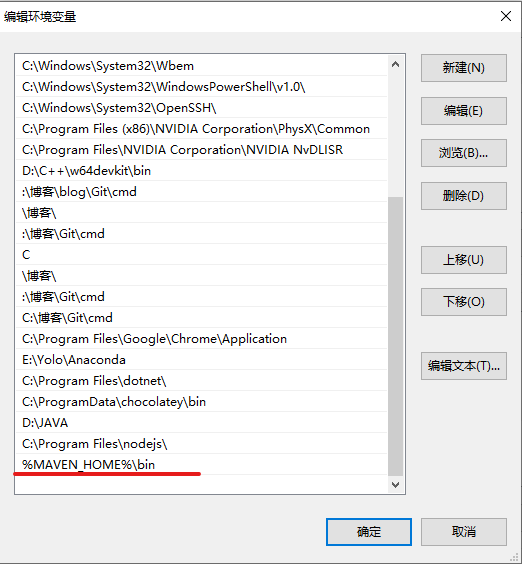
配置环境变量: MAVEN_HOME 为maven的解压目录,并将其bin目录加入PATH环境变量。
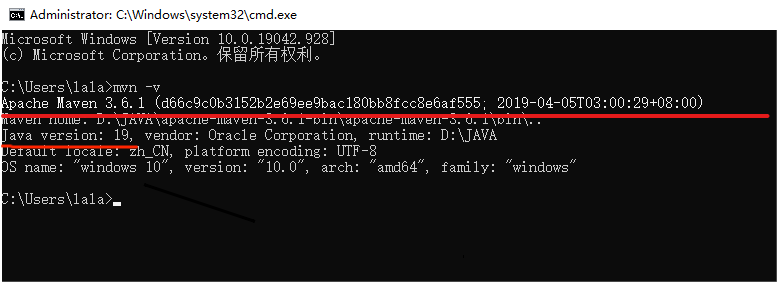
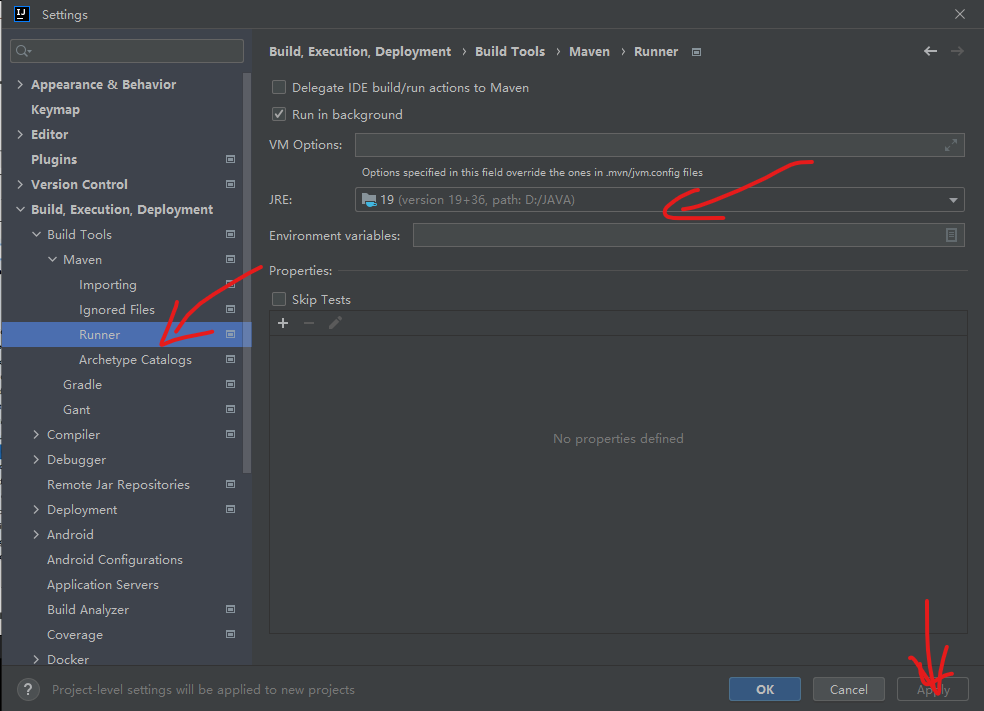
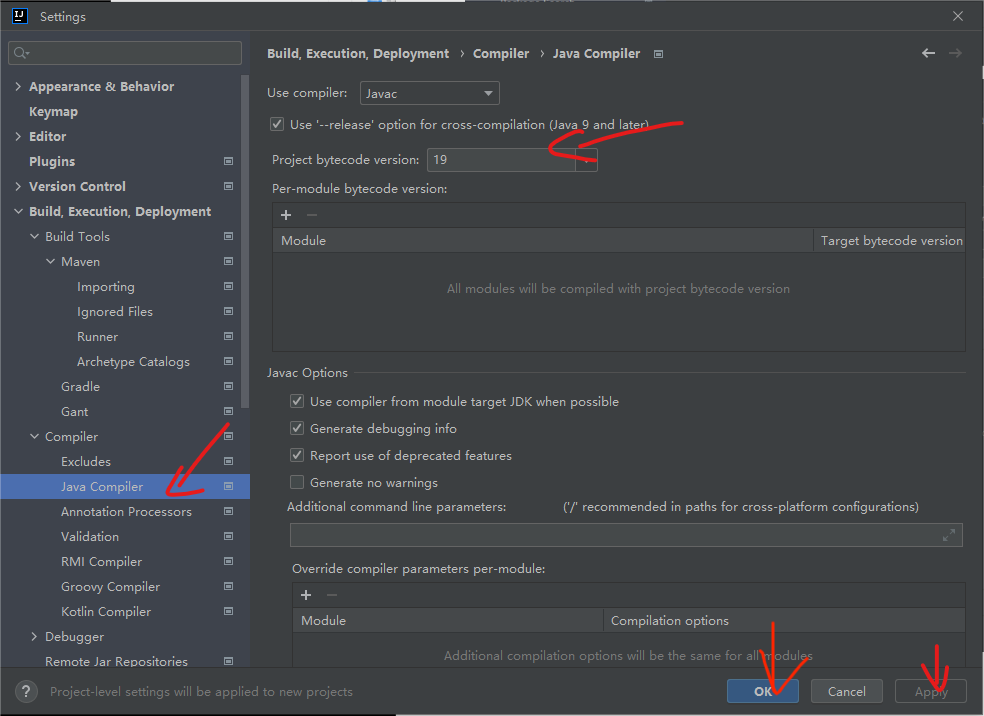
测试,cmd命令行输入,在这里看清楚你的jdk版本,我的是19
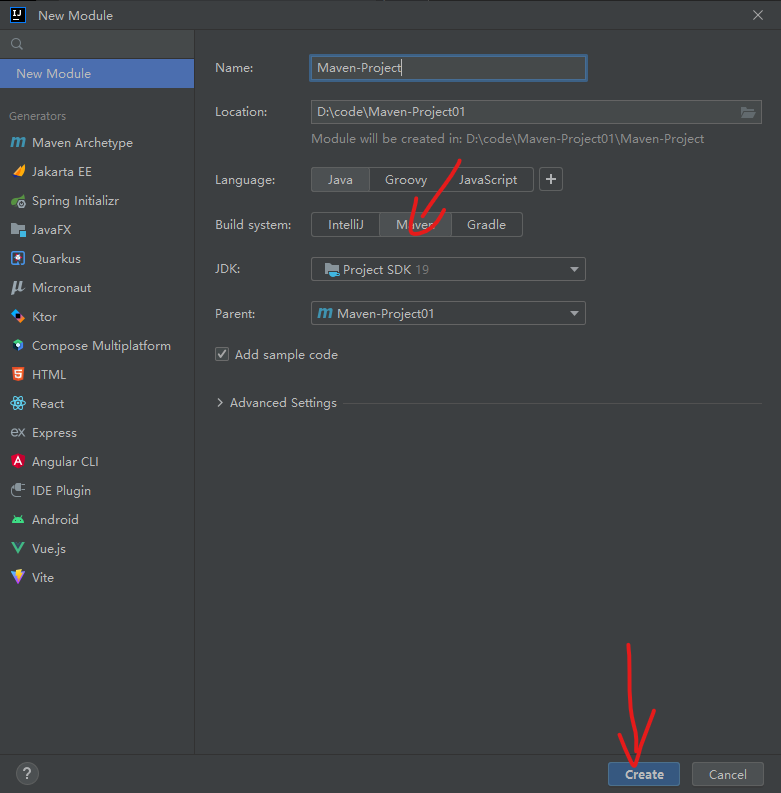
IDEA创建Maven项目
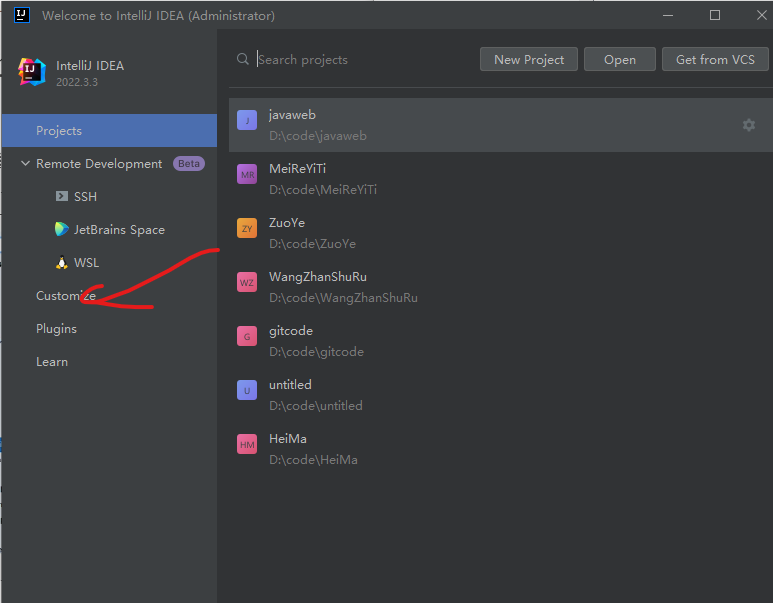
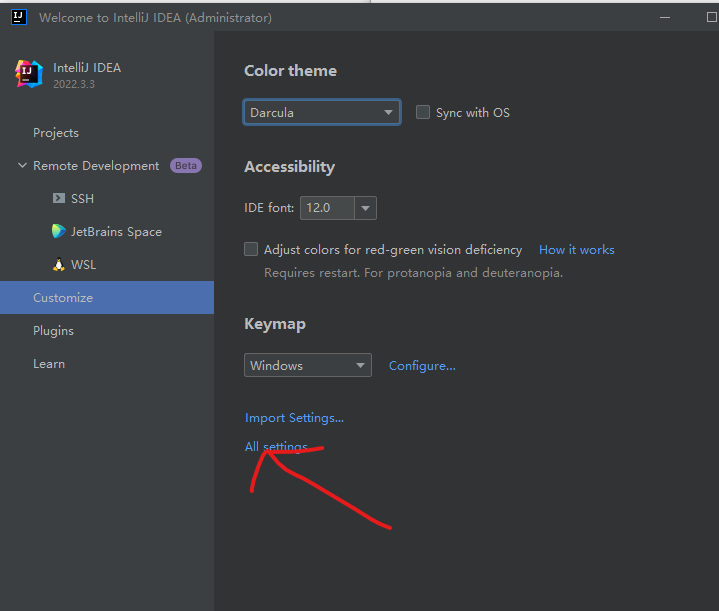
先直接配置Maven全局环境就好了
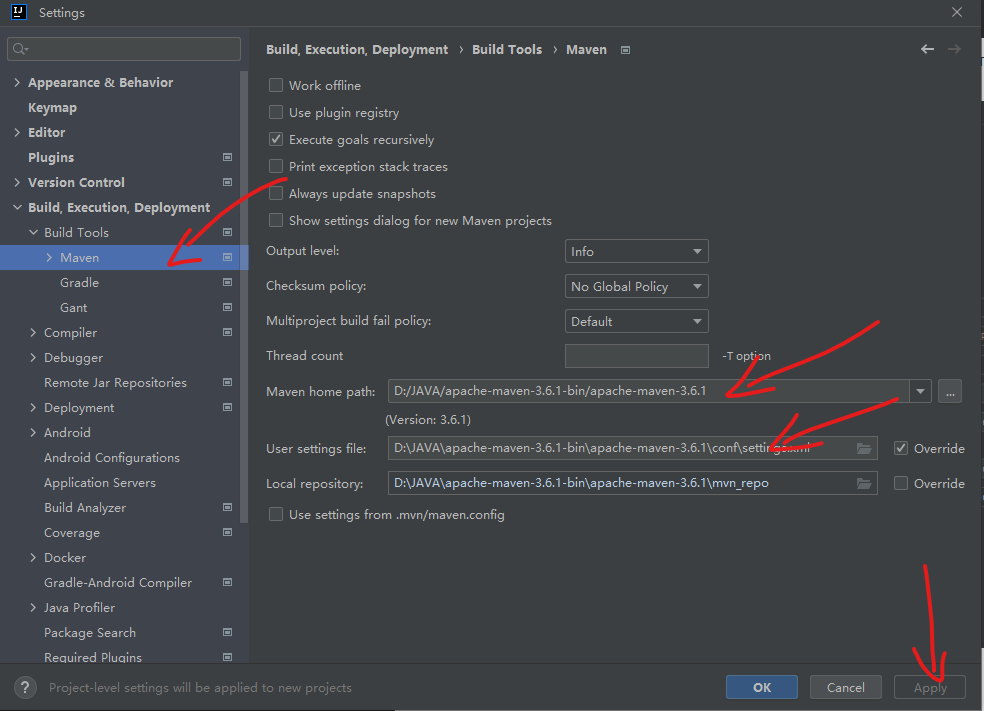
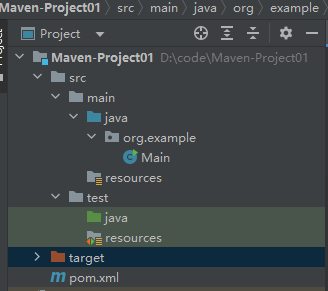
企业版IDEA常规项目创建
target文件夹本来是没有的,是你运行Java程序后才会有,test目录下的resources文件夹也是没有的,要自己创
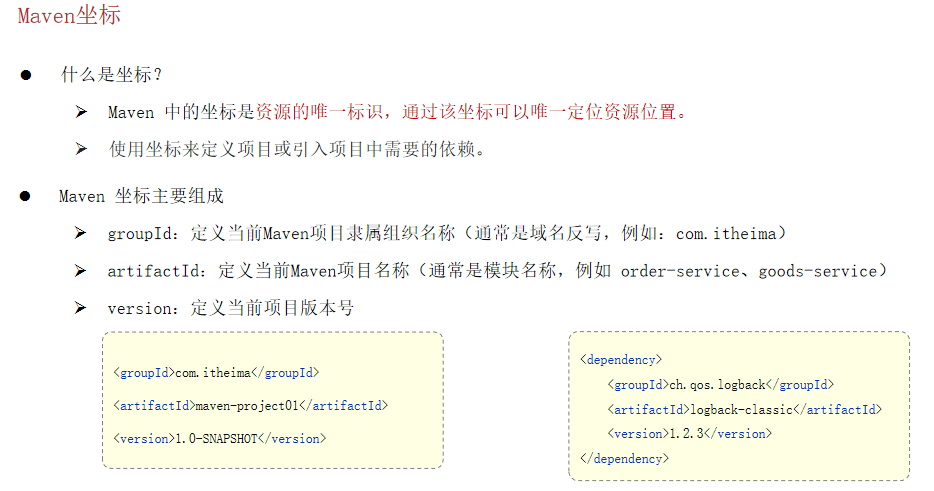
Maven坐标
其实就是下面的三项
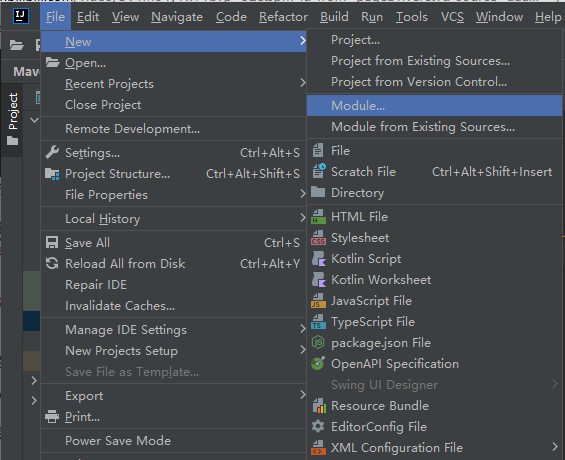
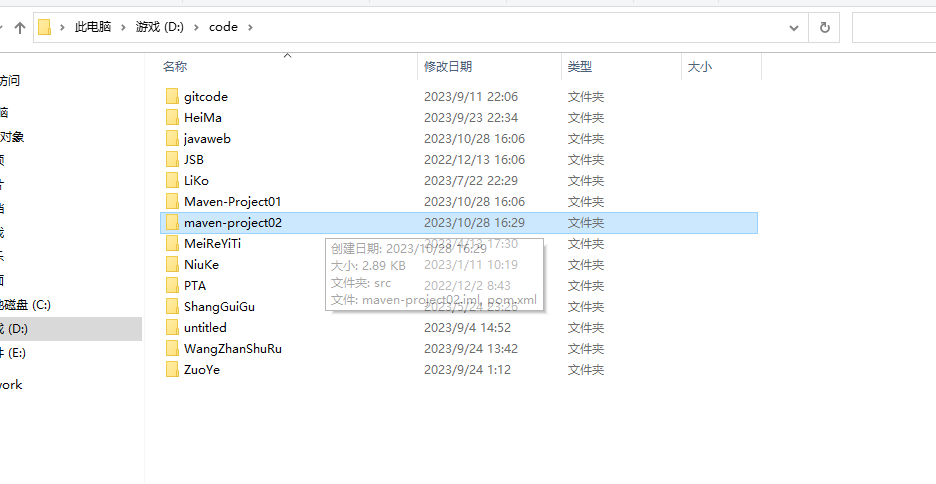
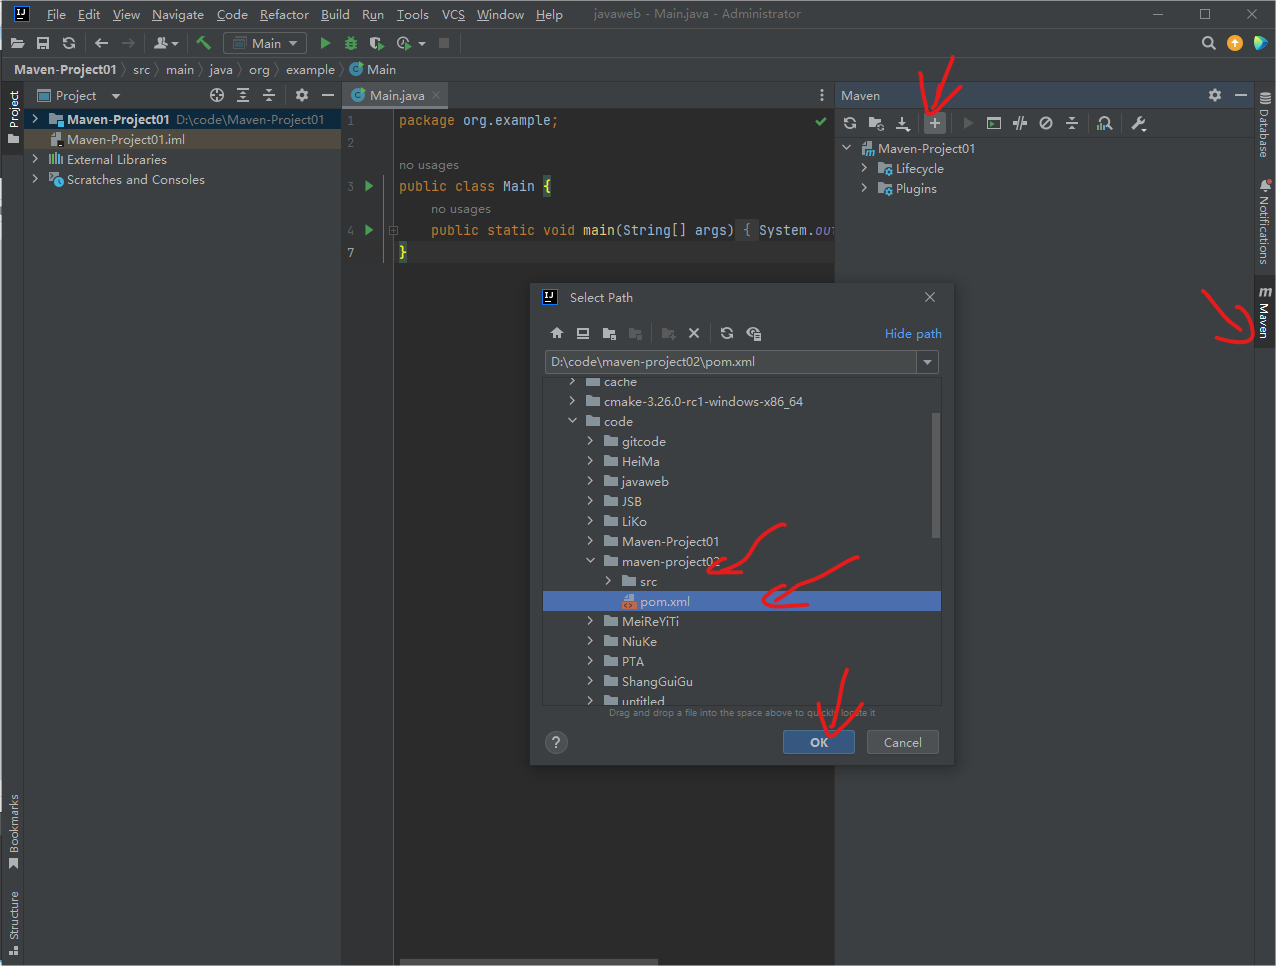
导入Maven模块
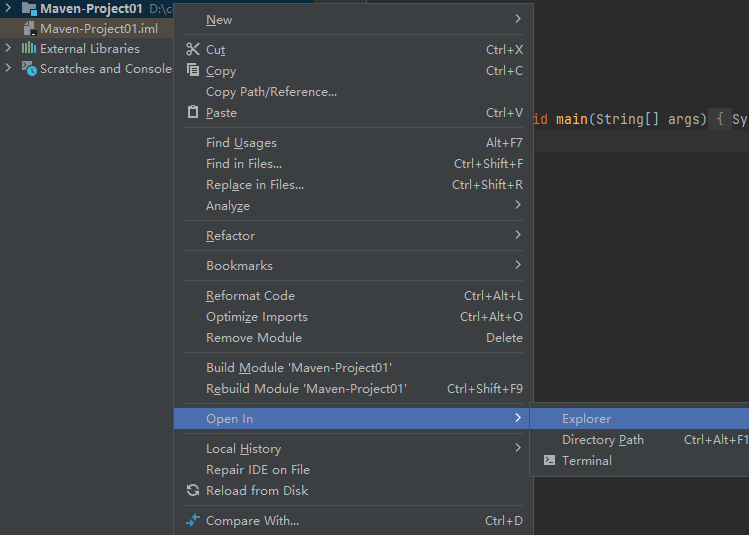
把要导入的maven工程粘贴进来
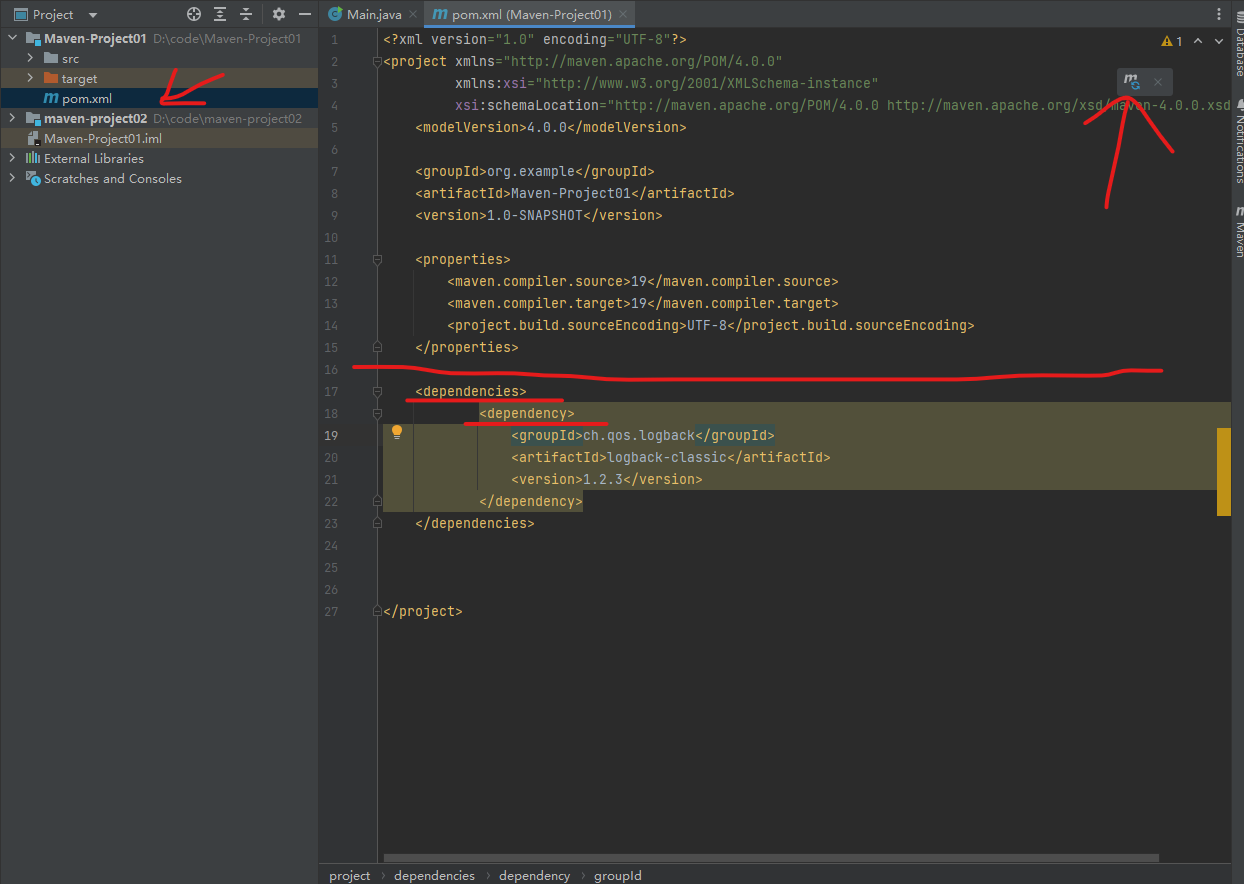
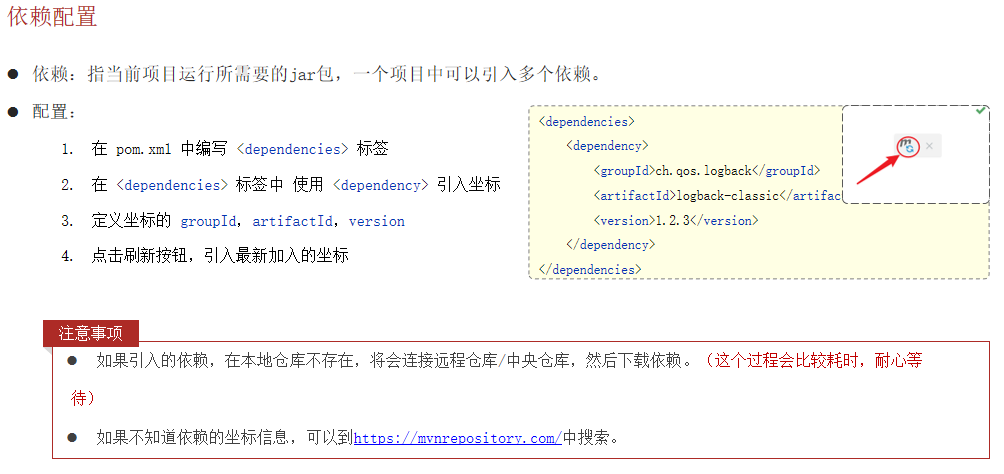
Maven依赖配置
进入pom.xml文件,红线上面的是文件本来就有的,添加依赖必须在下面添加<dependencies>和<dependency>标签,再在<dependency>标签里面添加你需要的依赖,然后一定要按右上角的按钮,否则不会生效
查看是否生效
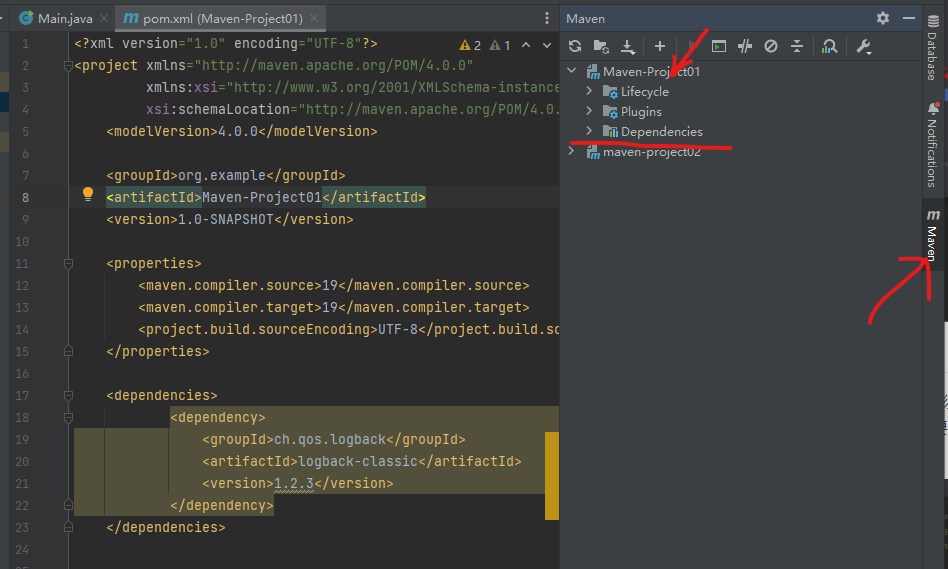
如图看见有Dependencies文件,说明生效了,一定要按右上角的按钮才会生效
总结
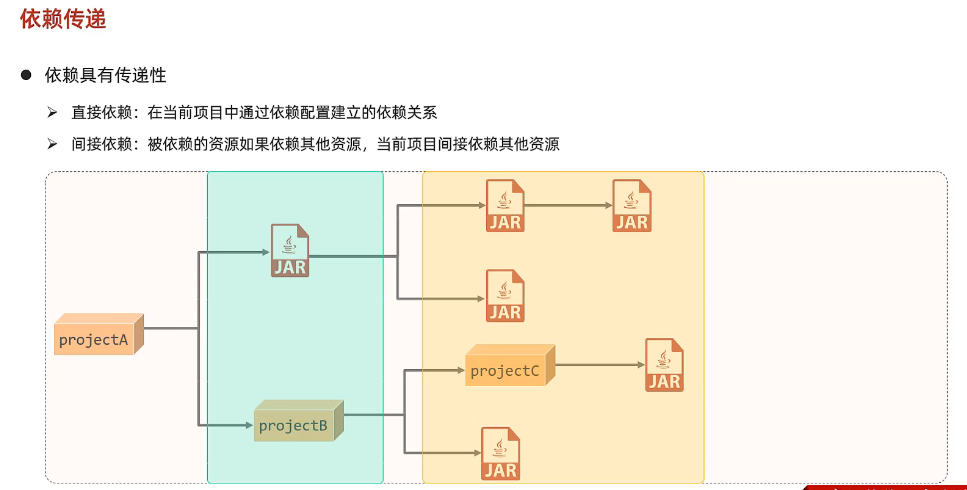
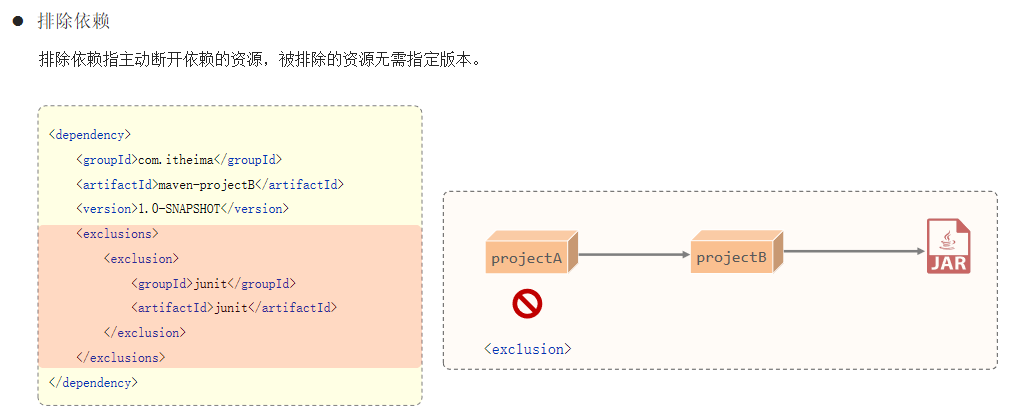
依赖传递
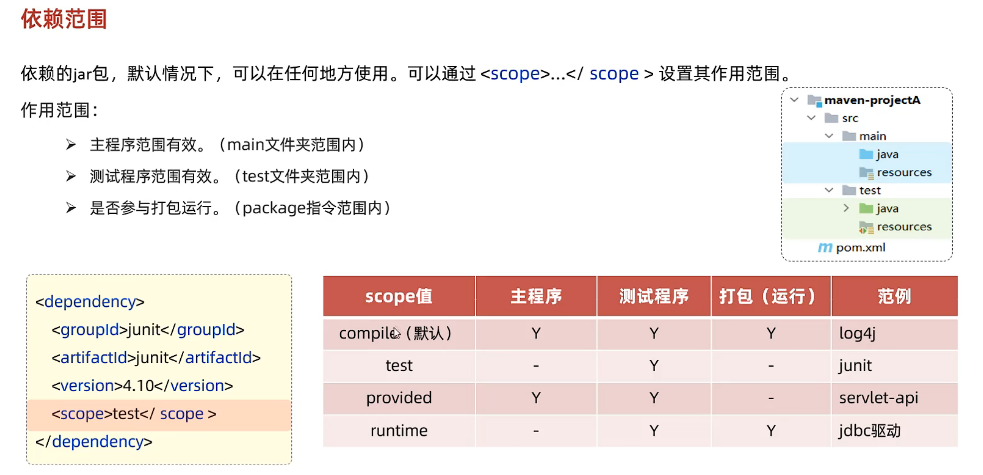
依赖范围
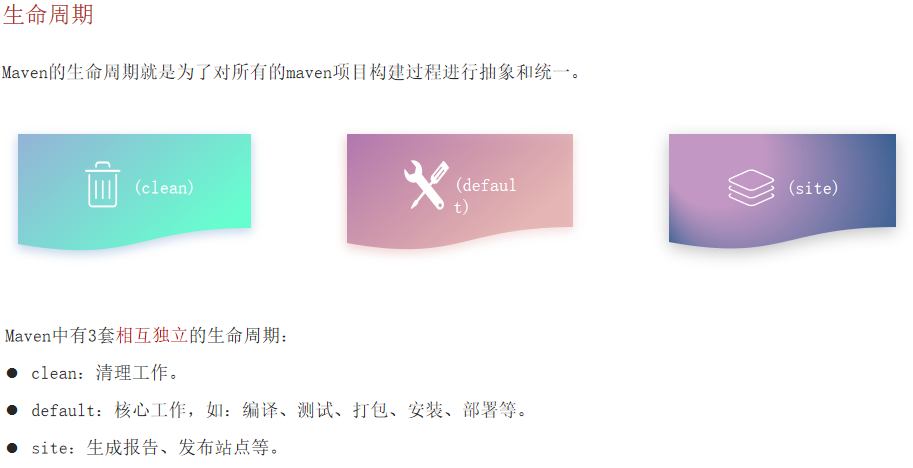
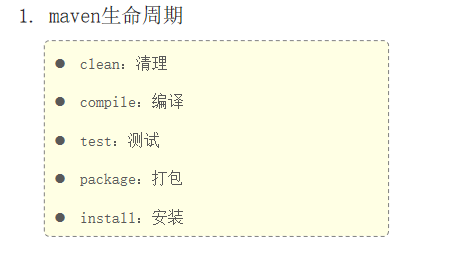
生命周期
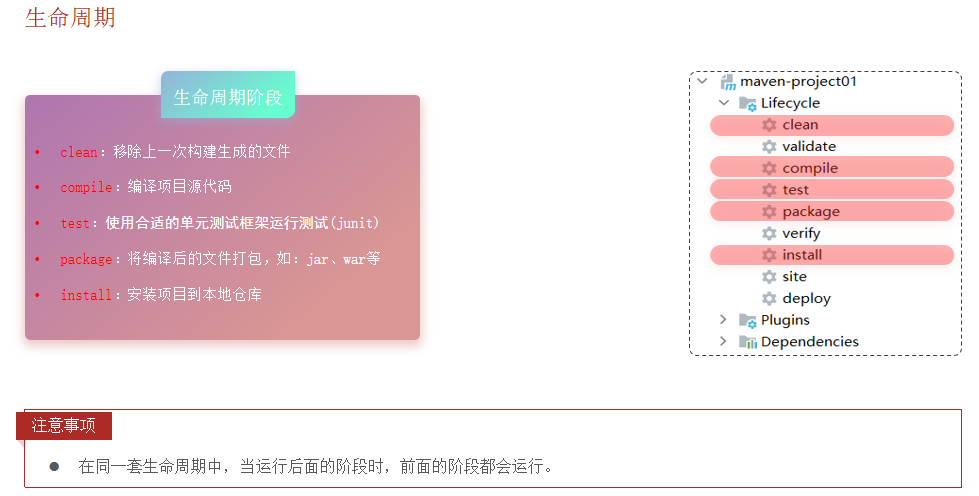
clean除外,从clean后开始,运行后面的程序,前面的也会运行一遍
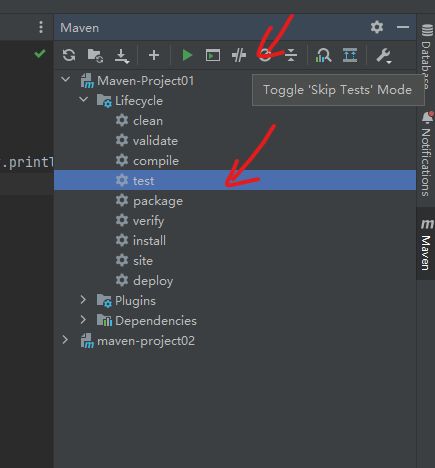
如果想跳过某一步,可以,选中你想跳过的,按上面的Skip按钮就可以跳过了
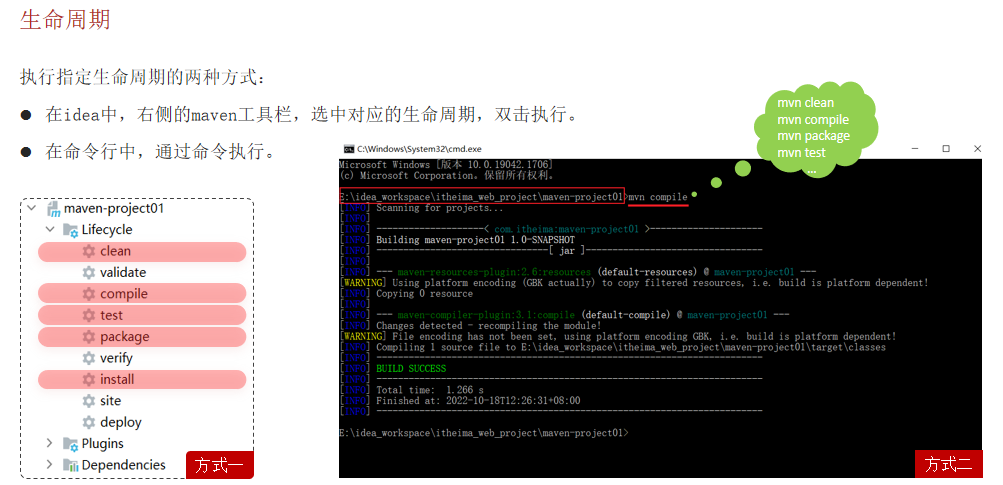
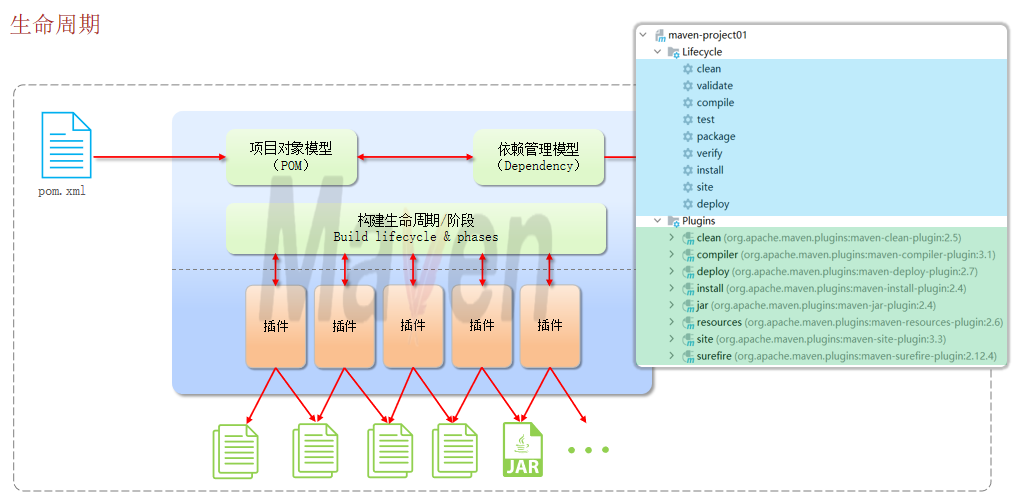
所有的JAR文件都是由插件运行的,Lifecycle里面点击运行,最终都是由下面Plugins里面的插件运行工作的
总结
SpringBoot
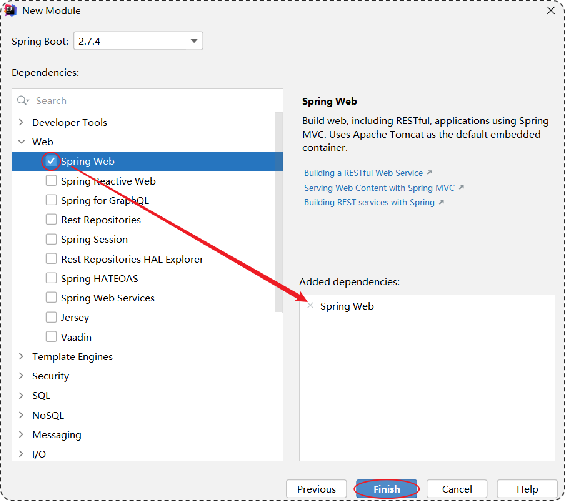
快速入门
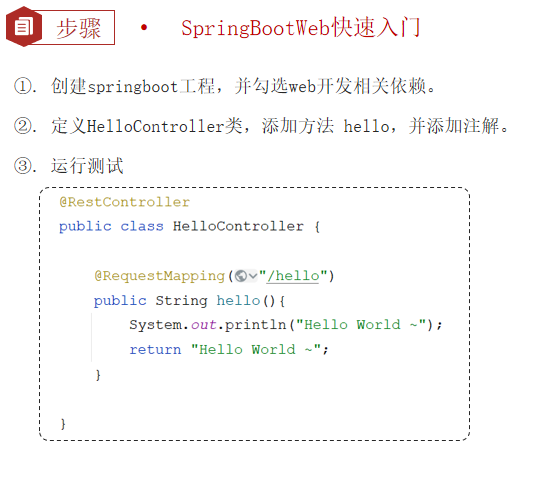
jdk根据自己的选择
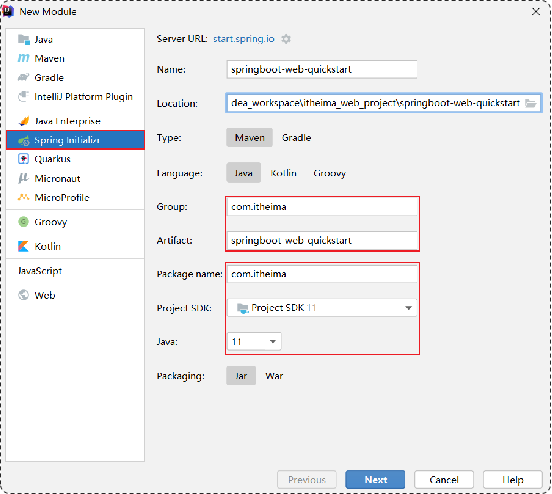
创建好项目后,在main的java下可以得到你命名创建的一个包,在这个包下有一个SpringbootWebQuickstartApplication文件,你需要另外创建一个包,要求要和SpringbootWebQuickstartApplication文件同级,我创建了controller包,里面写了HelloController.java文件
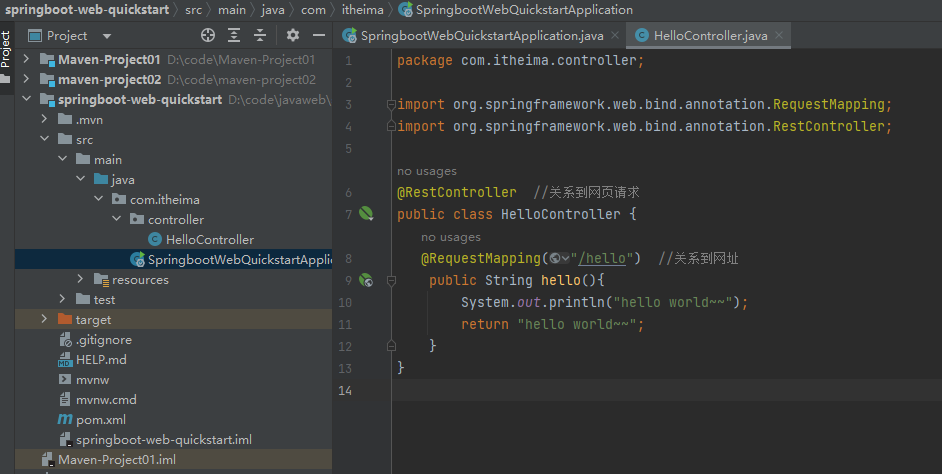
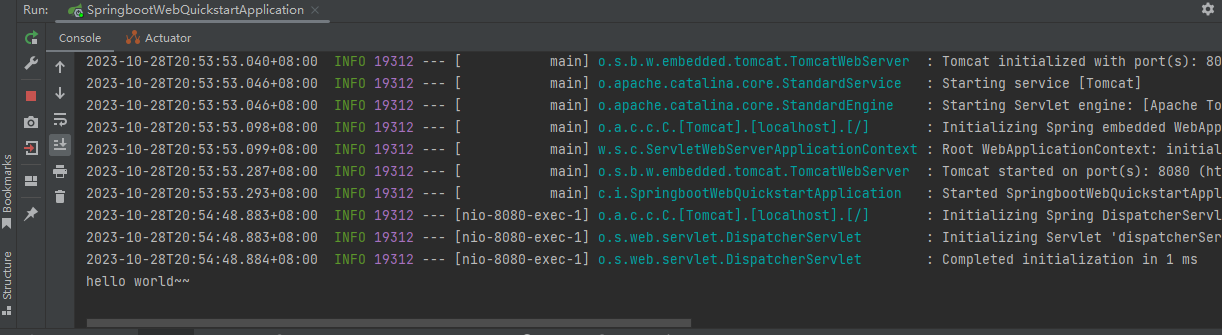
代码如图,然后到SpringbootWebQuickstartApplication文件,直接运行文件
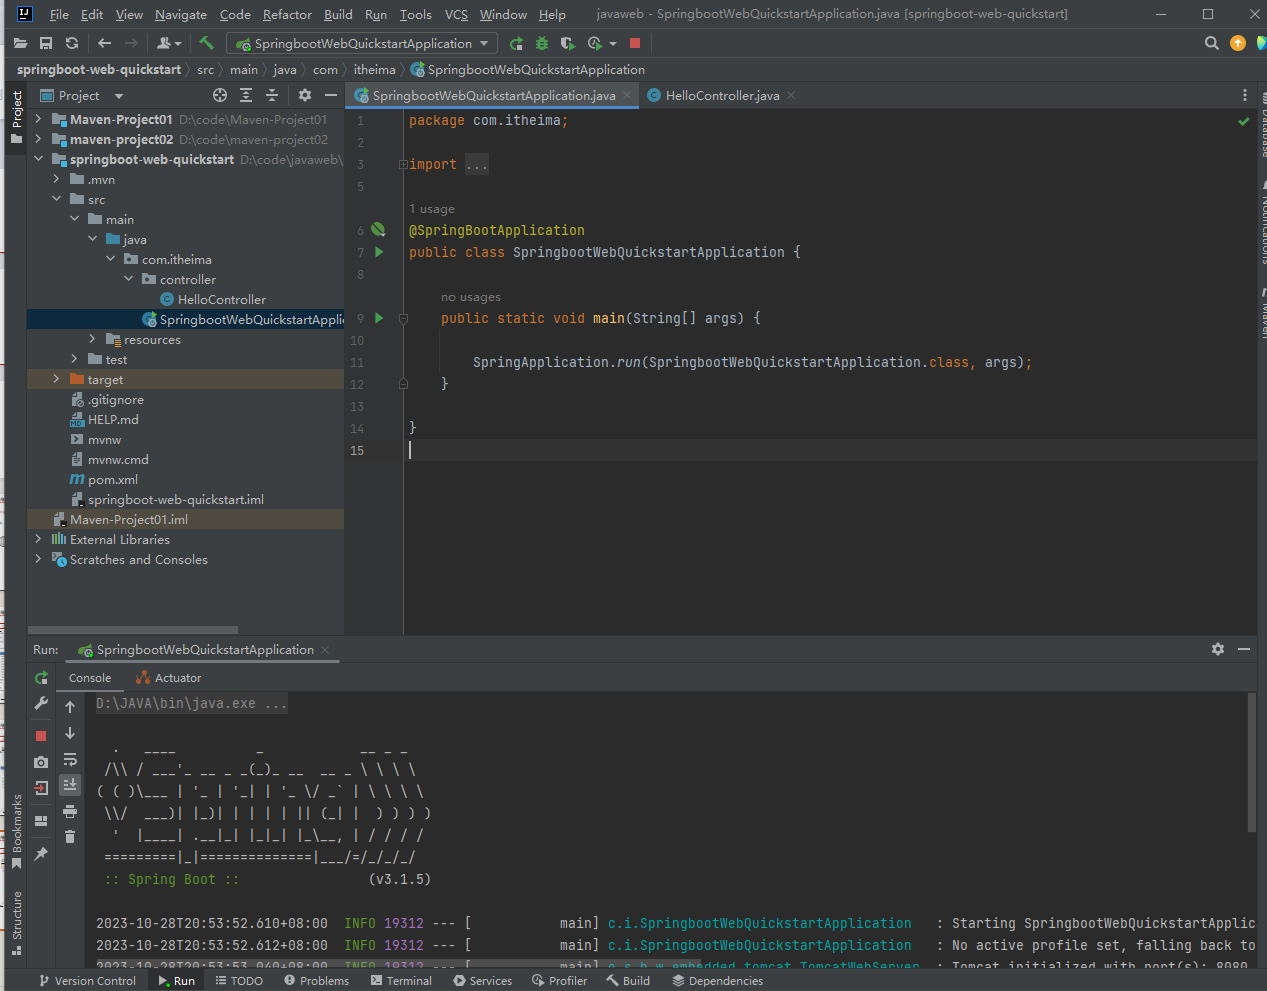
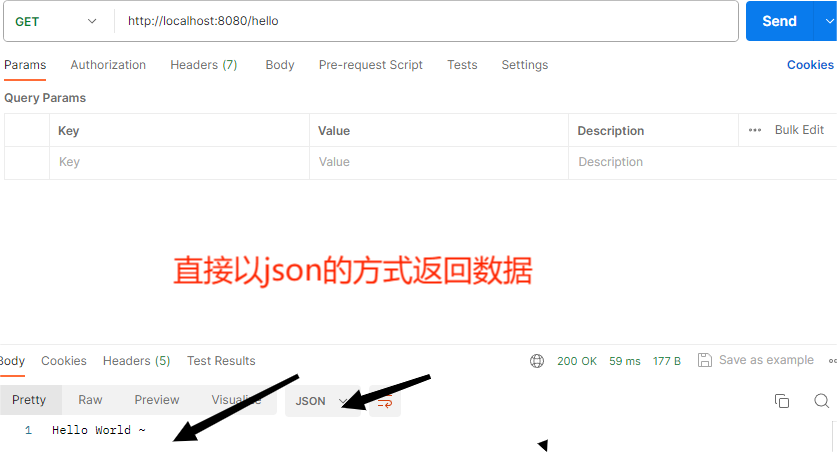
然后访问网址localhost:8080/hello
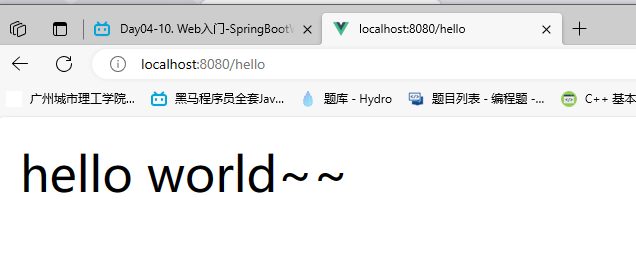
得到hello world~ ~, 在控制台也可以看到hello world~~
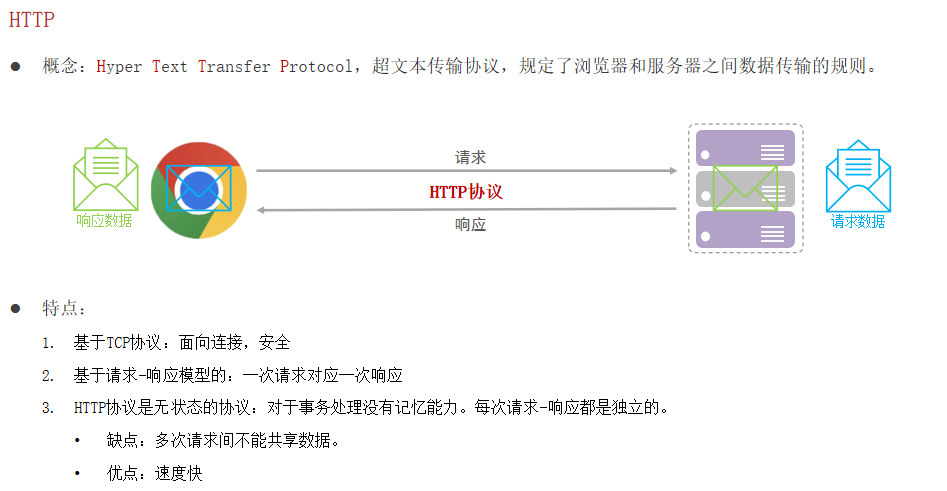
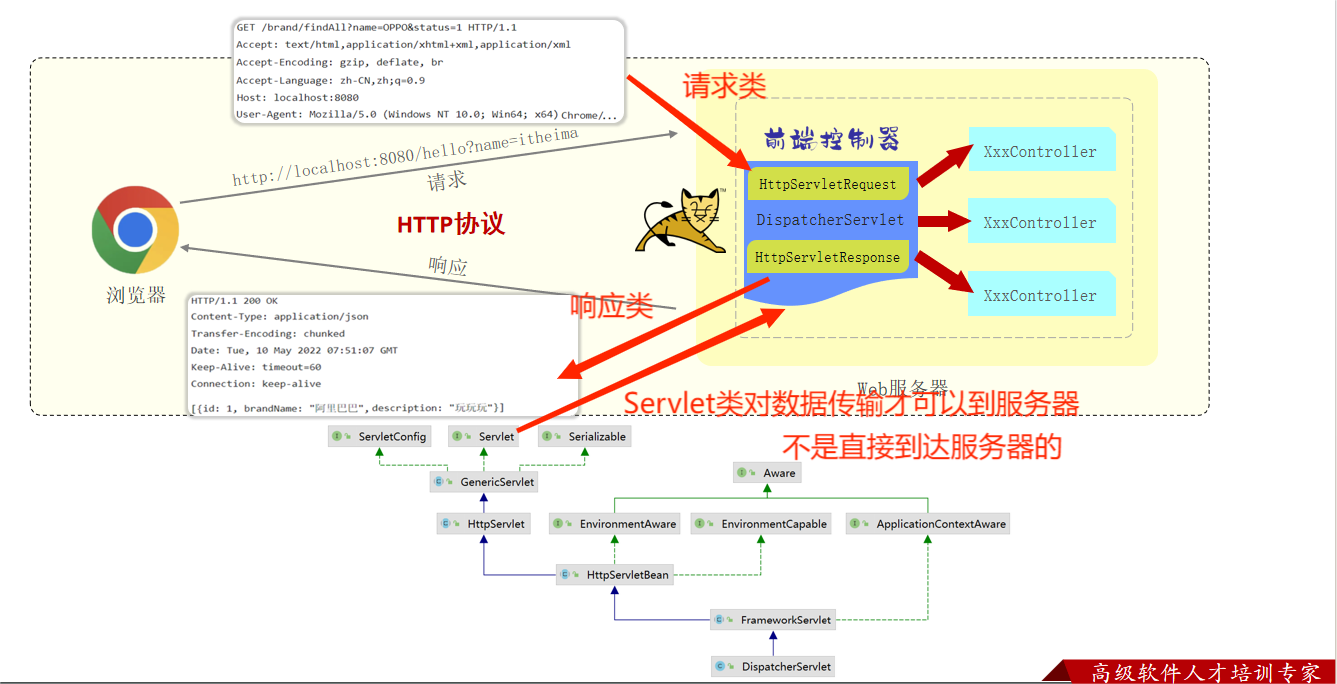
HTTP协议
HTTP概述
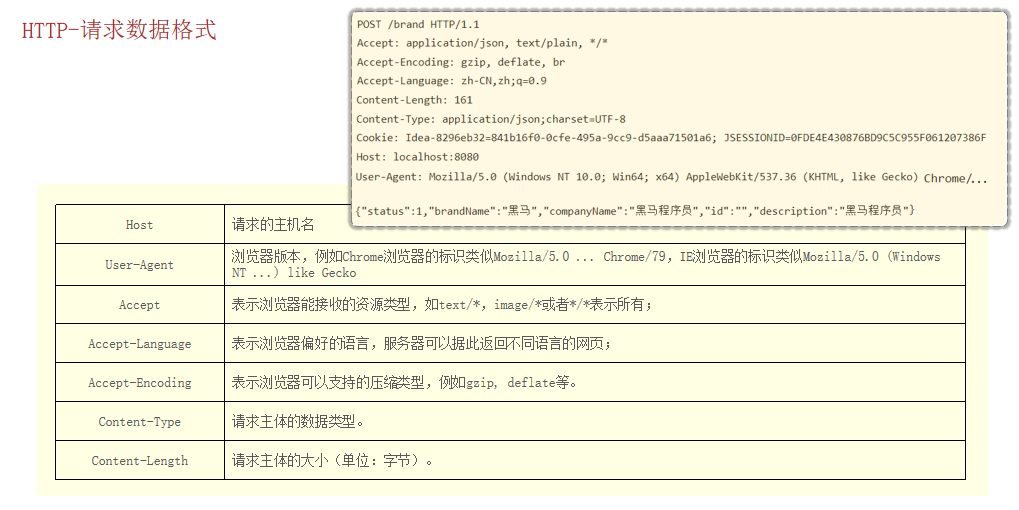
HTTP请求协议

HTTP响应协议
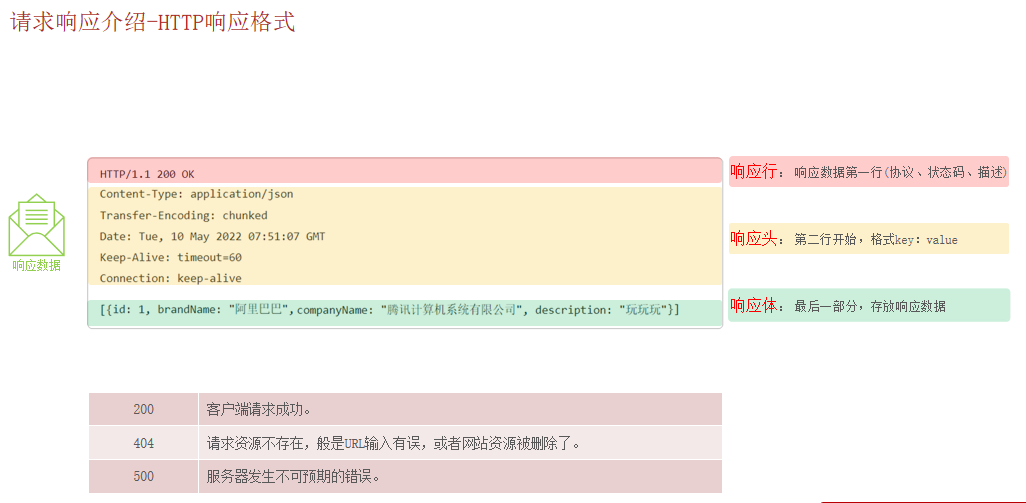
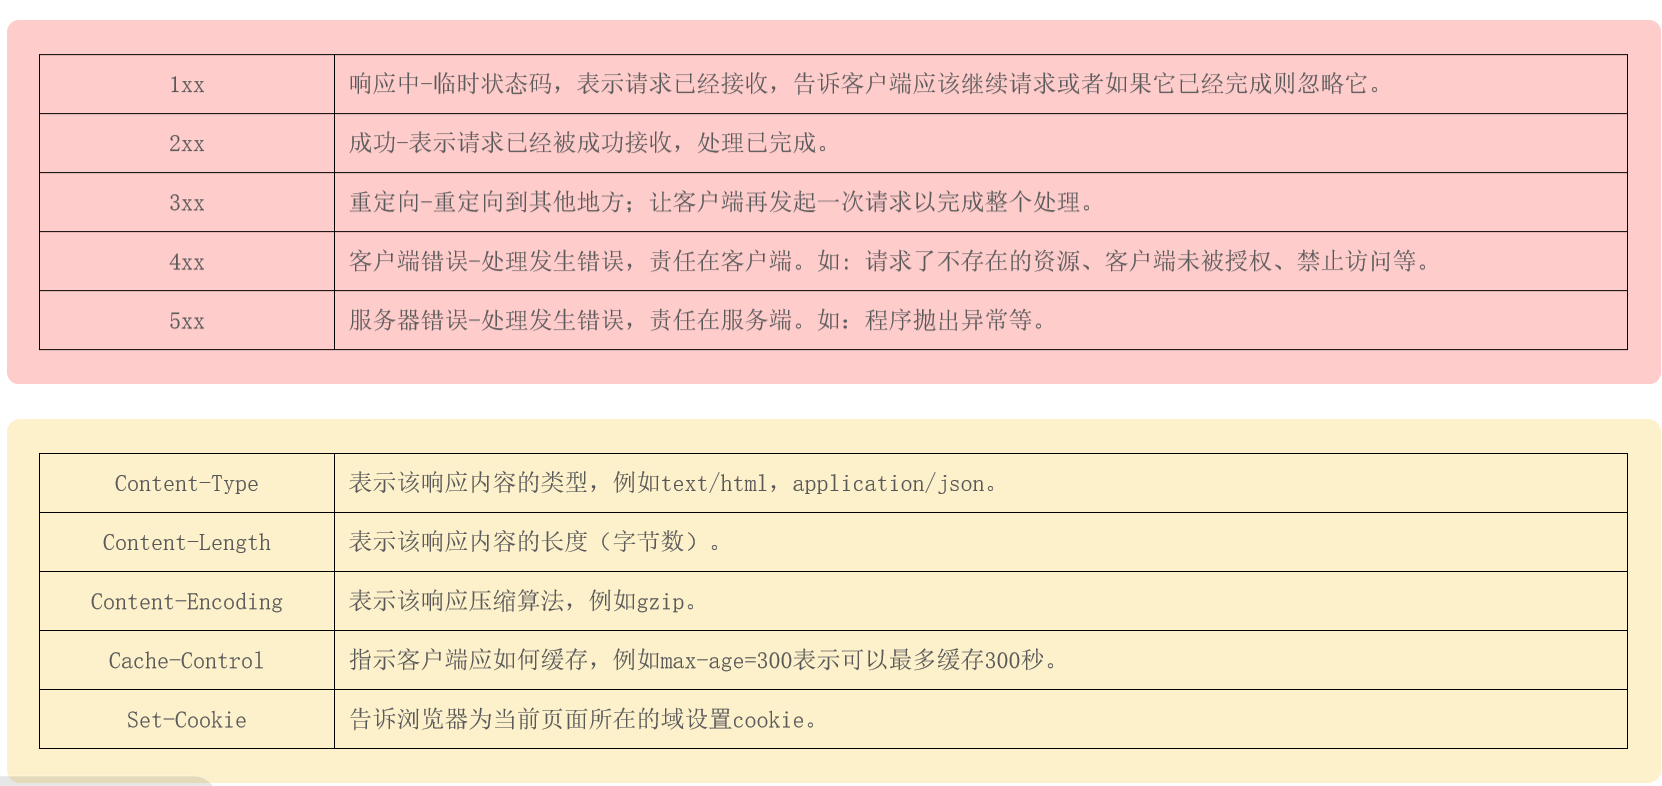
一、状态码大类
状态码分类 | 说明 |
1xx | 响应中——临时状态码,表示请求已经接受,告诉客户端应该继续请求或者如果它已经完成则忽略它 |
2xx | 成功——表示请求已经被成功接收,处理已完成 |
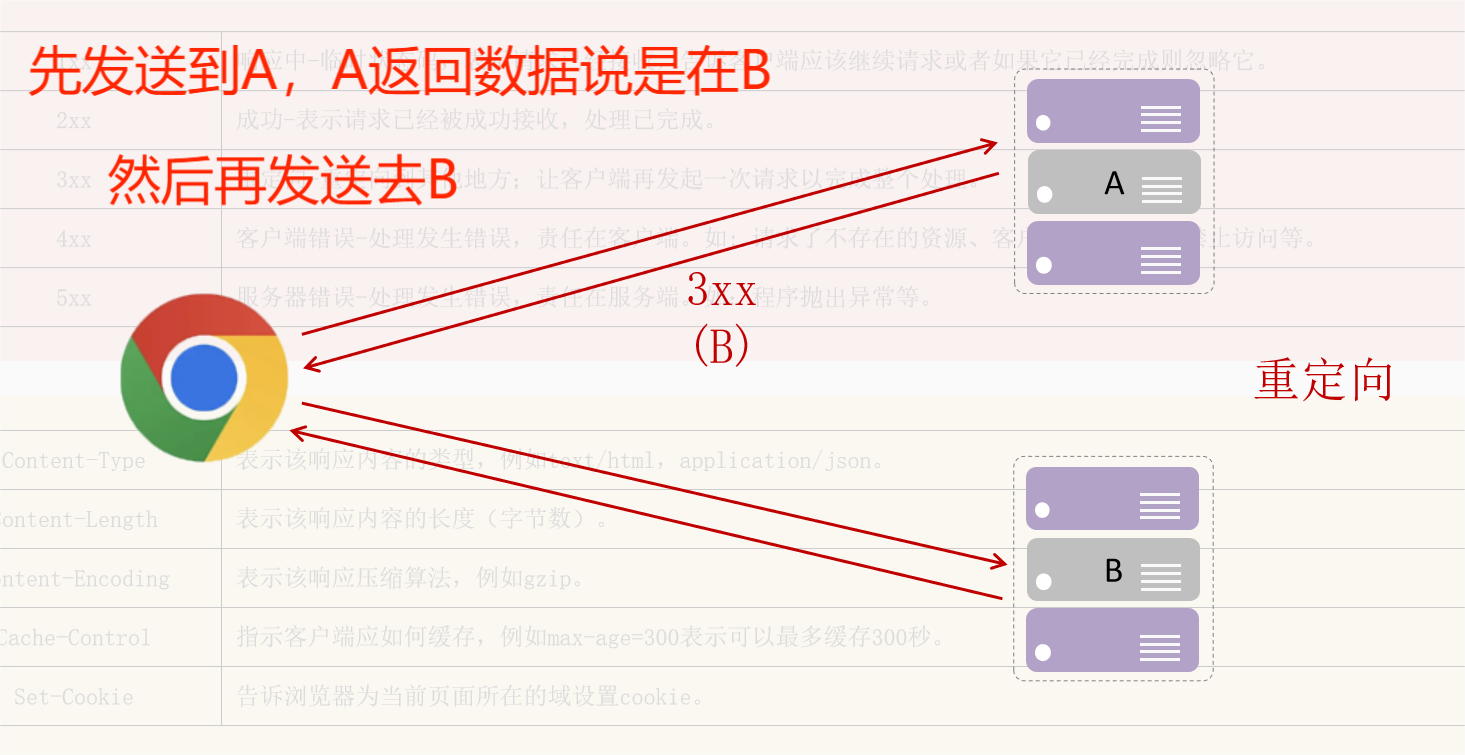
3xx | 重定向——重定向到其它地方:它让客户端再发起一个请求以完成整个处理。 |
4xx | 客户端错误——处理发生错误,责任在客户端,如:客户端的请求一个不存在的资源,客户端未被授权,禁止访问等 |
5xx | 服务器端错误——处理发生错误,责任在服务端,如:服务端抛出异常,路由出错,HTTP版本不支持等 |
二、常见的响应状态码
状态码 | 英文描述 | 解释 |
200 | OK | 客户端请求成功,即处理成功,这是我们最想看到的状态码 |
302 | Found | 指示所请求的资源已移动到由 Location响应头给定的 URL,浏览器会自动重新访问到这个页面 |
304 | Not Modified | 告诉客户端,你请求的资源至上次取得后,服务端并未更改,你直接用你本地缓存吧。隐式重定向 |
400 | Bad Request | 客户端请求有语法错误,不能被服务器所理解 |
403 | Forbidden | 服务器收到请求,但是拒绝提供服务,比如:没有权限访问相关资源 |
404 | Not Found | 请求资源不存在,一般是URL输入有误,或者网站资源被删除了 |
405 | Method Not Allowed | 请求方式有误,比如应该用GET请求方式的资源,用了POST |
428 | Precondition Required | 服务器要求有条件的请求,告诉客户端要想访问该资源,必须携带特定的请求头 |
429 | Too Many Requests | 指示用户在给定时间内发送了太多请求(“限速”),配合 Retry-After(多长时间后可以请求)响应头一起使用 |
431 | Request Header Fields Too Large | 请求头太大,服务器不愿意处理请求,因为它的头部字段太大。请求可以在减少请求头域的大小后重新提交。 |
500 | Internal Server Error | 服务器发生不可预期的错误。服务器出异常了,赶紧看日志去吧 |
503 | Service Unavailable | 服务器尚未准备好处理请求,服务器刚刚启动,还未初始化好 |
HTTP协议解析
这个不用理,有专门的服务器会进行解析,最常用的是Tomcat服务器
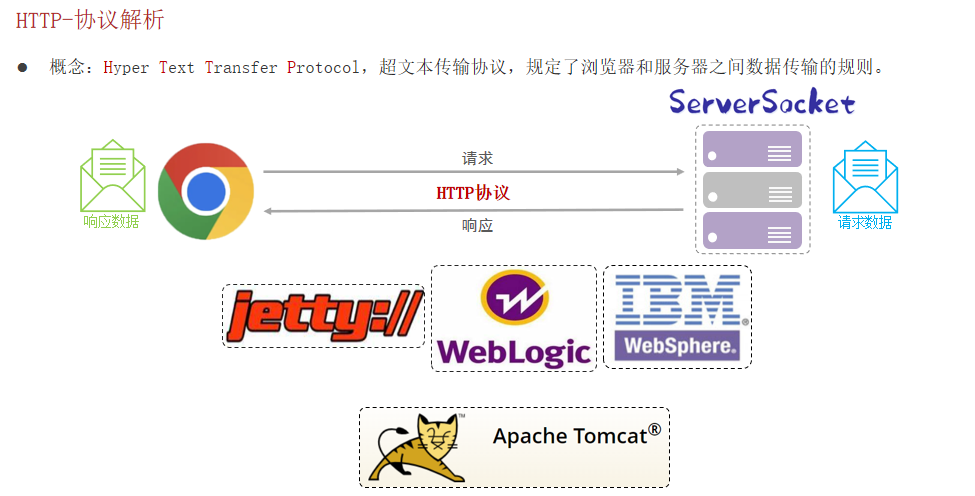
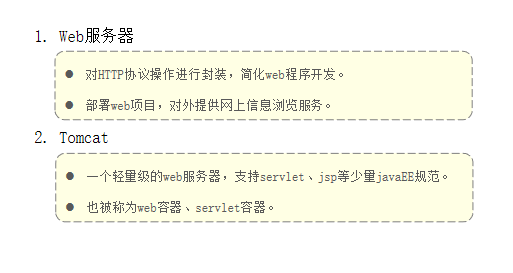
Web服务器-Tomcat
简介
基本使用

常见问题
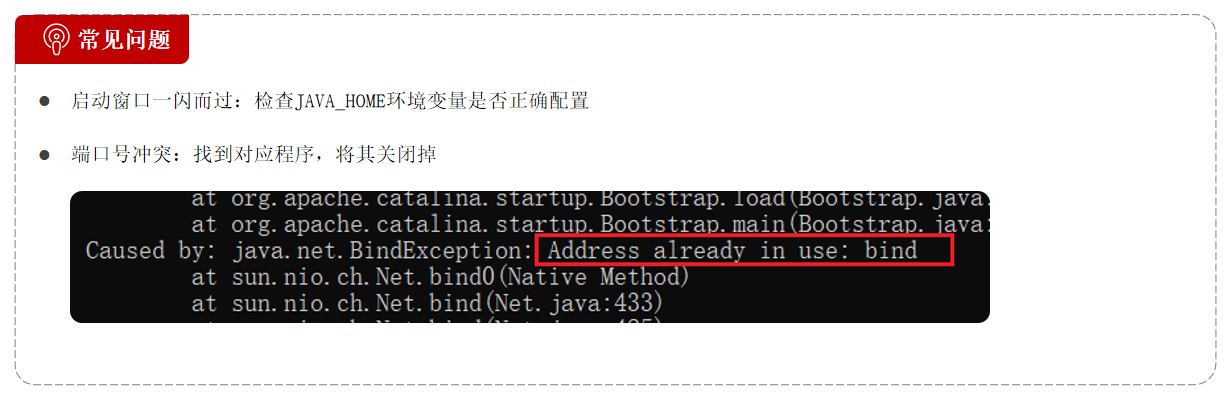
JAVA_HOME环境变量配置的是jdk环境
关掉程序也可以通过在任务管理器中关掉所有java进程
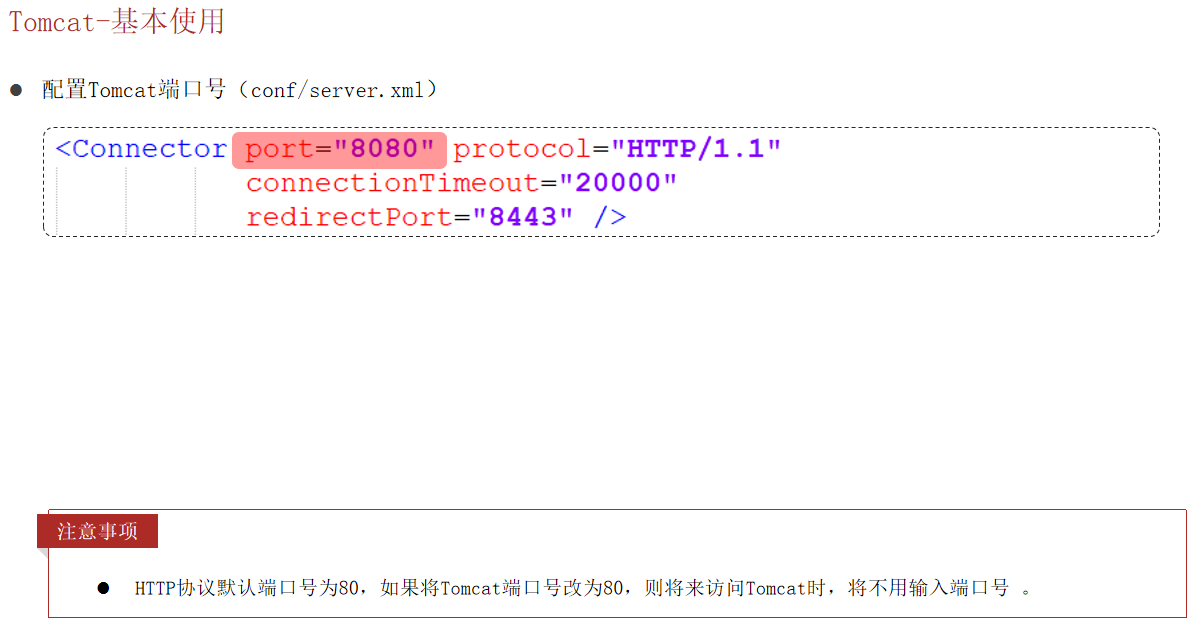
配置Tomcat端口号
Tomcat 部署项目
将项目放置到 webapps 目录下, 即部署完成

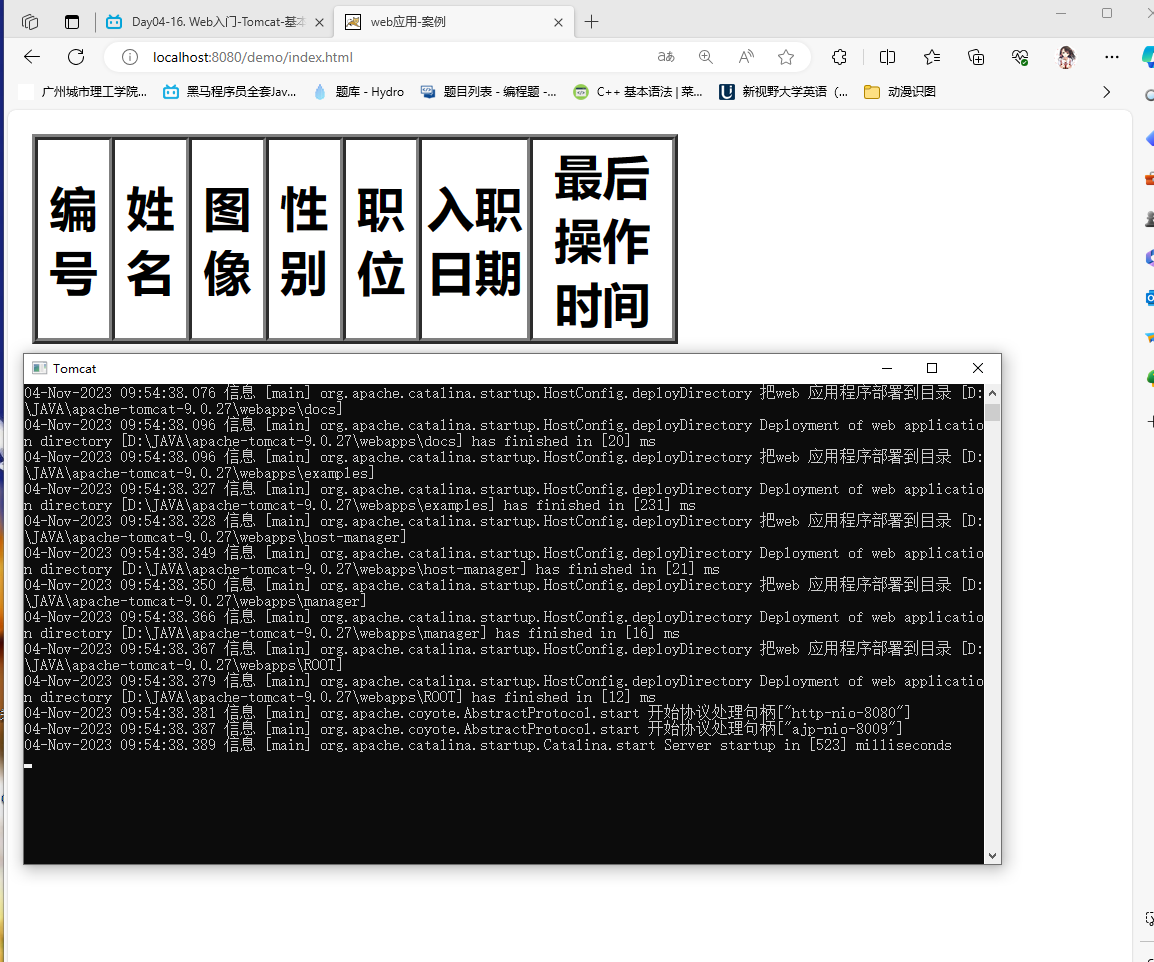
要开Tomcat服务器才可以部署
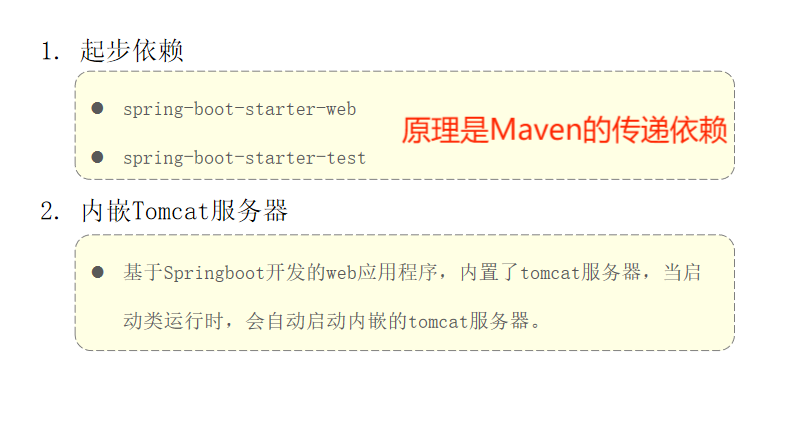
SpringBoot入门程序解析
在创建Spring Initializr中,是需要联网的
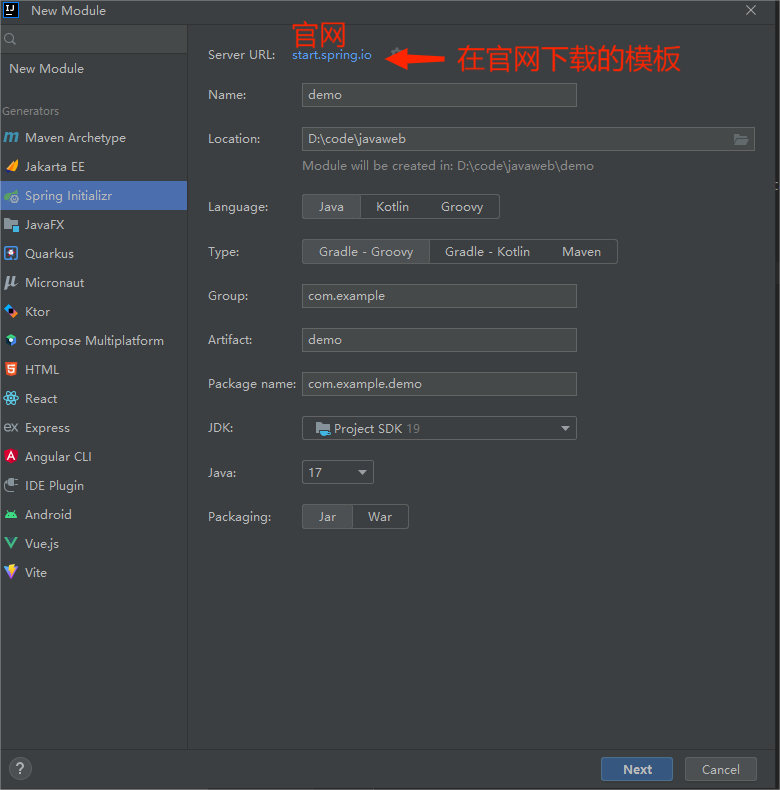
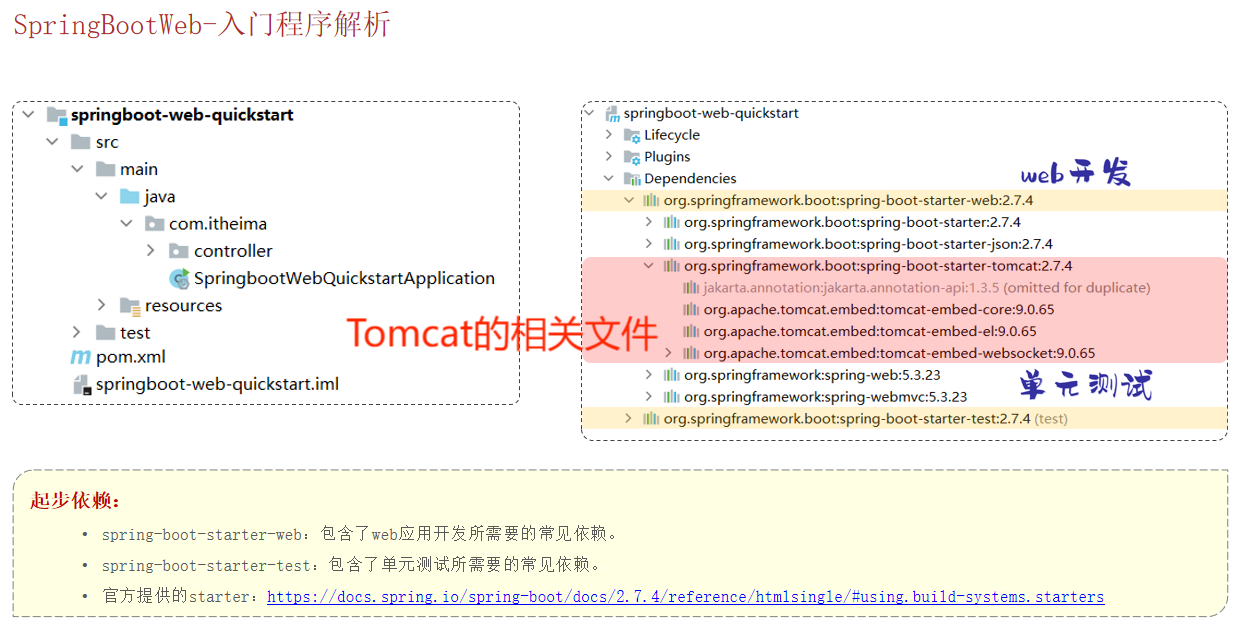
每一个依赖官方都打包好了,需要用什么依赖就下载相应的依赖,里面都有你需要的功能
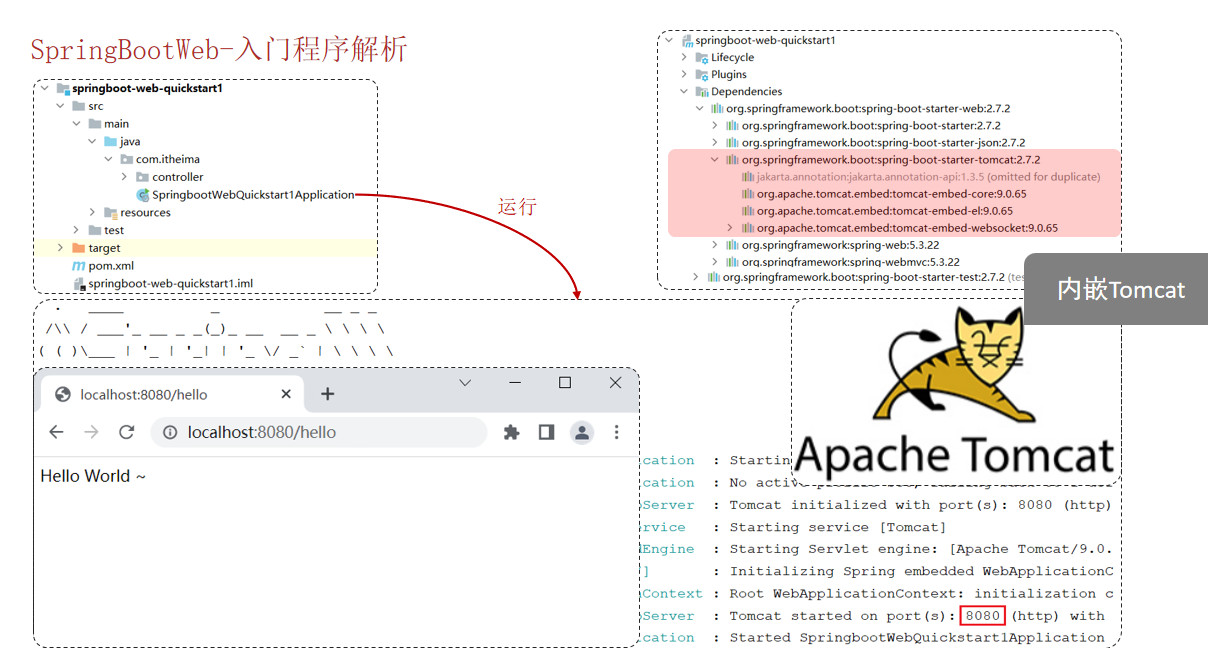
IDEA中有一个内嵌的Tomcat,大多数都是用这个内嵌的Tomcat
小结
请求响应
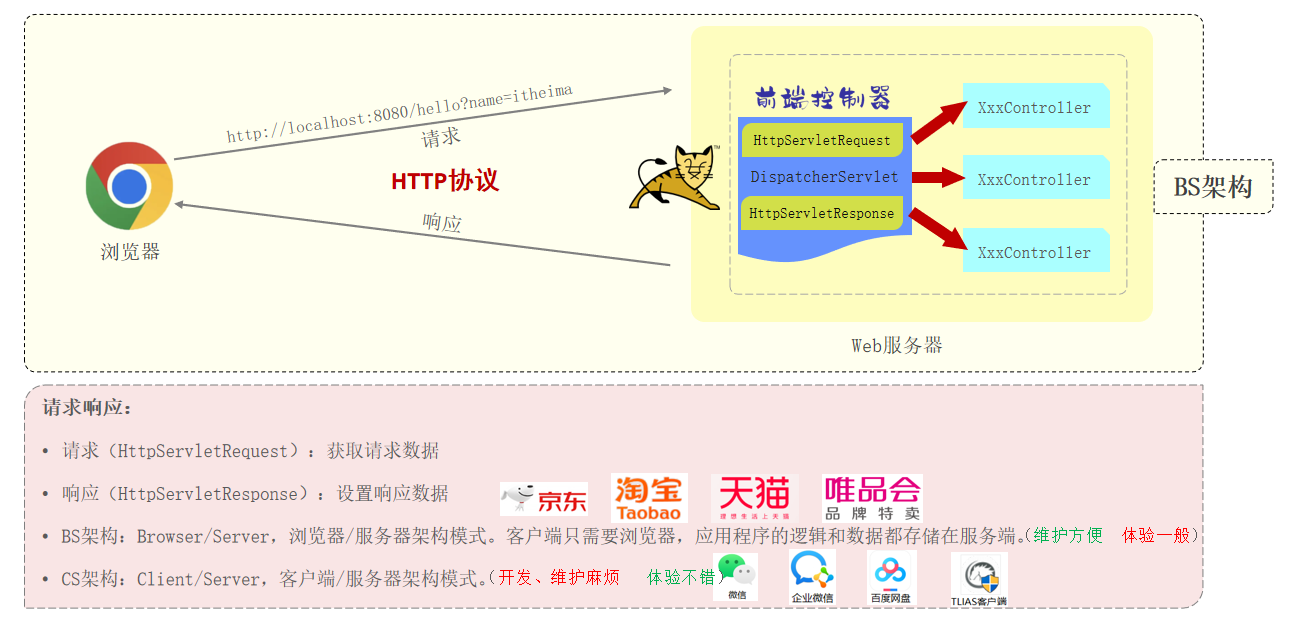
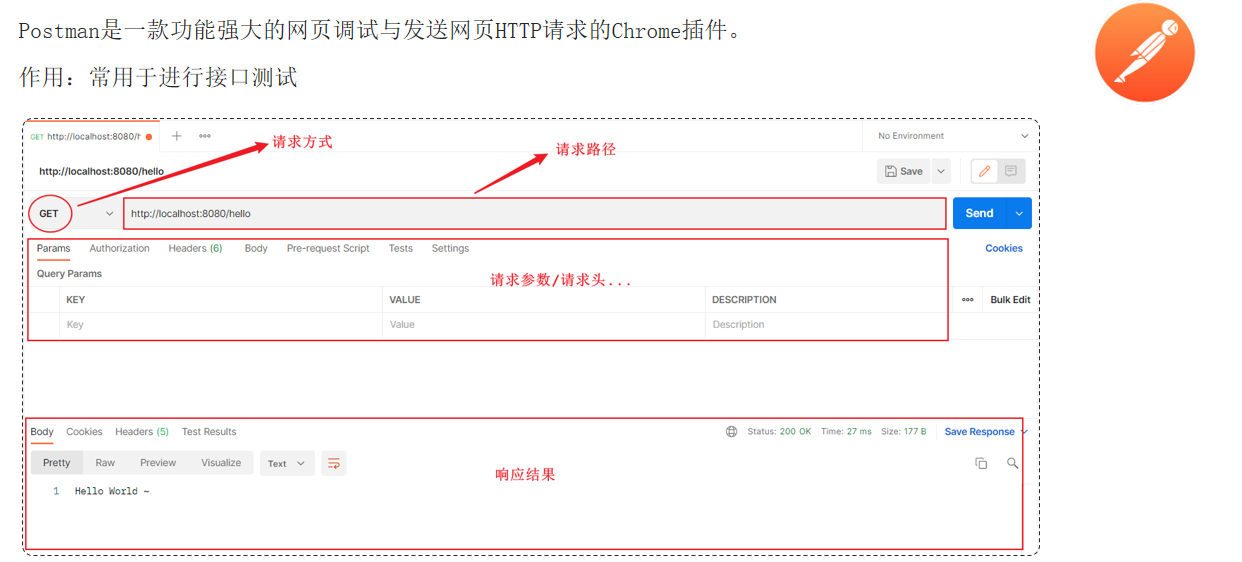
请求
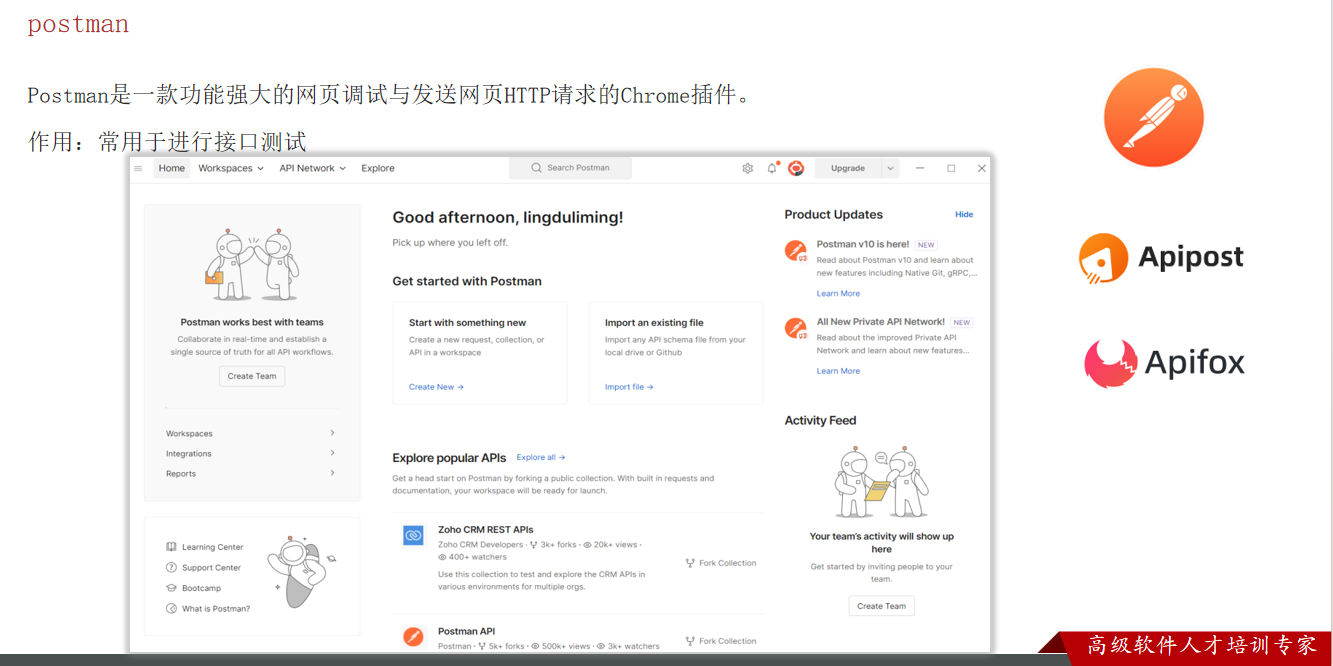
postman
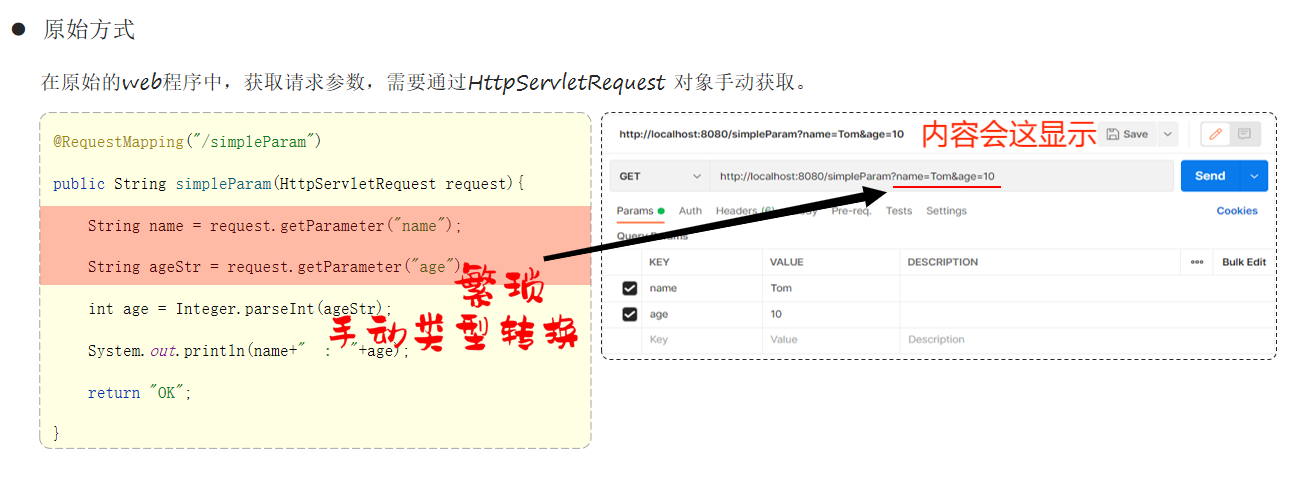
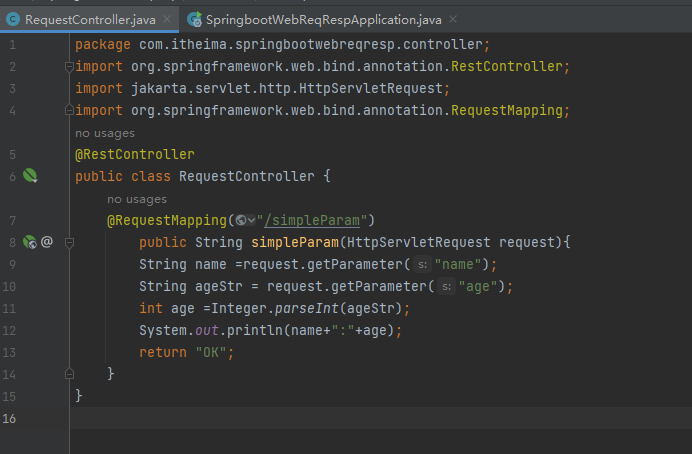
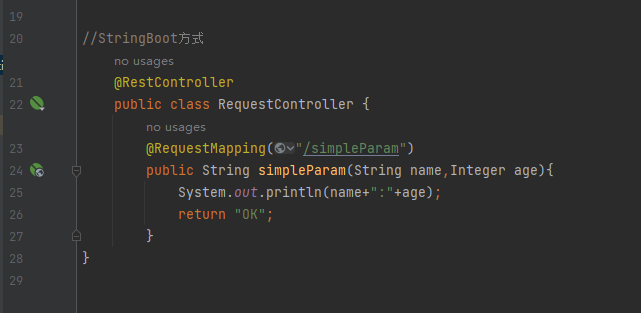
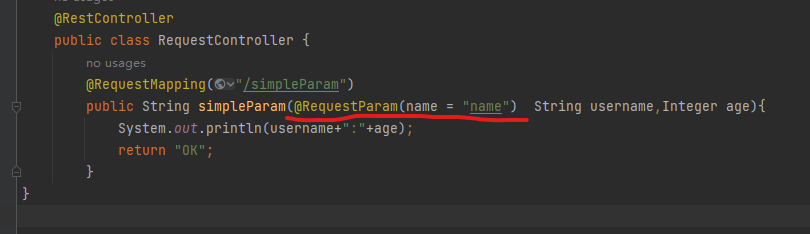
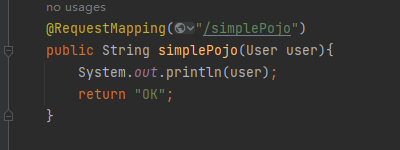
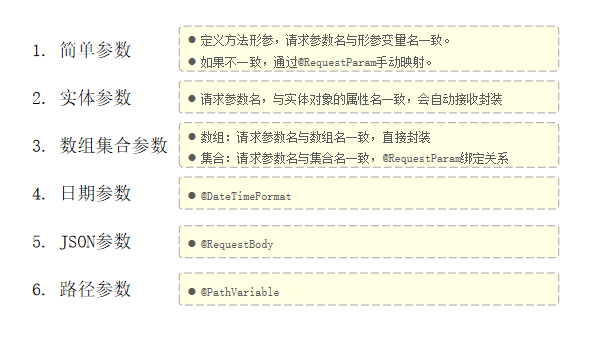
简单参数
这里的导包不要搞错了,还有@标记的一定要有,否则会报404
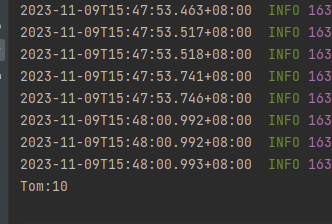
结果
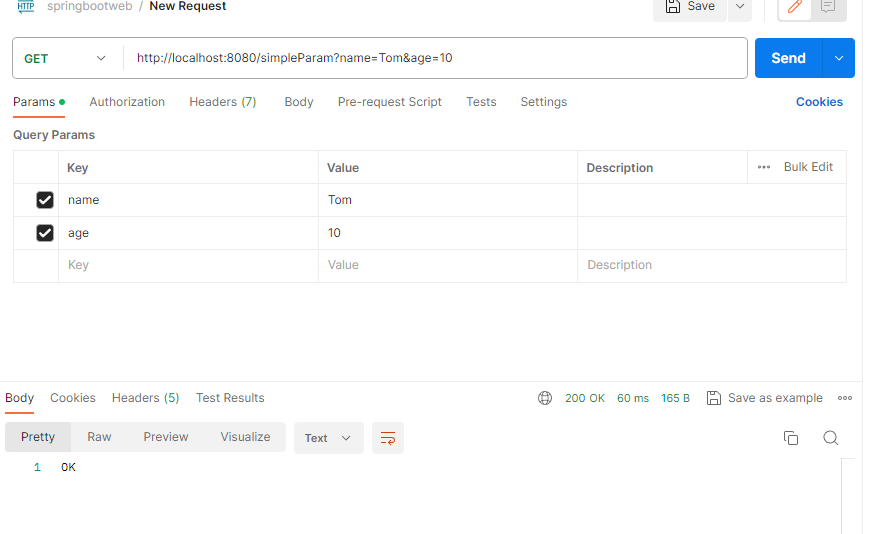
结果和上面的一样
上面都是Get请求的
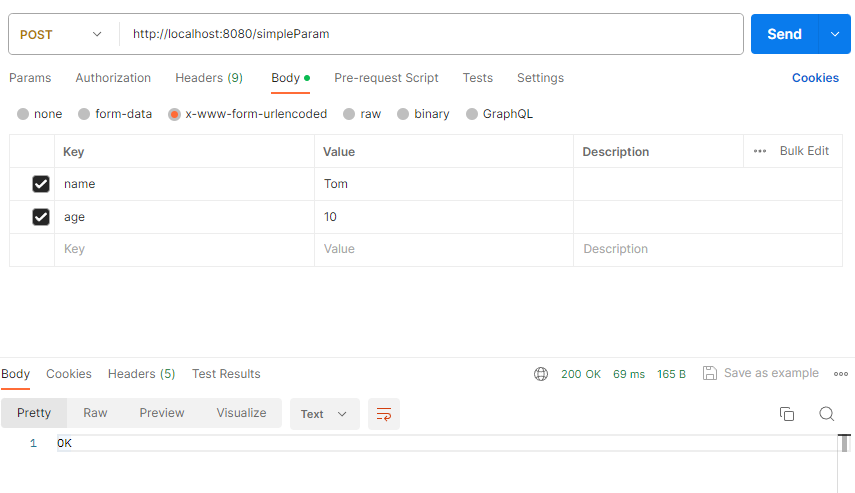
下面是Post请求的,代码都是一样的,只是Postman的请求方式不太一样
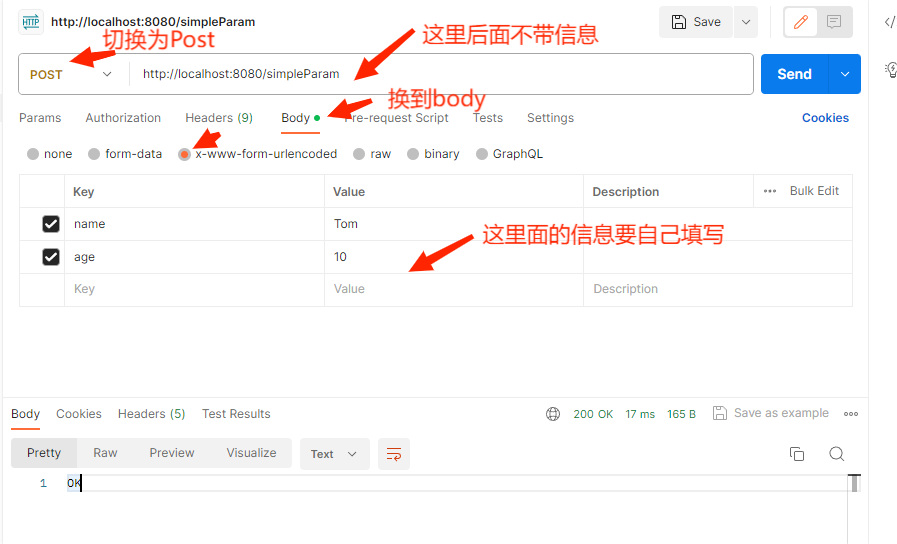
以上都是参数对应情况
当参数不对应时,如下把name改成username,重启
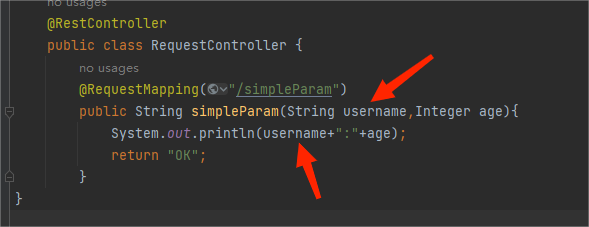
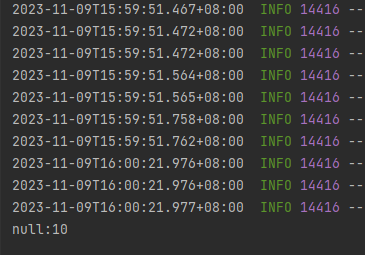
再次发送Postman的请求,内容不变还是name,可以看到不报错,成功返回“OK”
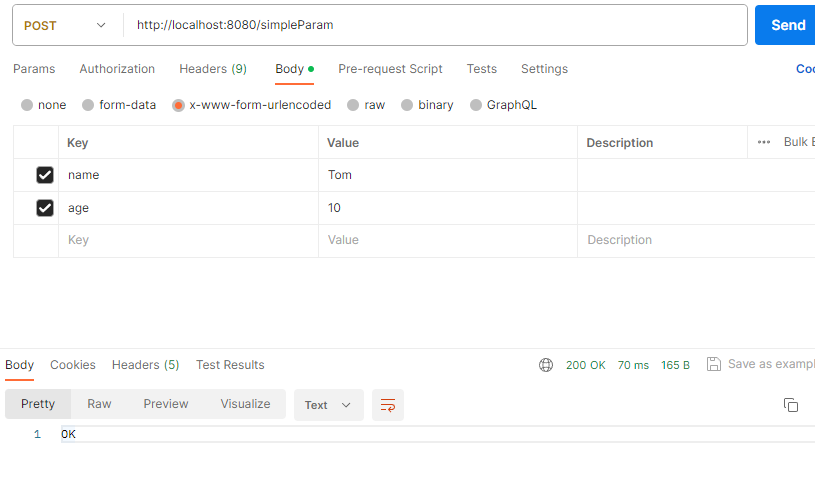
但是服务器接收到的是null,说明参数不对应时并不是真正的把数据传过去了

那有没有办法在这种情况下,可以让数据传过去呢??
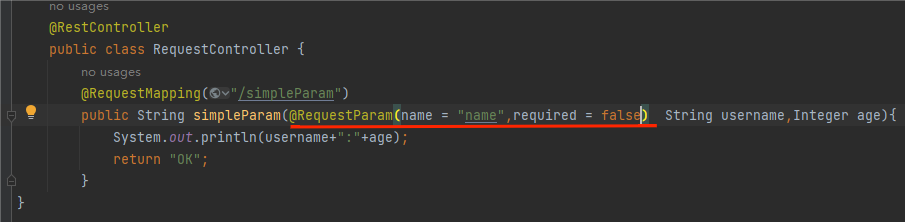
其实是可以的,需要用到@RequestParam完成映射,修改代码如下,注意“name”填写是Postman里的name
Postman再次发送
返回查看结果,可以看到username有值了
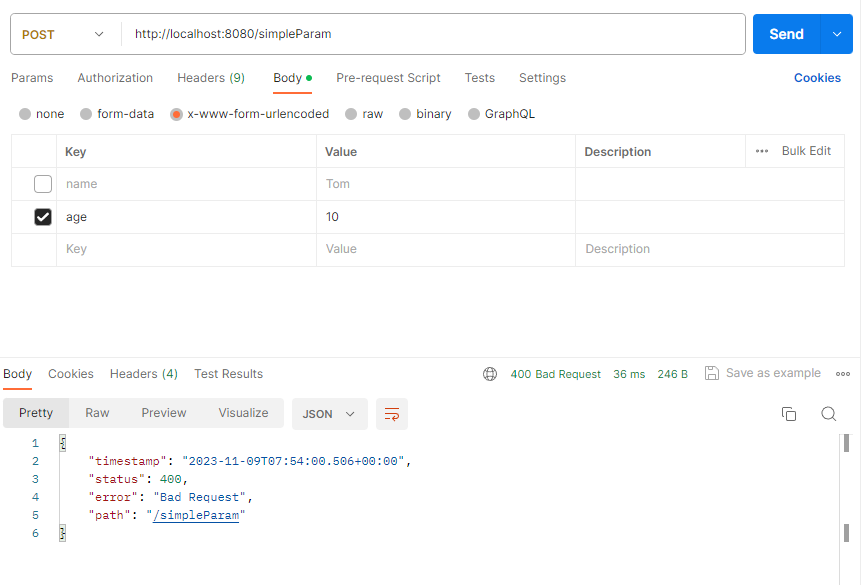
这里需要注意一下, @RequestParam中的required属性默认为true,代表该请求参数必须传递,如果不传递将报错。 如果该参数是可选的,可以将required属性设置为false。
如图,name的上传取消,可以看到报错
解决办法:
把代码修改如下,加上required=false,重启
Postman发送,这里可以看到不会报错了
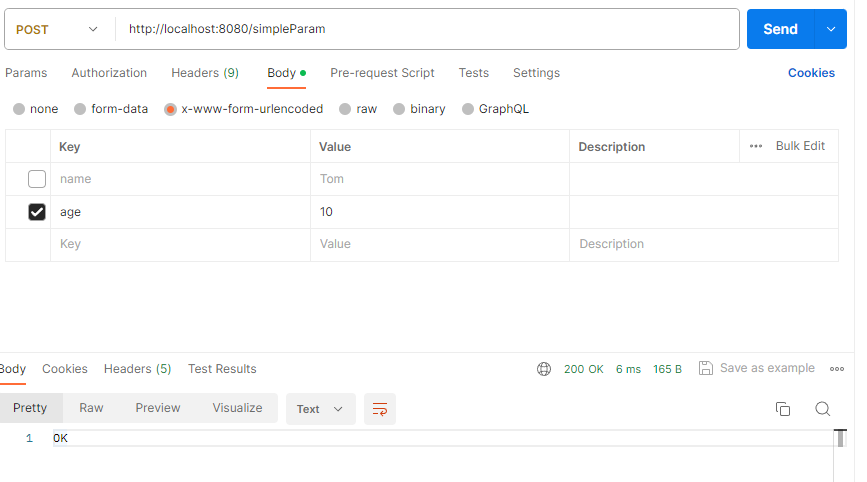
因为没有勾选name的上传,所以这里是null
勾选name后,再次发送
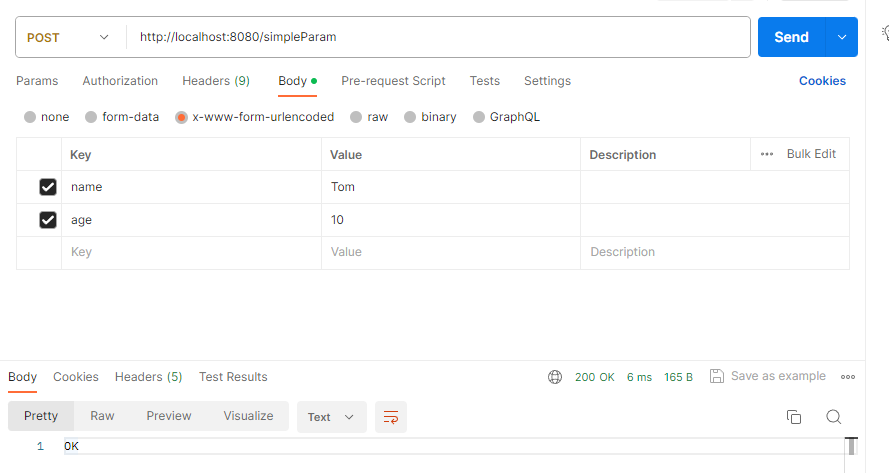
可以看到name值传上来了

从上面的例子可以看到,加上了required=false,你可以传递也可以不传递,并不会报错
小结

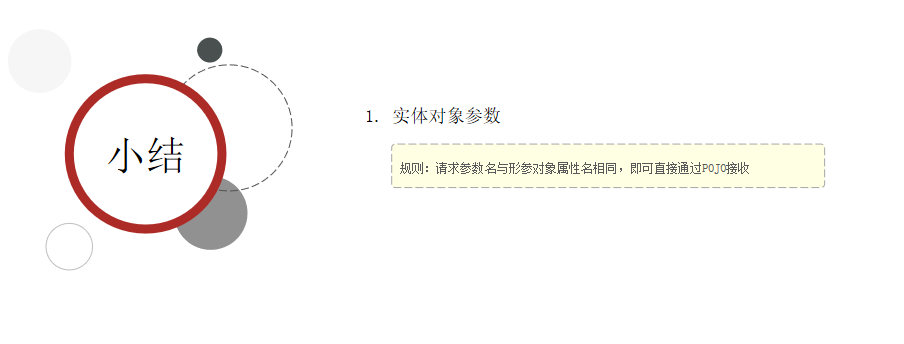
实体参数
因为简单参数Get请求需要把信息写到网址后面,如果网页有20多个参数信息,那么就需要把20多个参数信息都写到网址的后面,这样过于麻烦,而且网址会很长,因此我们考虑把所有的参数信息封装到一个实体类里
想要完成封装就需要完成一个原则,就是参数名要对应,在网址里有一个name,那么在类里也要有一个name属性,一一对应
首先定义一个类User,把参数信息写在里面

在请求控制台(RequestController)把这个类搭进去,重启服务器
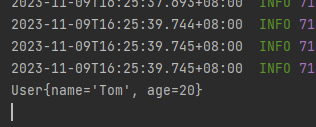
Postman发送信息
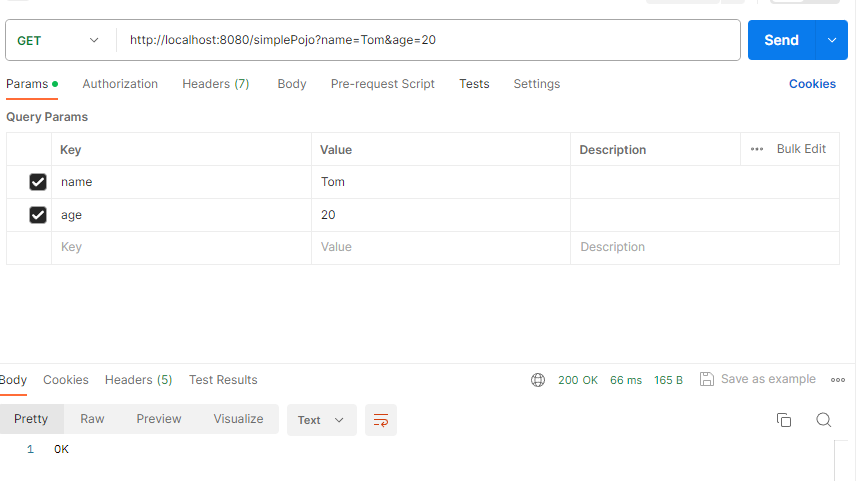
返回结果
接下来给大家说明一下有复杂的参数要怎么搞定它
想要完成下面的功能
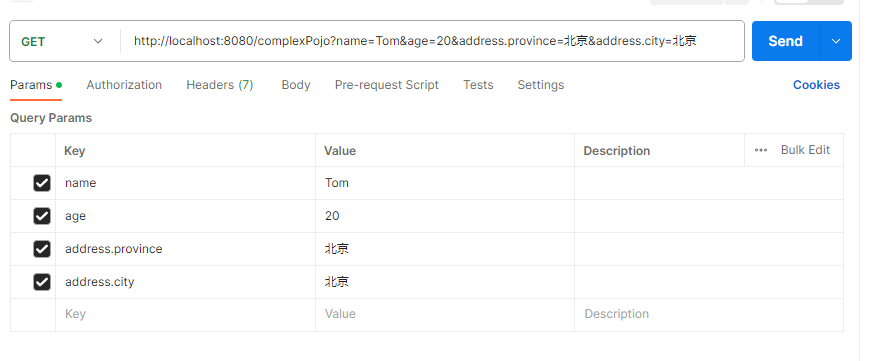
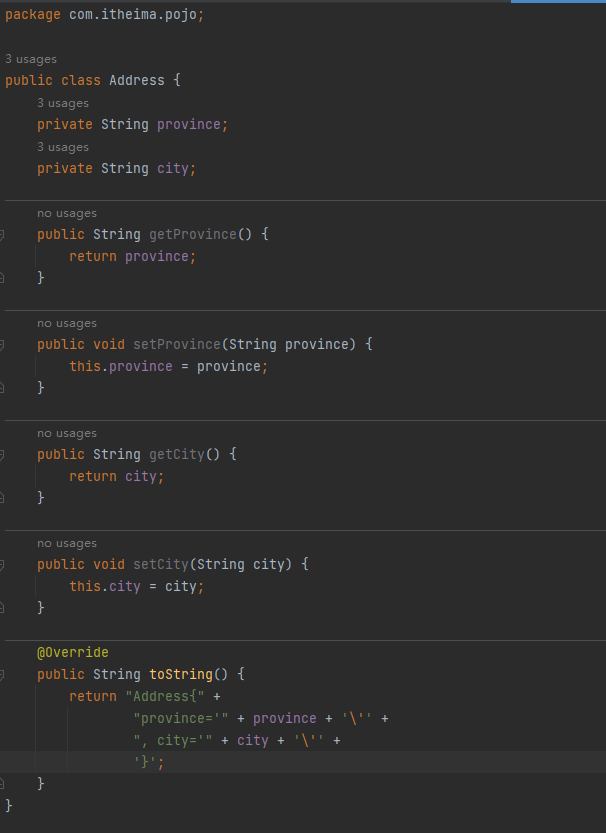
首先创造Address类,有参数province和city,还有他们的get和set方法
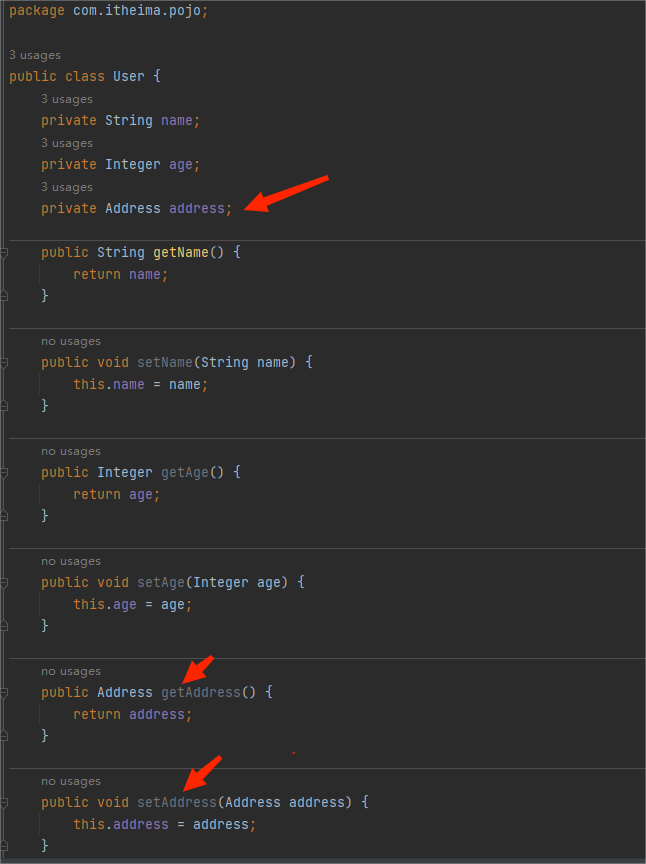
然后把Address类放进User类里面,增加address的get和set方法
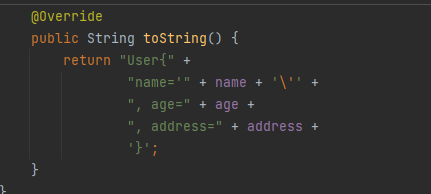
还有重写一下toString方法
在控制台加入User类,启动服务器
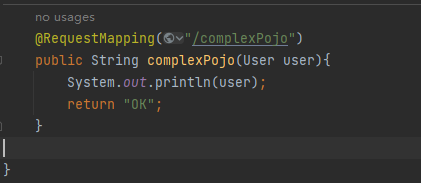
Postman发送
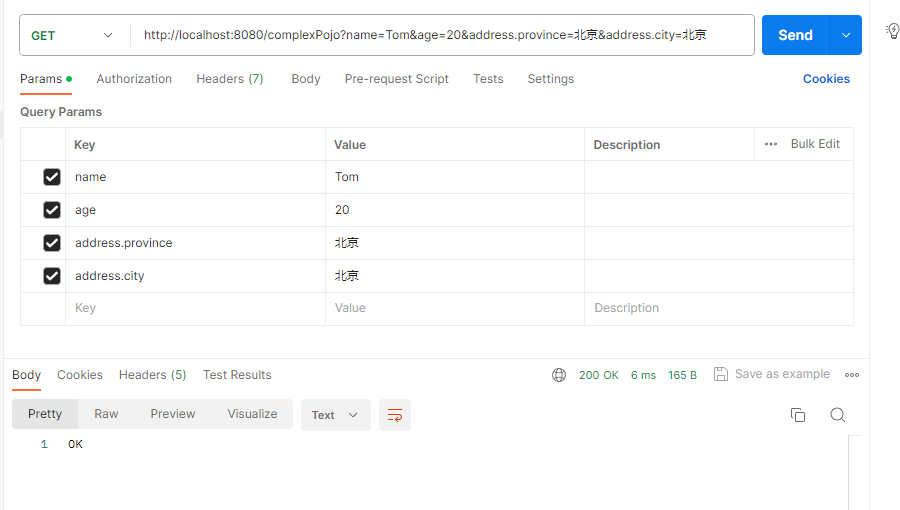
返回的信息

小结:
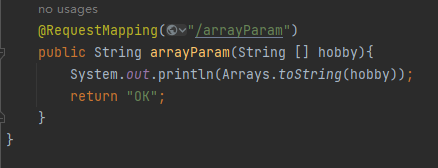
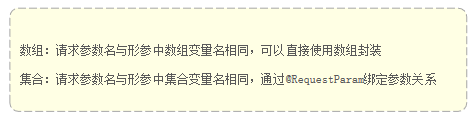
数组集合参数
使用数组完成参数的封装
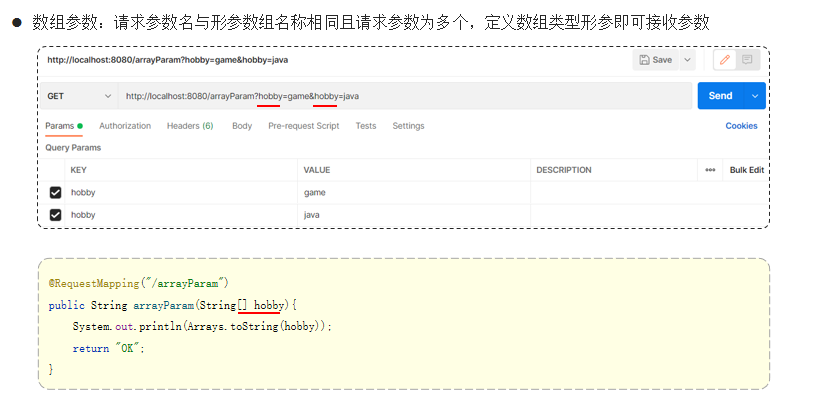
控制台添加代码
Postman请求数据
服务器结果
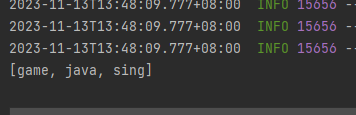
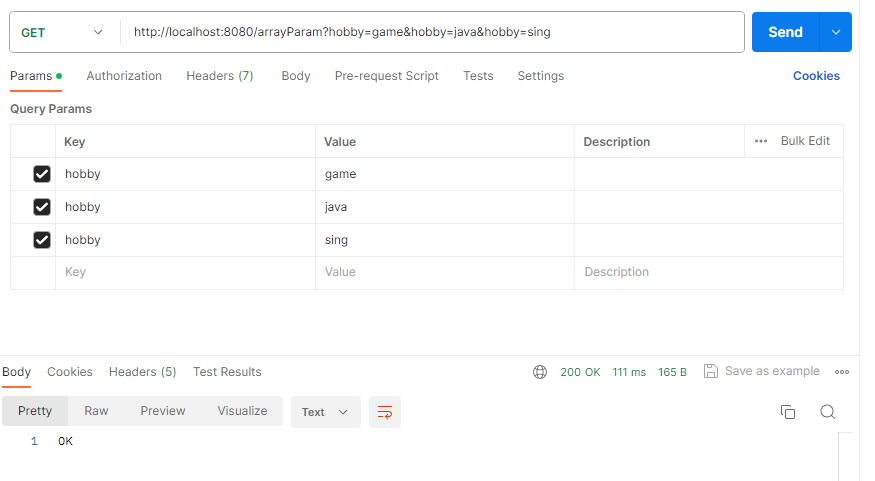
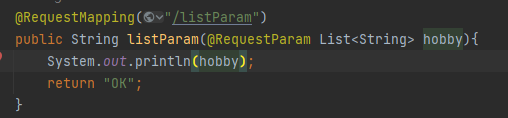
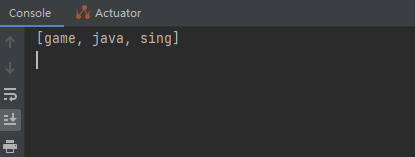
使用集合完成参数的封装
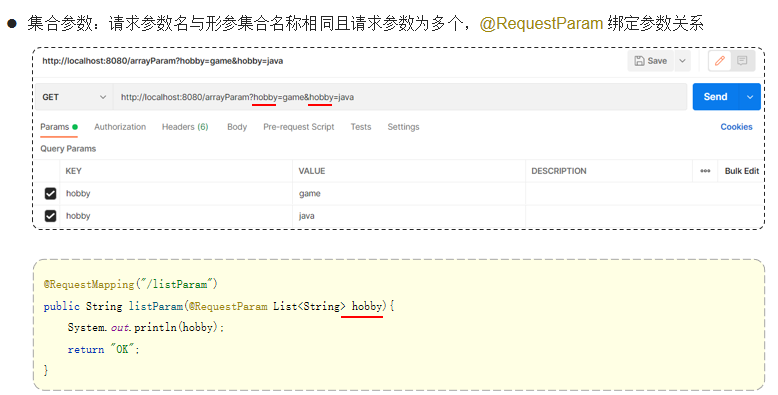
控制台输入代码,重启服务器
Postman请求数据
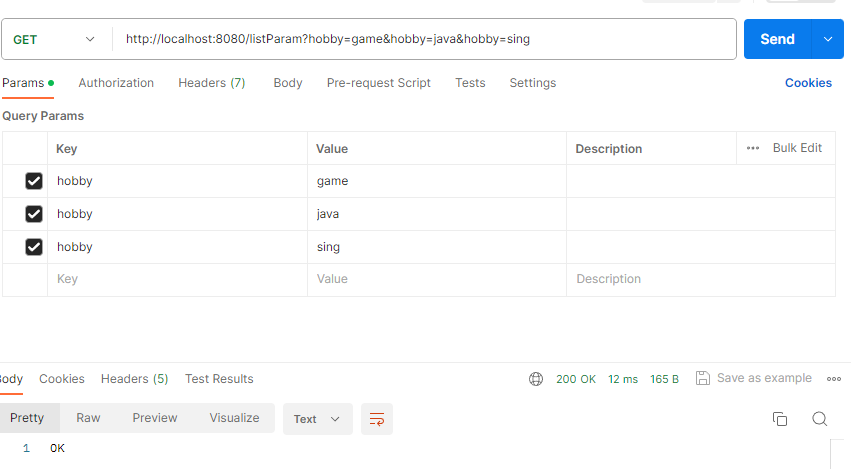
服务器接收
小结
日期参数
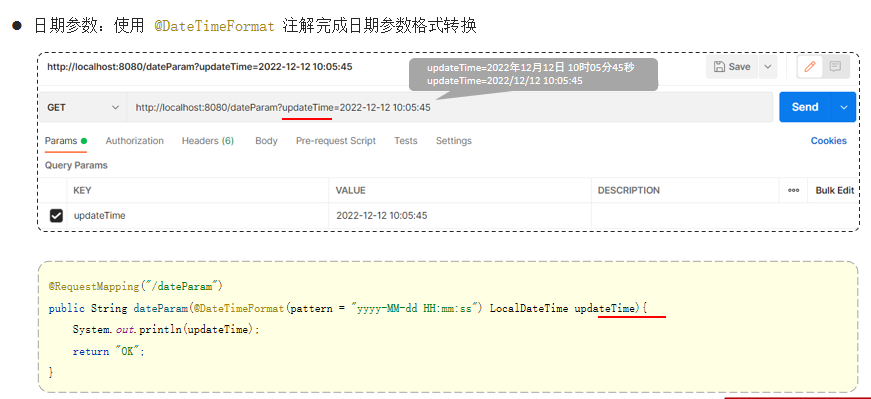
控制台加入代码,重启服务器

Postman请求数据
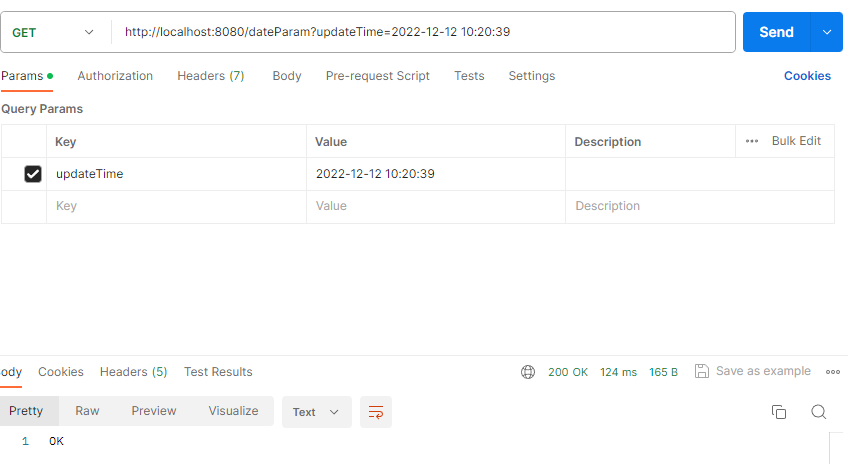
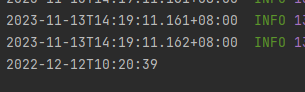
服务器接收
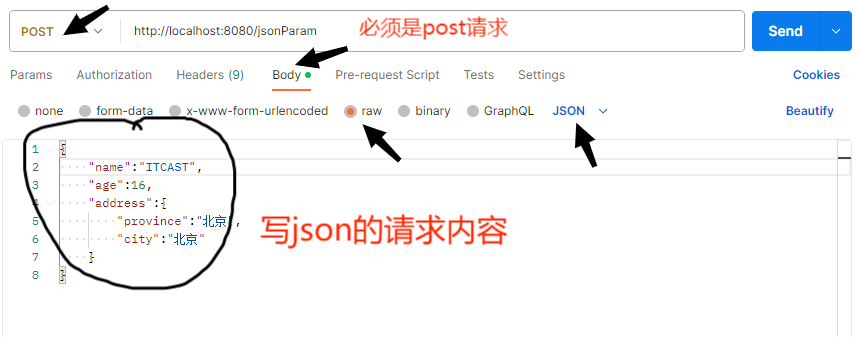
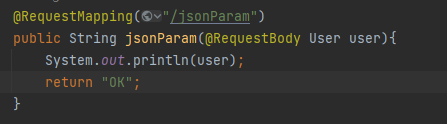
Json参数
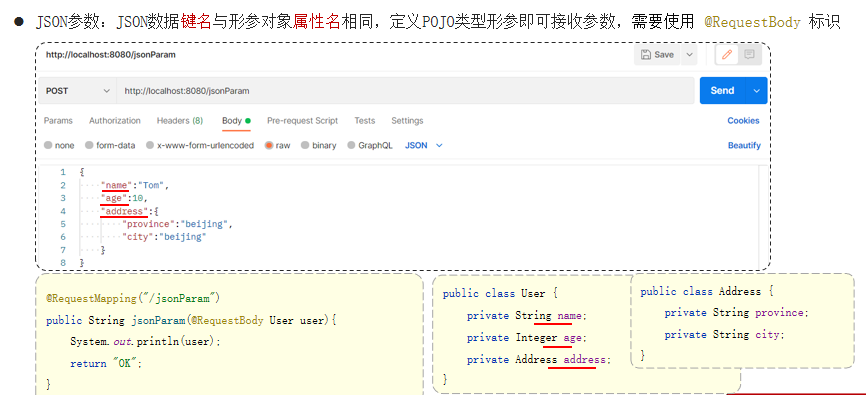
Postman请求方式
服务器的接收有要求,第一个图的类和Jons请求的属性要一一对应才可以
下面是演示,控制台输入代码
Postman请求数据
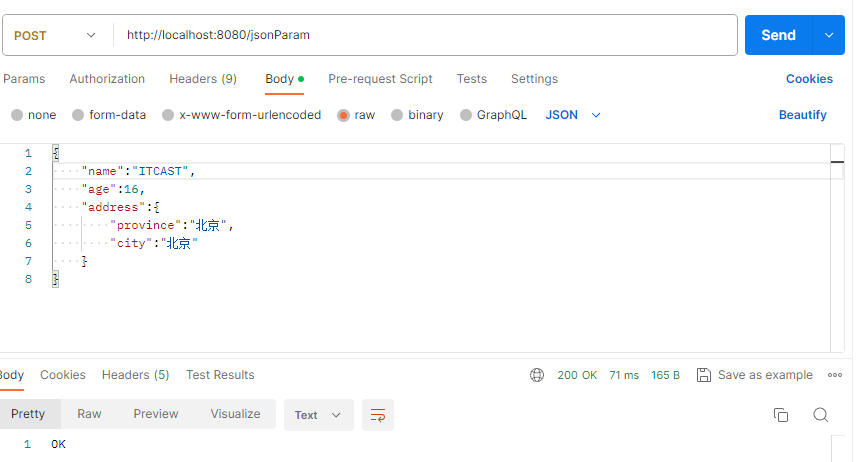
服务端接收

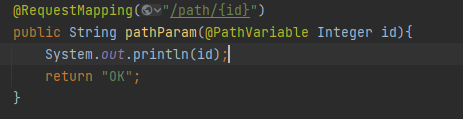
路径参数
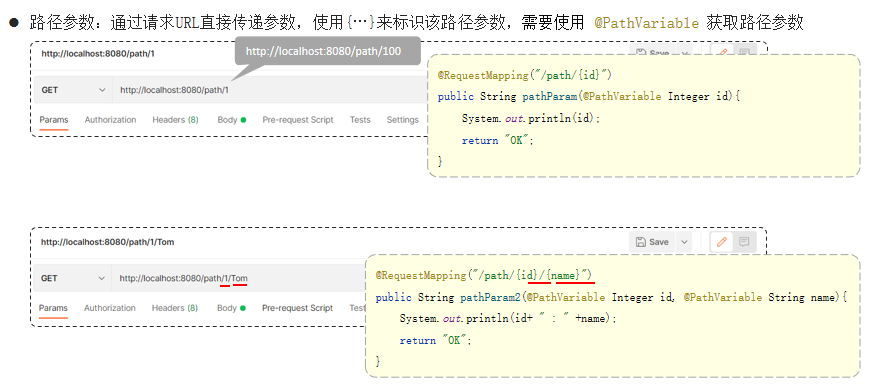
单个参数的上传
控制台加入代码
Postman请求数据
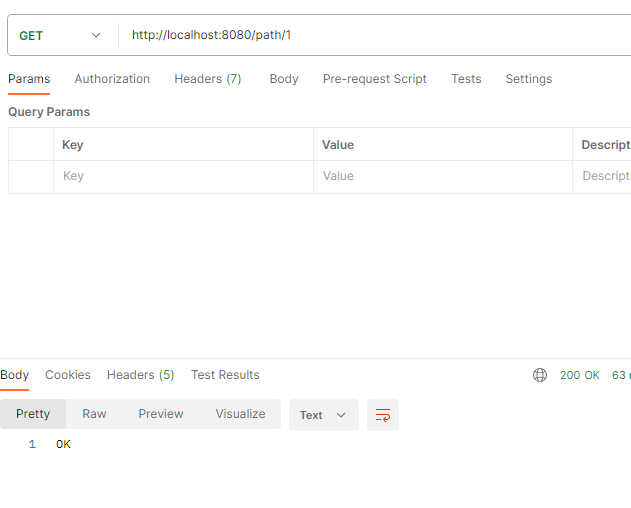
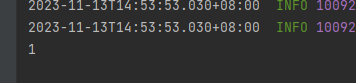
服务端接收结果
多个参数的上传
控制台加入代码
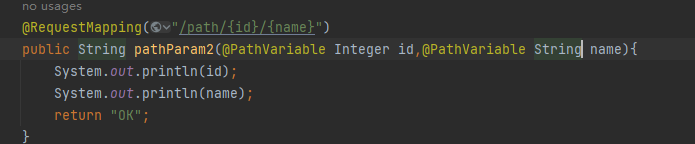
Postman请求数据
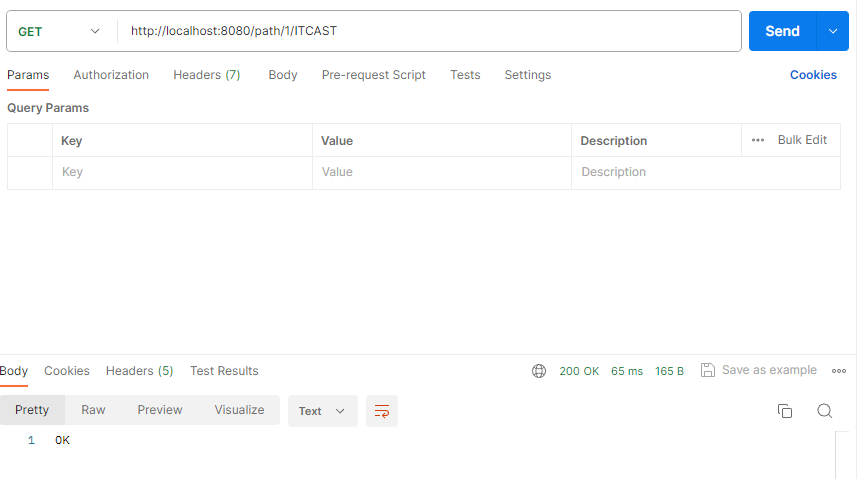
服务器接收结果
总结:
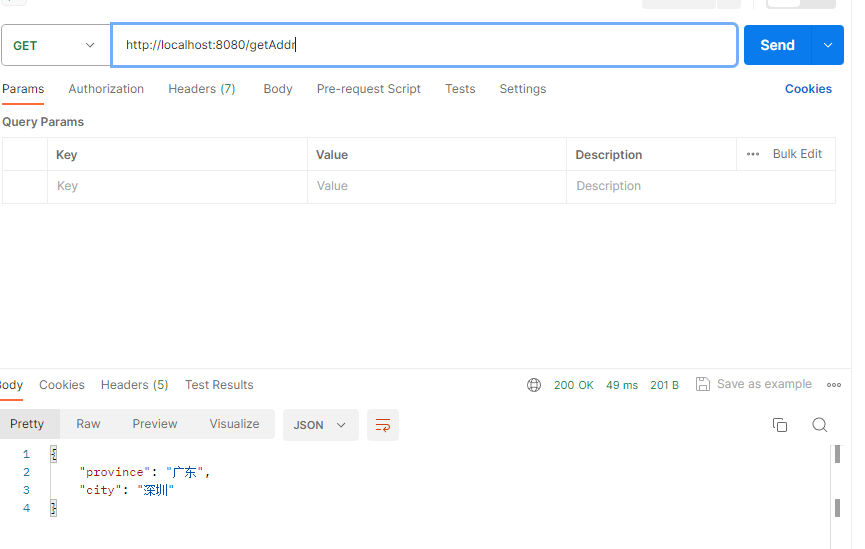
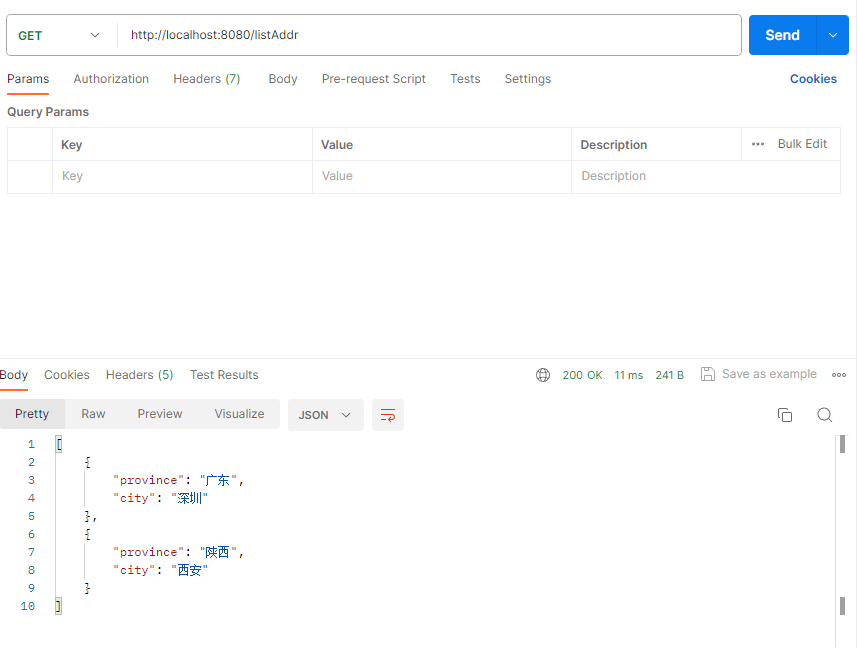
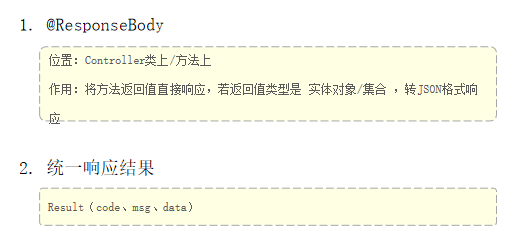
响应数据
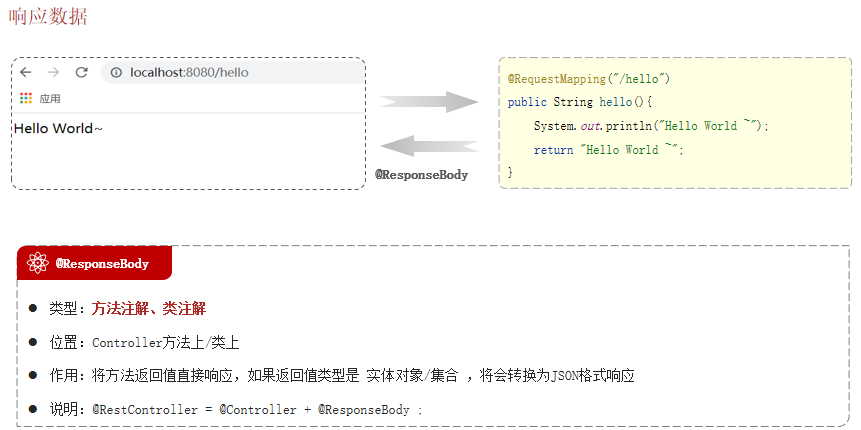
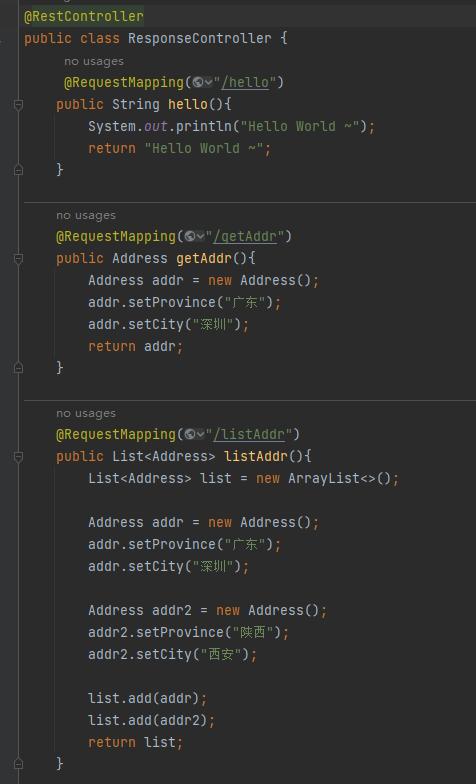
准备代码
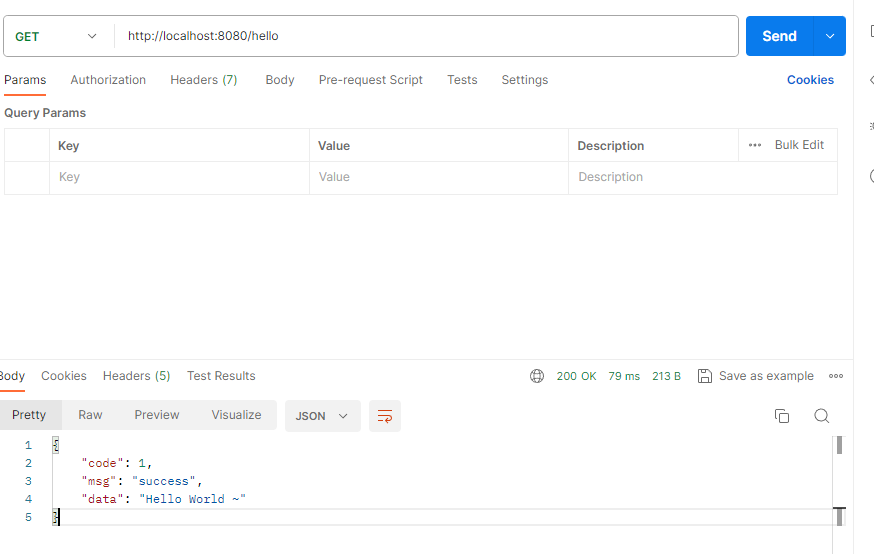
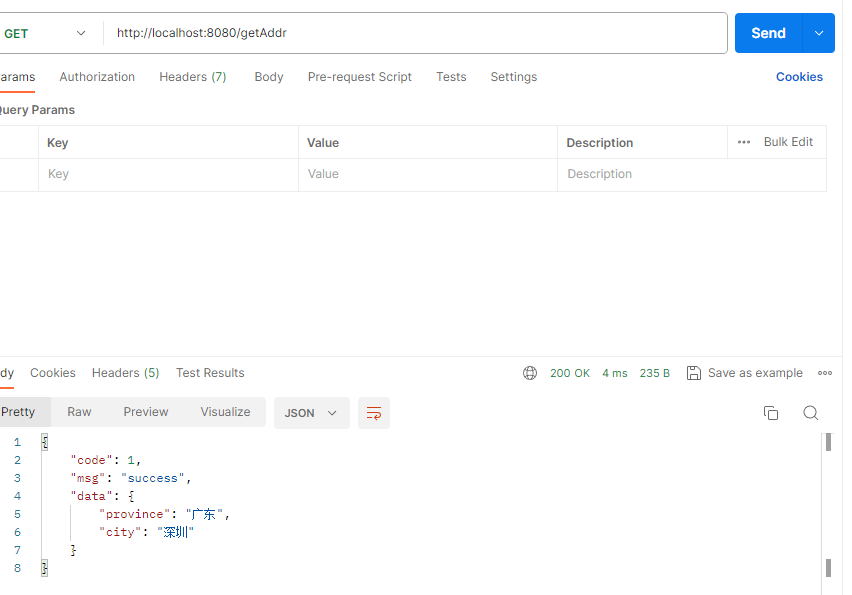
Postman请求测试
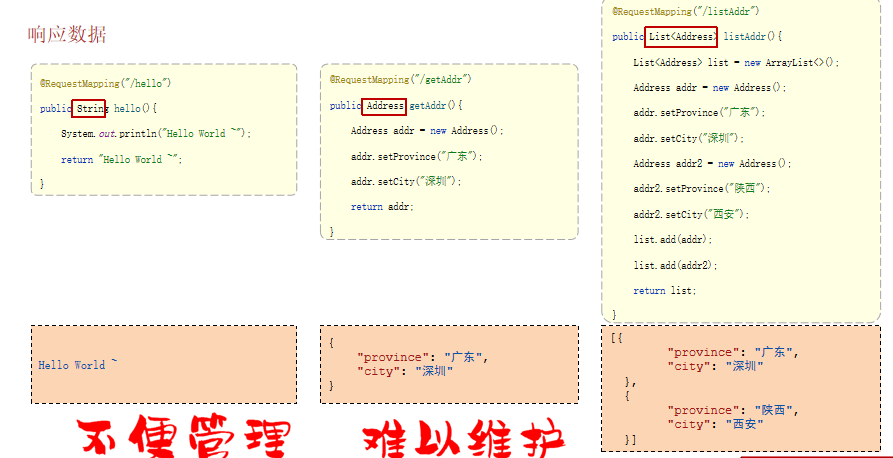
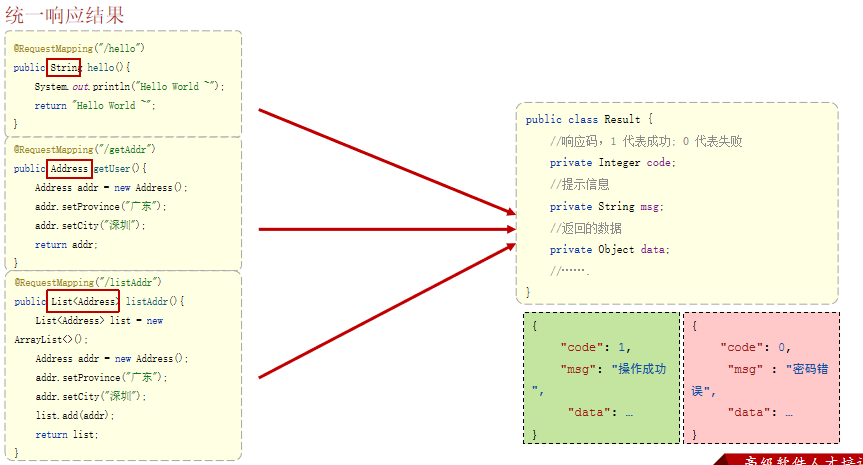
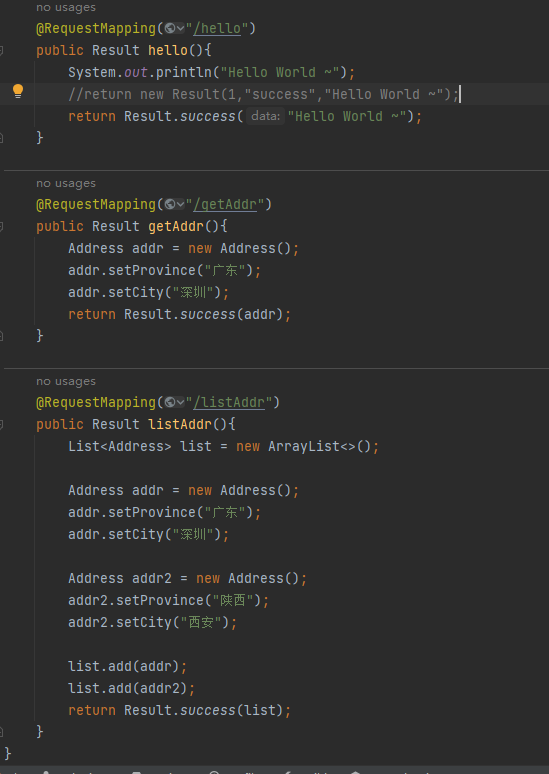
代码修改,注意这里代码的返回值全部是Result,没有上面那么多种类型,简化是类型
Postman请求
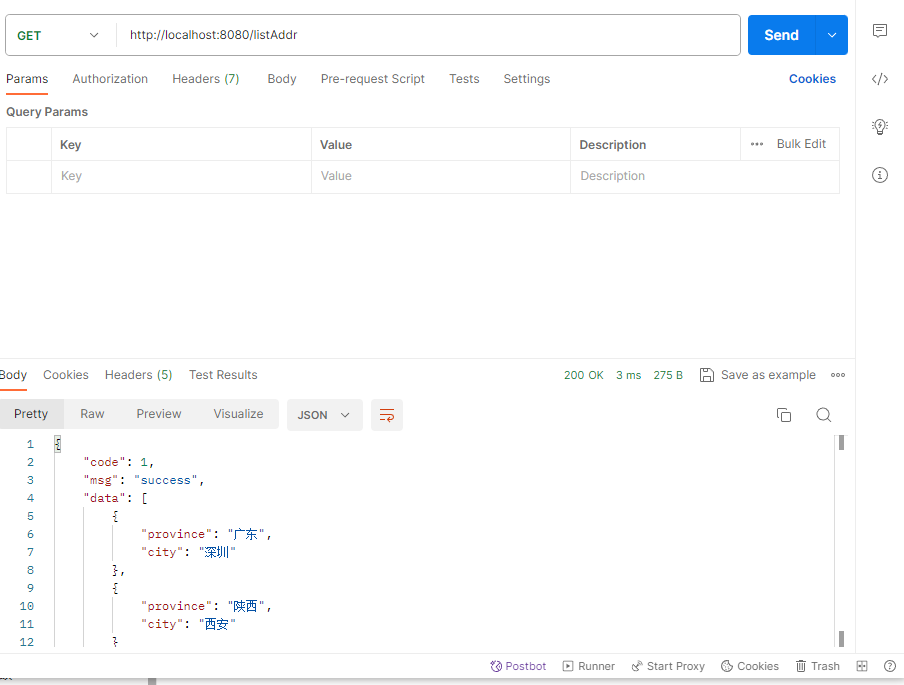
小结
分层解耦
三层架构
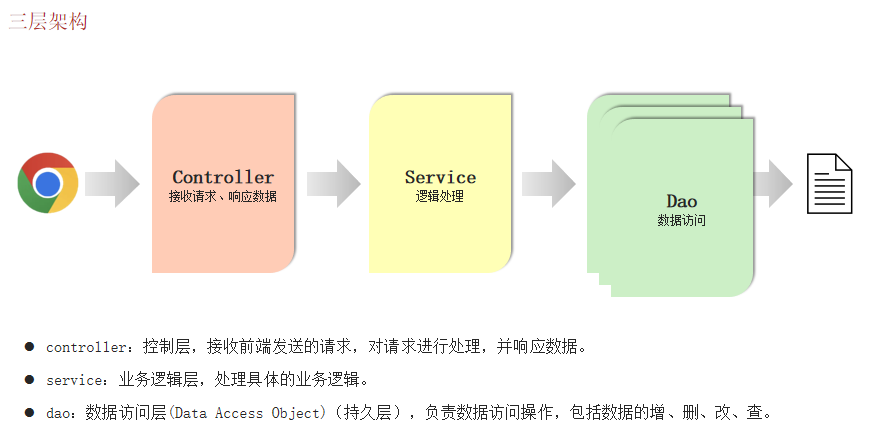
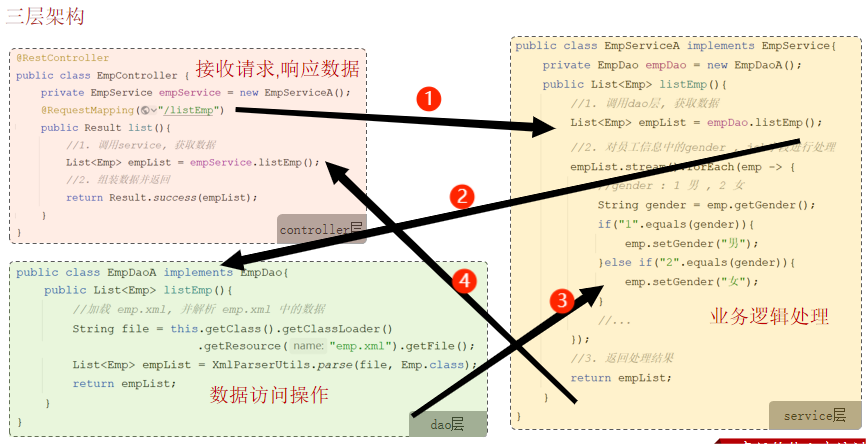
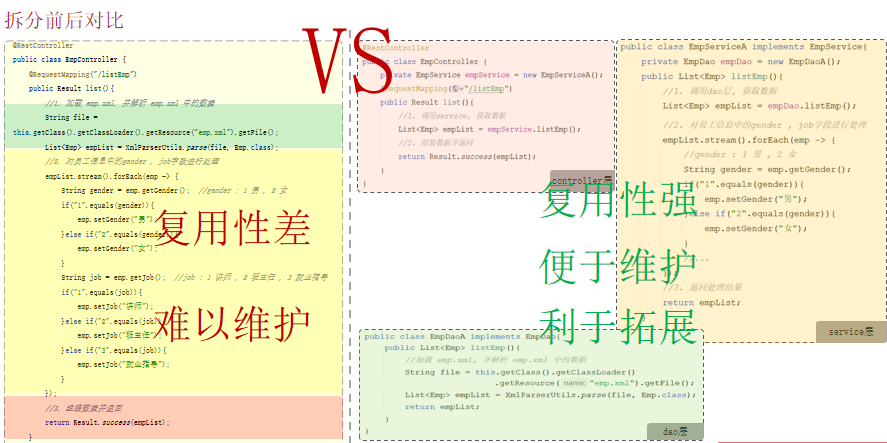
分层解耦

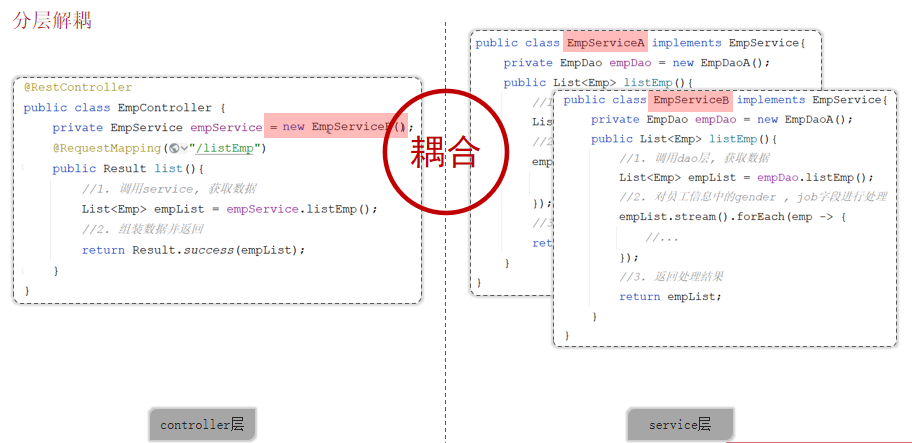
当调用controller层时,会相应的调用service层的代码,而当service层的参数名发生变化时,controller层不得不发生参数名变化,这就是耦合,想要解除耦合,就必须要有一个容器,把service层的参数放进去,当调用controller层时,在容器里面找有没有这个参数名就可以了,controller层的代码不需要改变
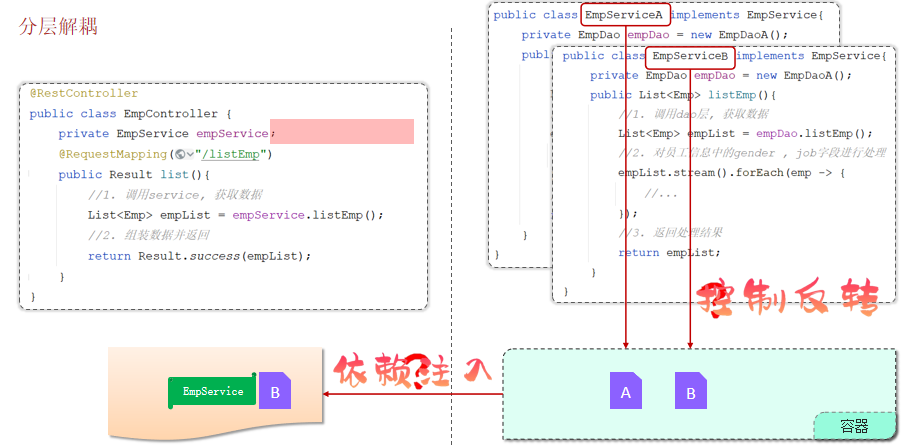

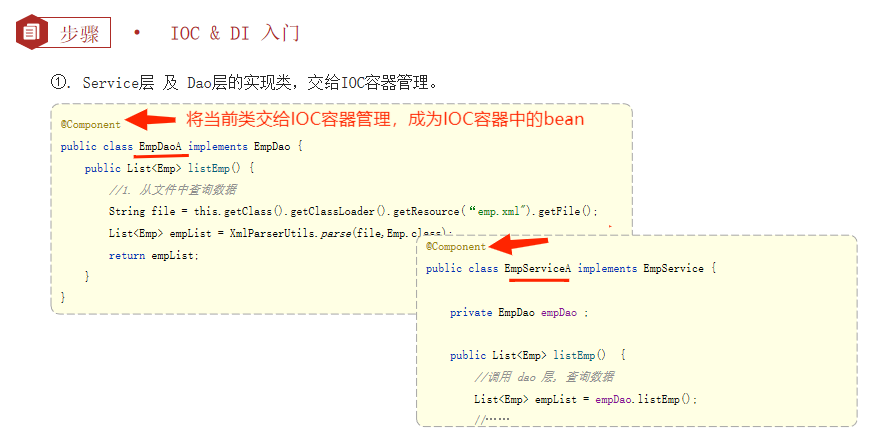
IOC&DI入门
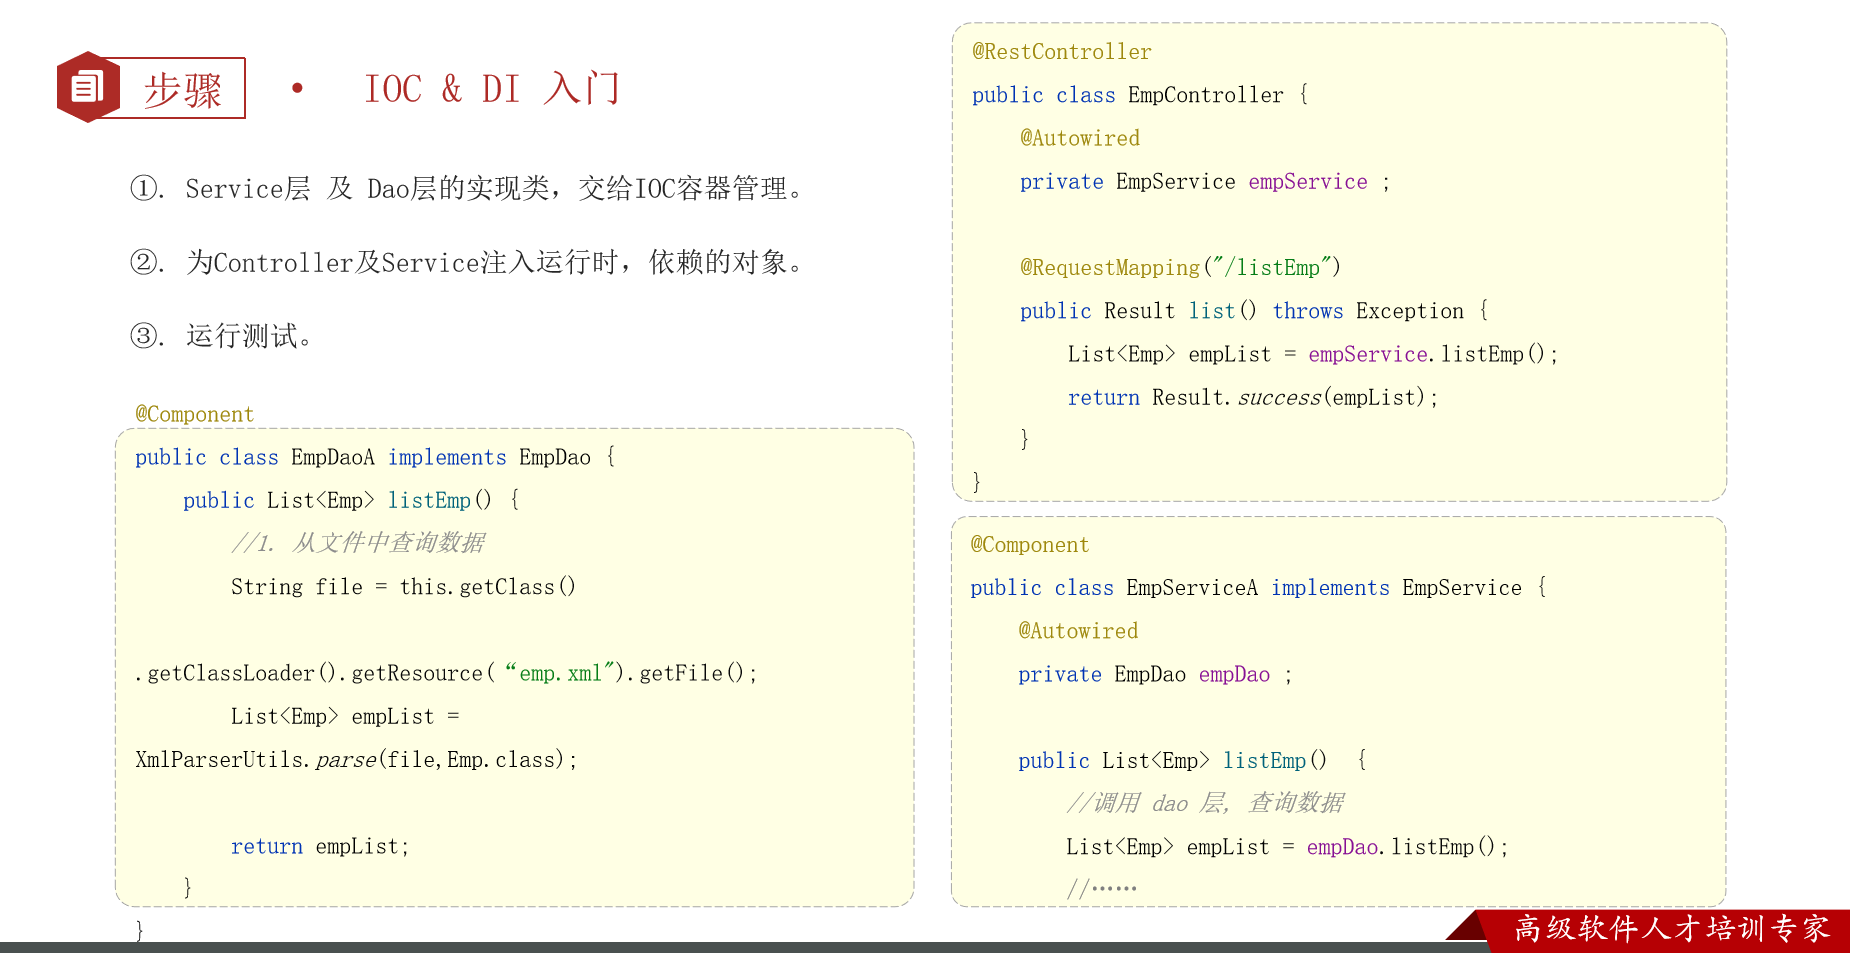


能正常打开就是可以的
当你想把性别里的“男”改成“男士”
直接复制一份serviceA的代码,改名serviceB,把serviceA代码的@Component和@Autowired注释掉,serviceB把代码里的“男”改成“男士”,其他不变,重启服务端,刷新页面就是男士了,想要变回来就注释serviceB的,开放serviceA的注释,重启服务端,刷新页面就是原来的了
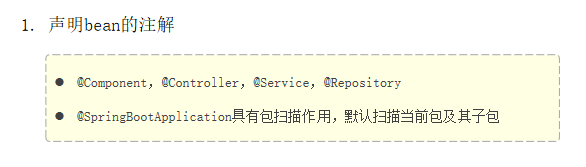
IOC详解
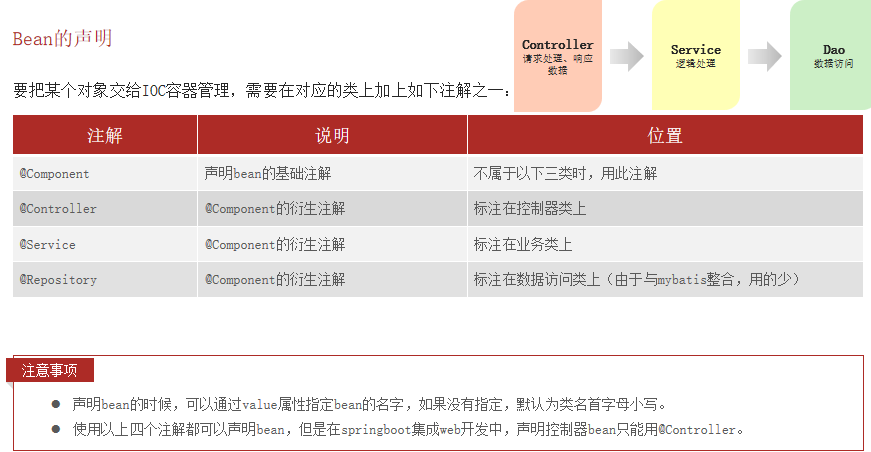
用相应的较好,@Component包含了所有
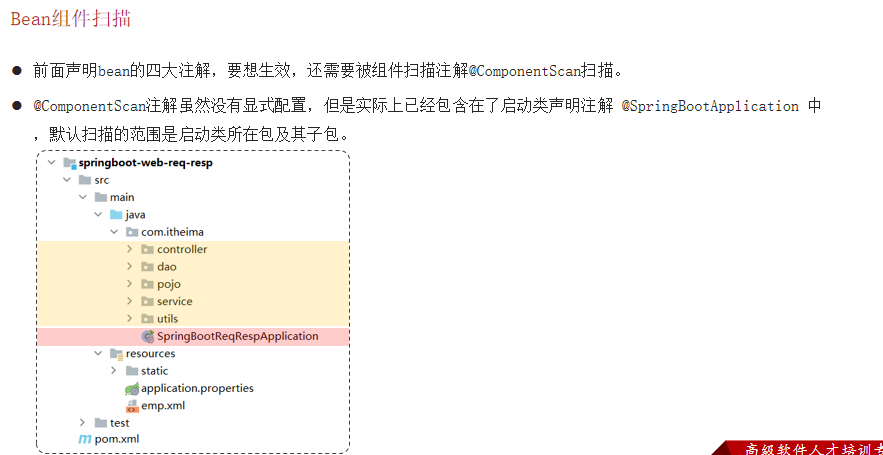
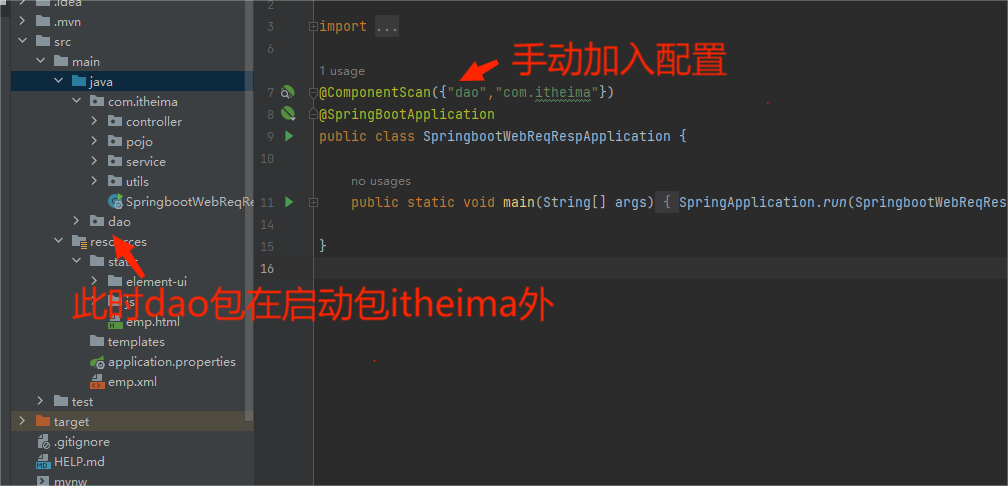
当要用到的包不在启动包及子包下时,需要手动配置
小结
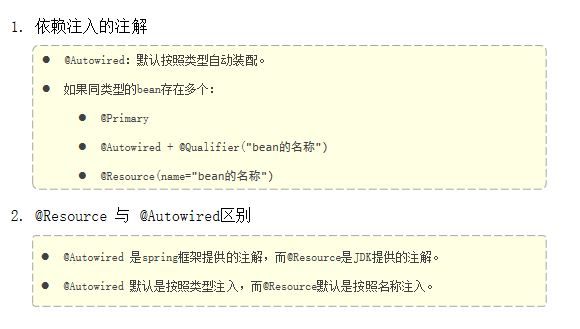
DI详解
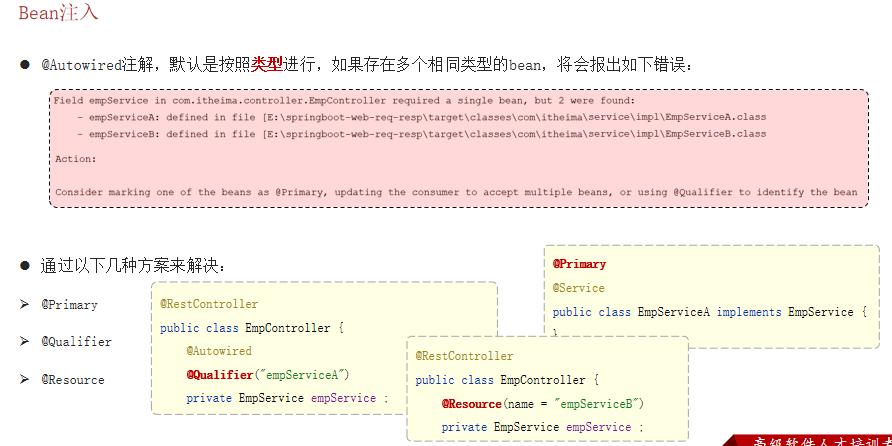
在有多个相同的bean时会报错,可以采用@Primary来确定注入哪一个,想要注入哪一个,就在哪一个加上@Primary,也可以在控制台@Autowired的下面加入@Qualifier("注入值,一般是类名,但是首字母是小写"),还可以直接在控制台输入@Resource("注入名")
查看注入值可以用Debug启动程序,在网页要返回程序时——刷新网页,把鼠标放到参数名上就可以查看了
小结